1) 3D Printing Technology
3D printing is a way to make real objects from a digital design by adding material layer by layer. It is also called additive manufacturing. It is useful for making prototypes, models, tools, and custom parts quickly.
Common 3D printing technologies
- SLA: uses light to harden liquid resin.
- SLS: uses a laser to fuse powder.
- FDM: melts plastic filament layer by layer.
- DLP, MJF, PolyJet, DMLS, EBM: other advanced methods.
At FabLab Hisar, we mainly use FDM-type printers for our 3D projects.
2) FDM Printers in the Lab
In FabLab Hisar, there are many FDM-type 3D printers for rapid prototyping (total: 19). Below are some machine types used in the lab.
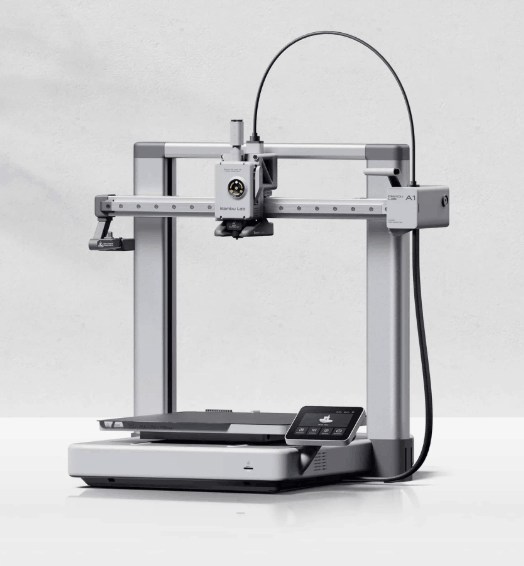
Bambu Lab A1
FDM 256×256×256 mm Open frame
- Build Volume: 256 × 256 × 256 mm
- Max Speed: up to 500 mm/s
- Max Hotend Temp: 300°C
- Nozzle: 0.4 mm (optional: 0.2 / 0.6 / 0.8 mm)
- Filament Diameter: 1.75 mm
- Type: bed-slinger
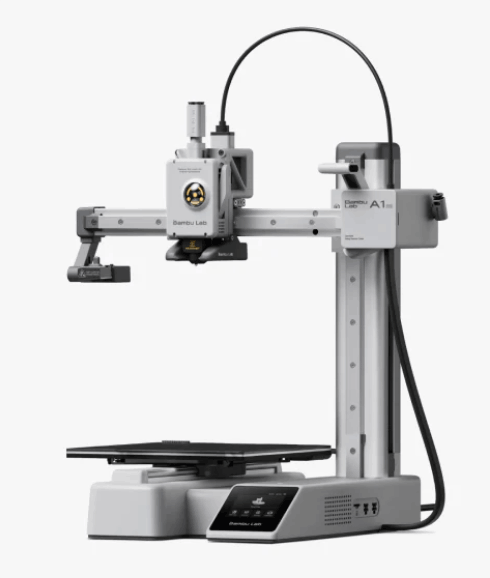
Bambu Lab A1 Mini
FDM 180×180×180 mm Compact
- Build Volume: 180 × 180 × 180 mm
- Max Hotend Temp: 300°C
- Nozzle: 0.4 mm (optional: 0.2 / 0.6 / 0.8 mm)
- Filament Diameter: 1.75 mm
- Type: compact open-frame printer
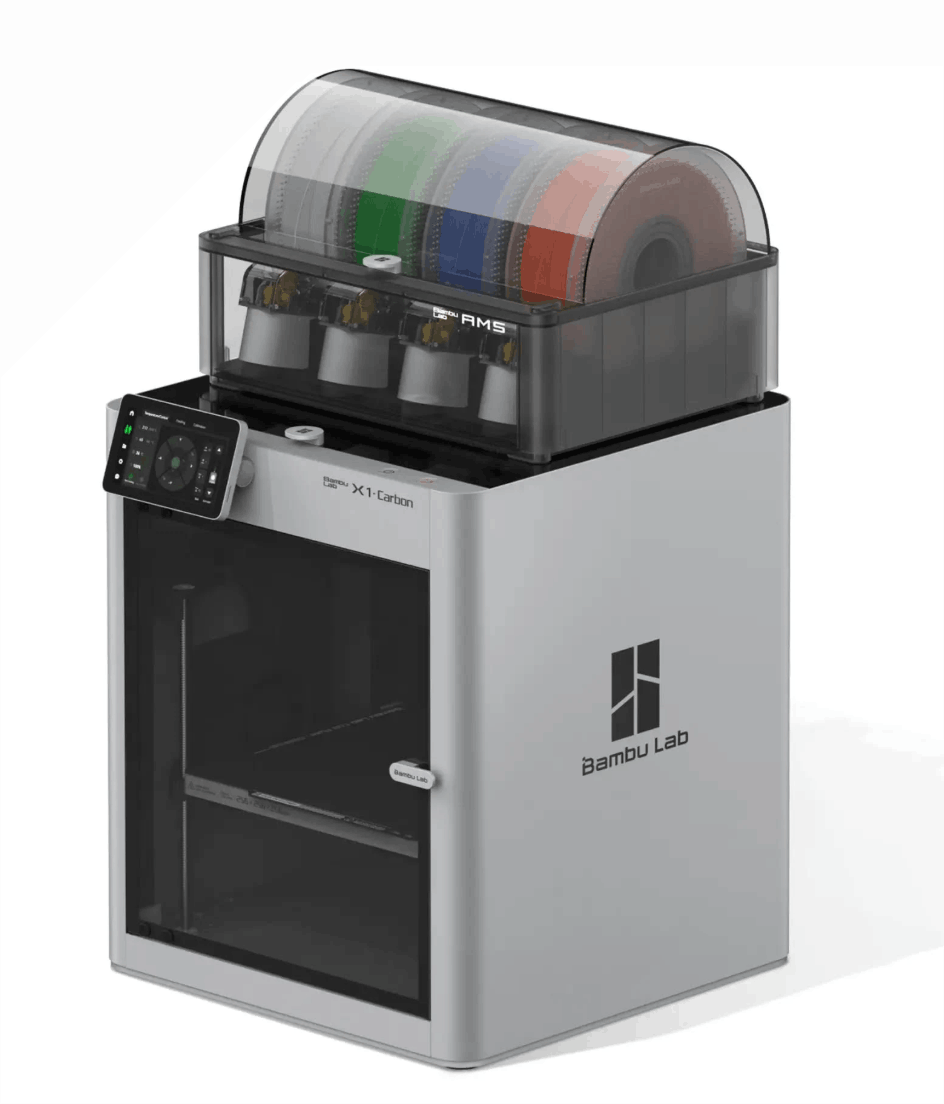
Bambu Lab X1
FDM (CoreXY) Enclosed Lidar
- Build Volume: 256 × 256 × 256 mm
- Max Speed: up to 500 mm/s
- Max Hotend Temp: 300°C
- Max Acceleration: up to 20 m/s² (20,000 mm/s²)
- Enclosure: Yes
- Features: lidar-assisted features, better compatibility with stronger materials
For this assignment, we focus on the Bambu Lab P1S.
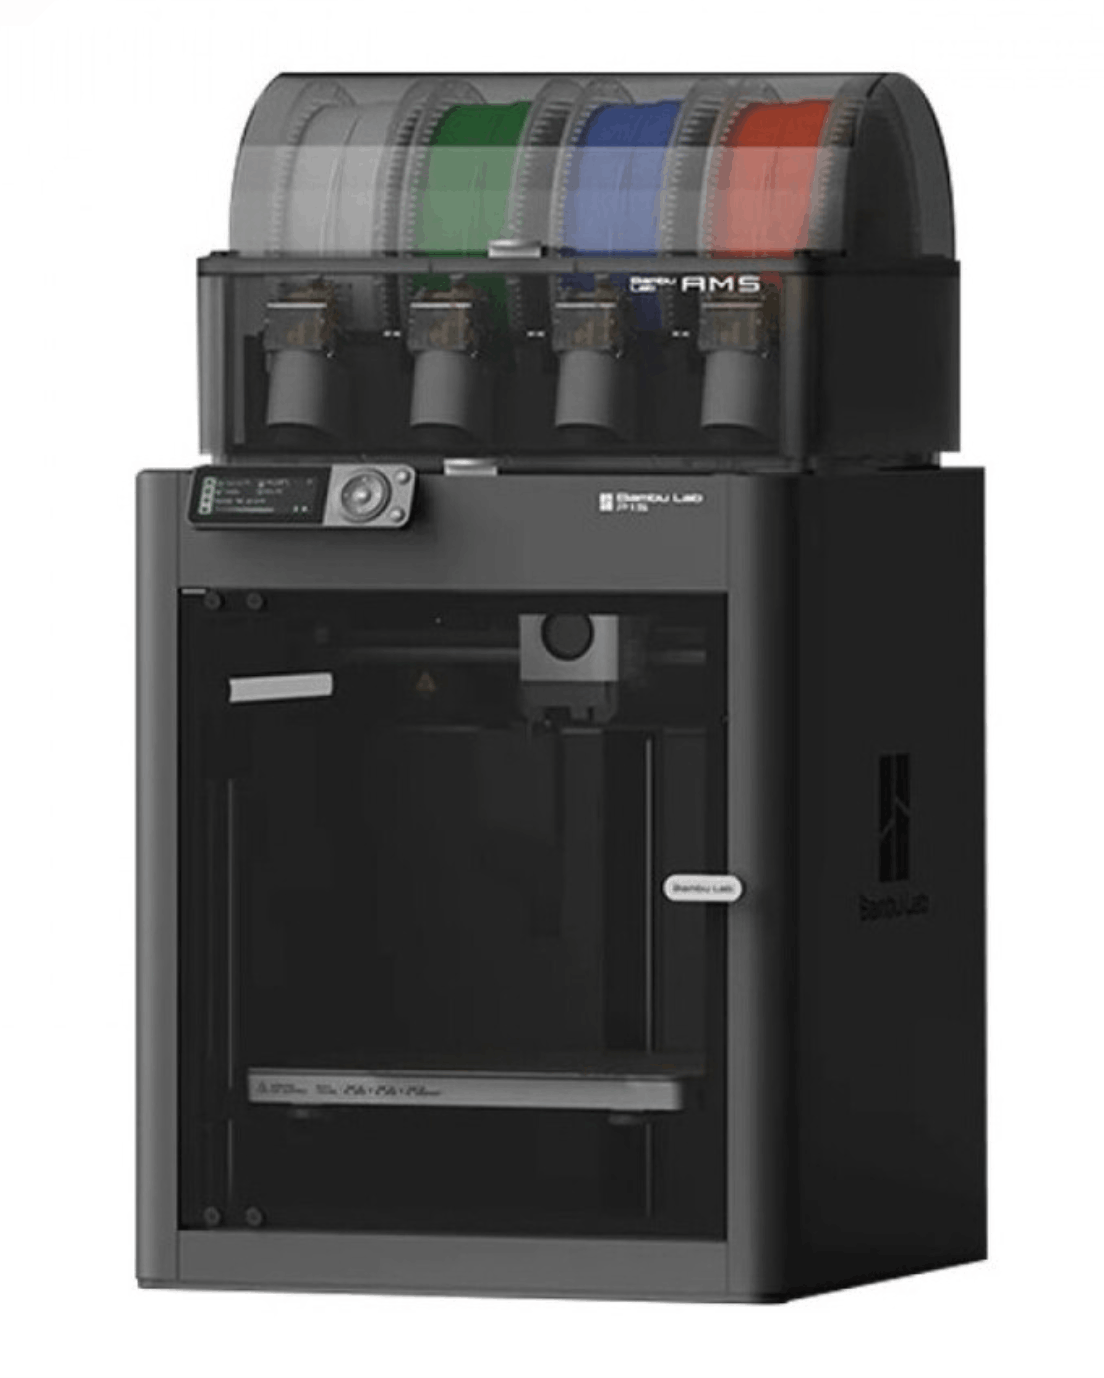
Bambu Lab P1S
FDM 256×256×256 mm Enclosed
- Build Volume: 256 × 256 × 256 mm
- Max Speed: up to 500 mm/s
- Max Hotend Temp: 300°C
- Enclosure: Yes
- Typical Materials: PLA, PETG, TPU, ABS, ASA (depending on setup)
Short analysis: P1S is fast and enclosed, great for reliable prototyping and printing materials like ABS/ASA more consistently.

3) How To Add Filaments To Machines In Our Lab
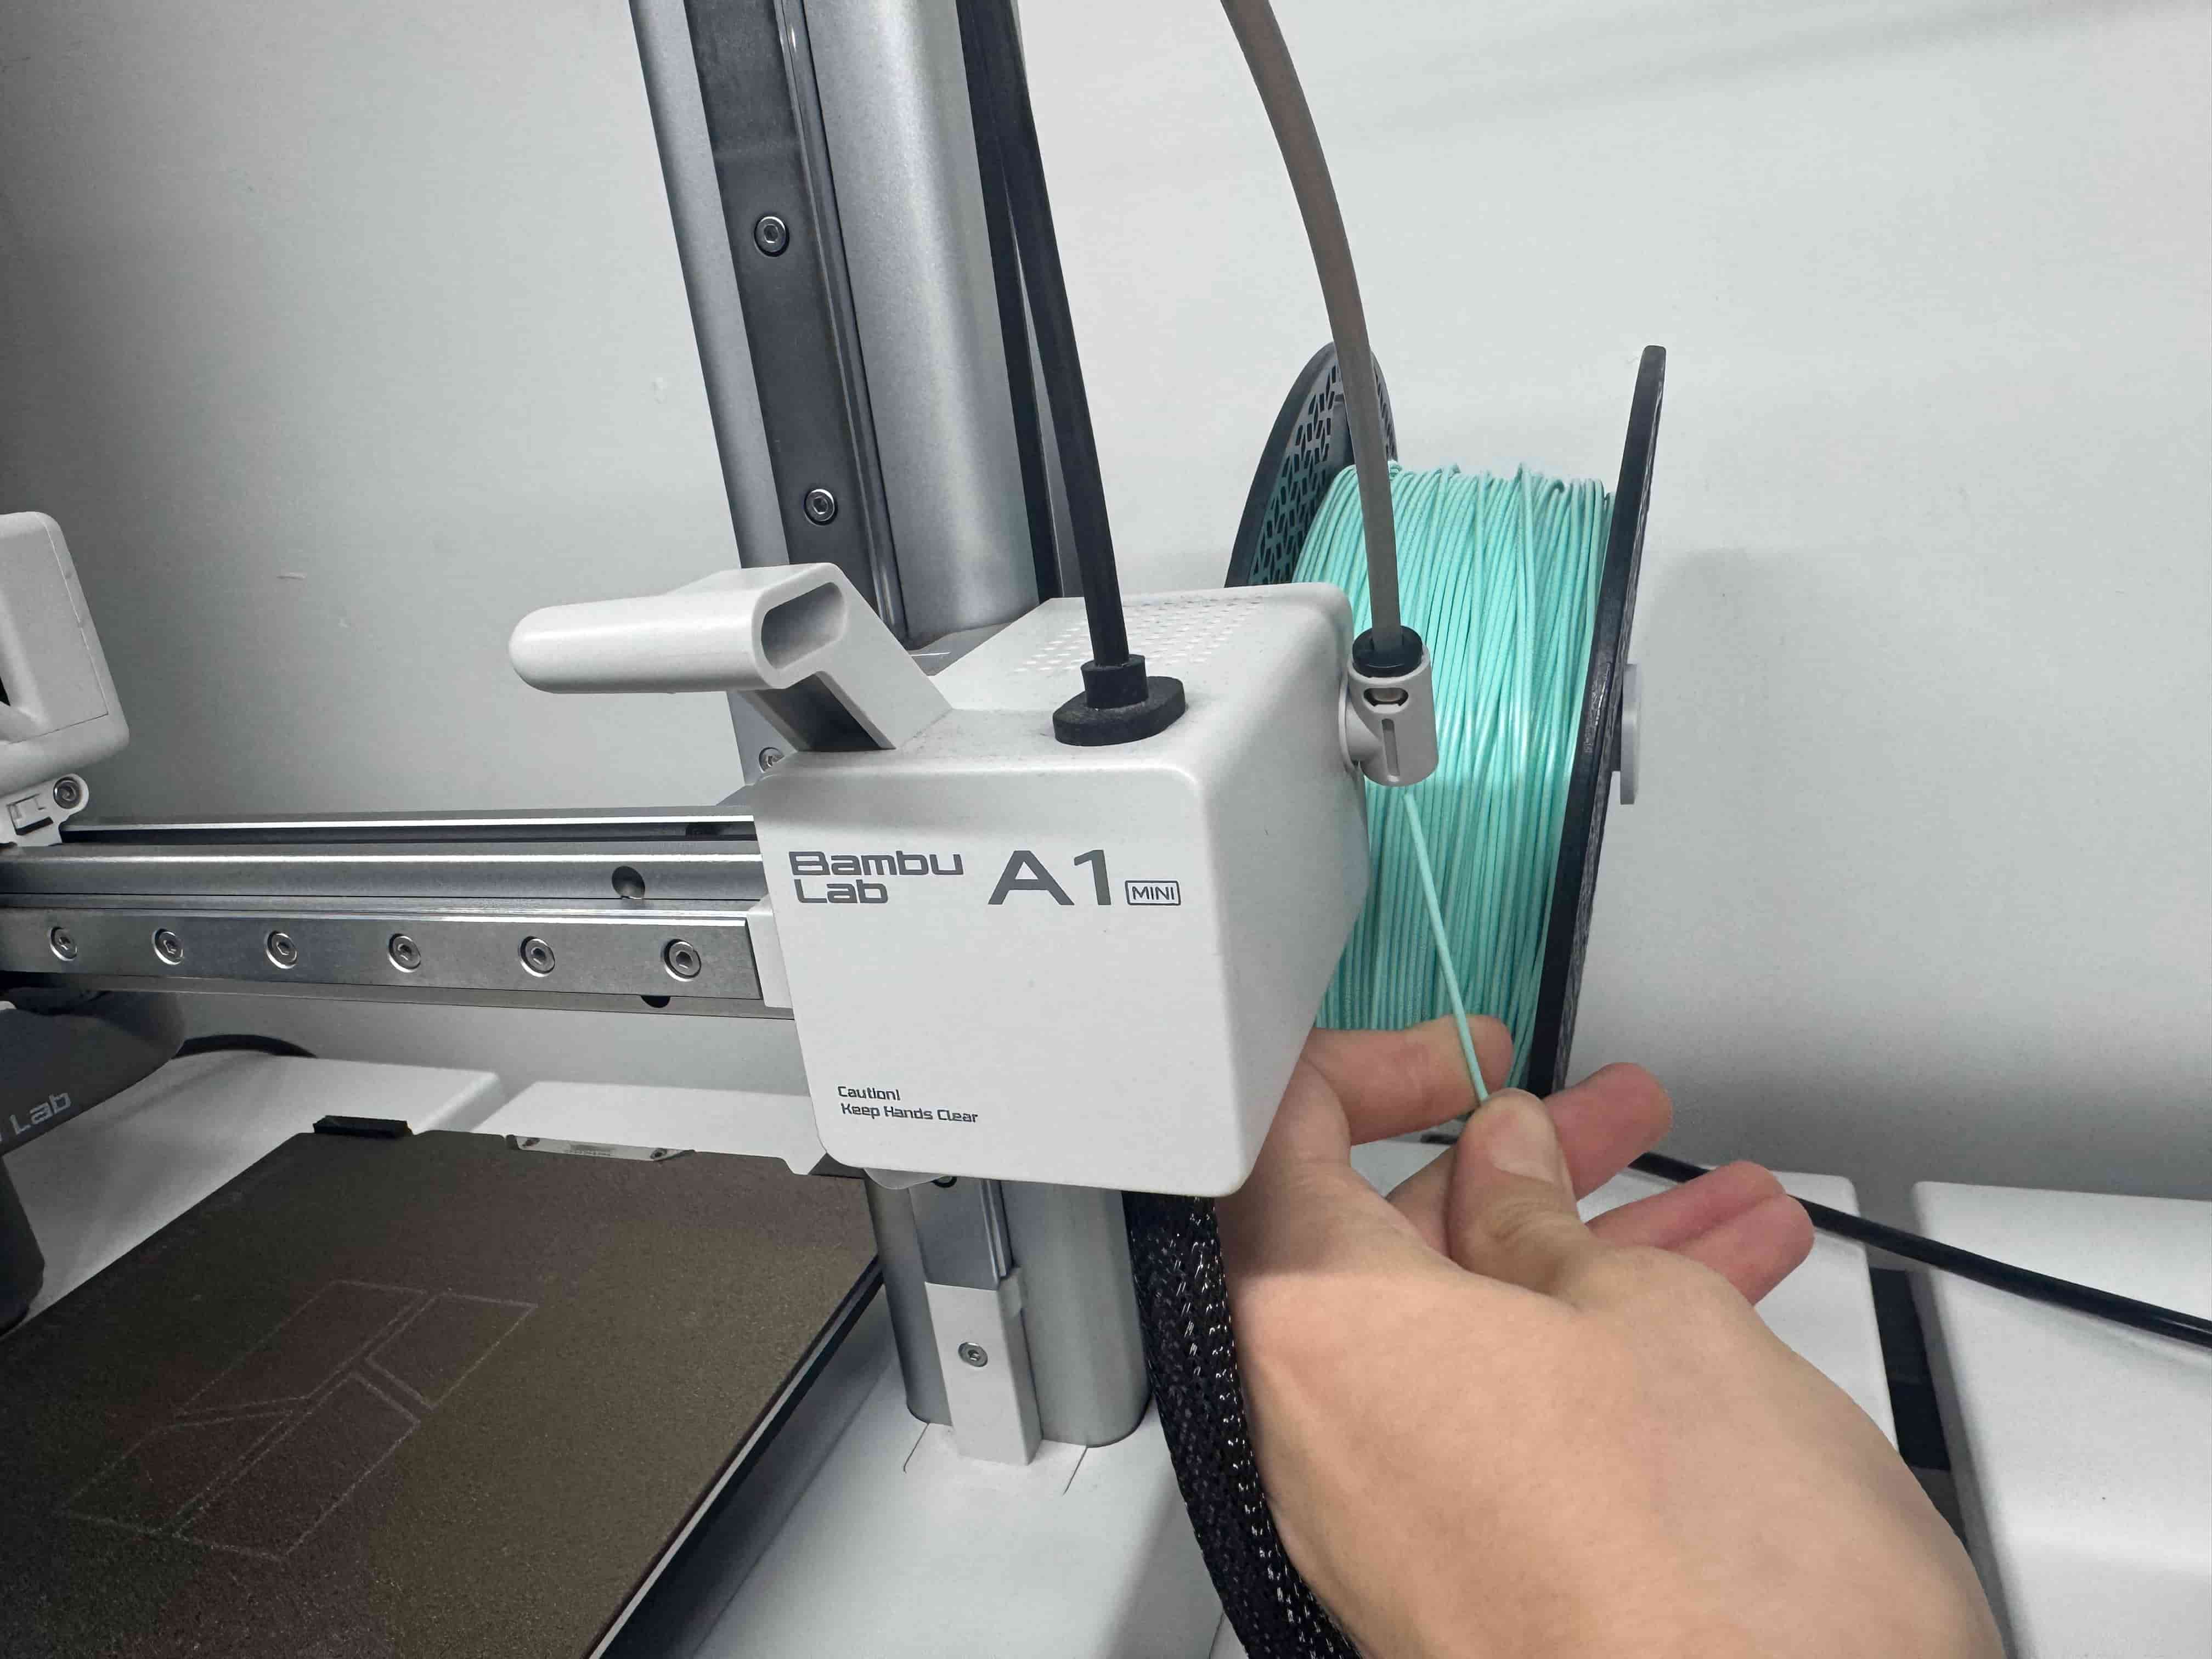
3a) Bambu Lab A1
- Get the filament you will use.
- Place the PLA filament on the holder and feed it into the tube.
- On the screen: Filament → Load.

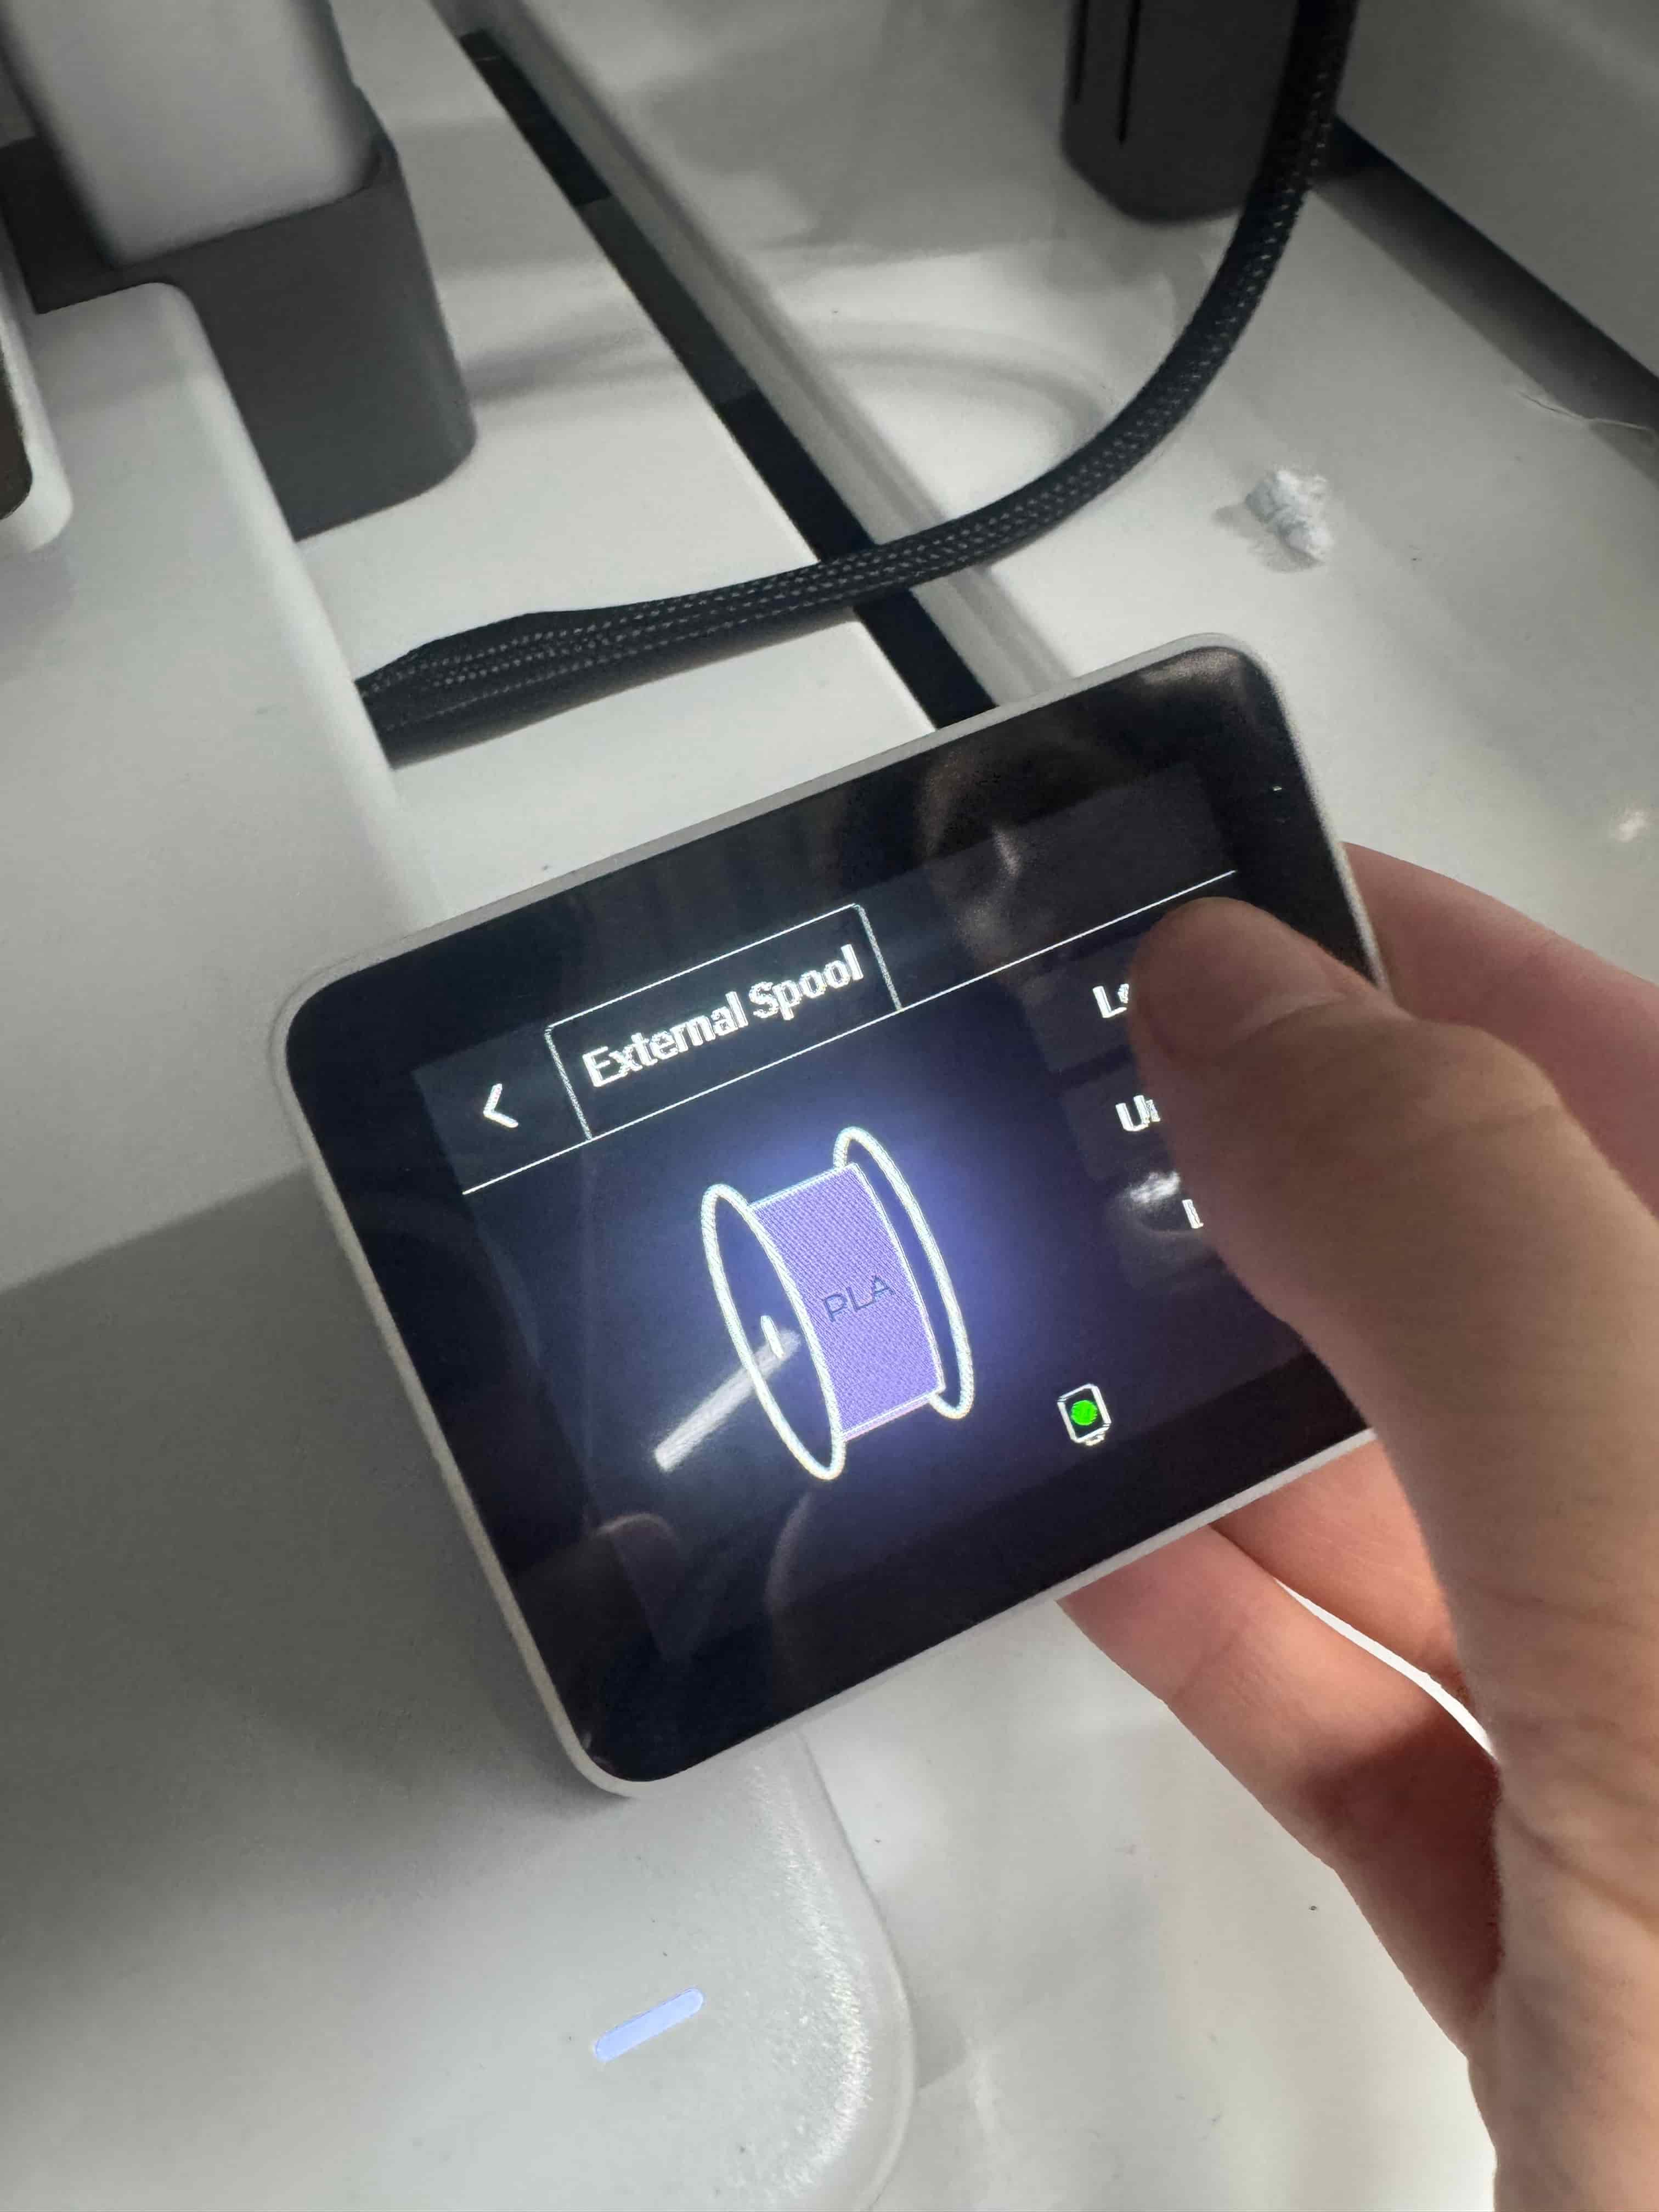
- When loading finishes, filament should come out of the nozzle.
- For unloading: Filament → Unload.
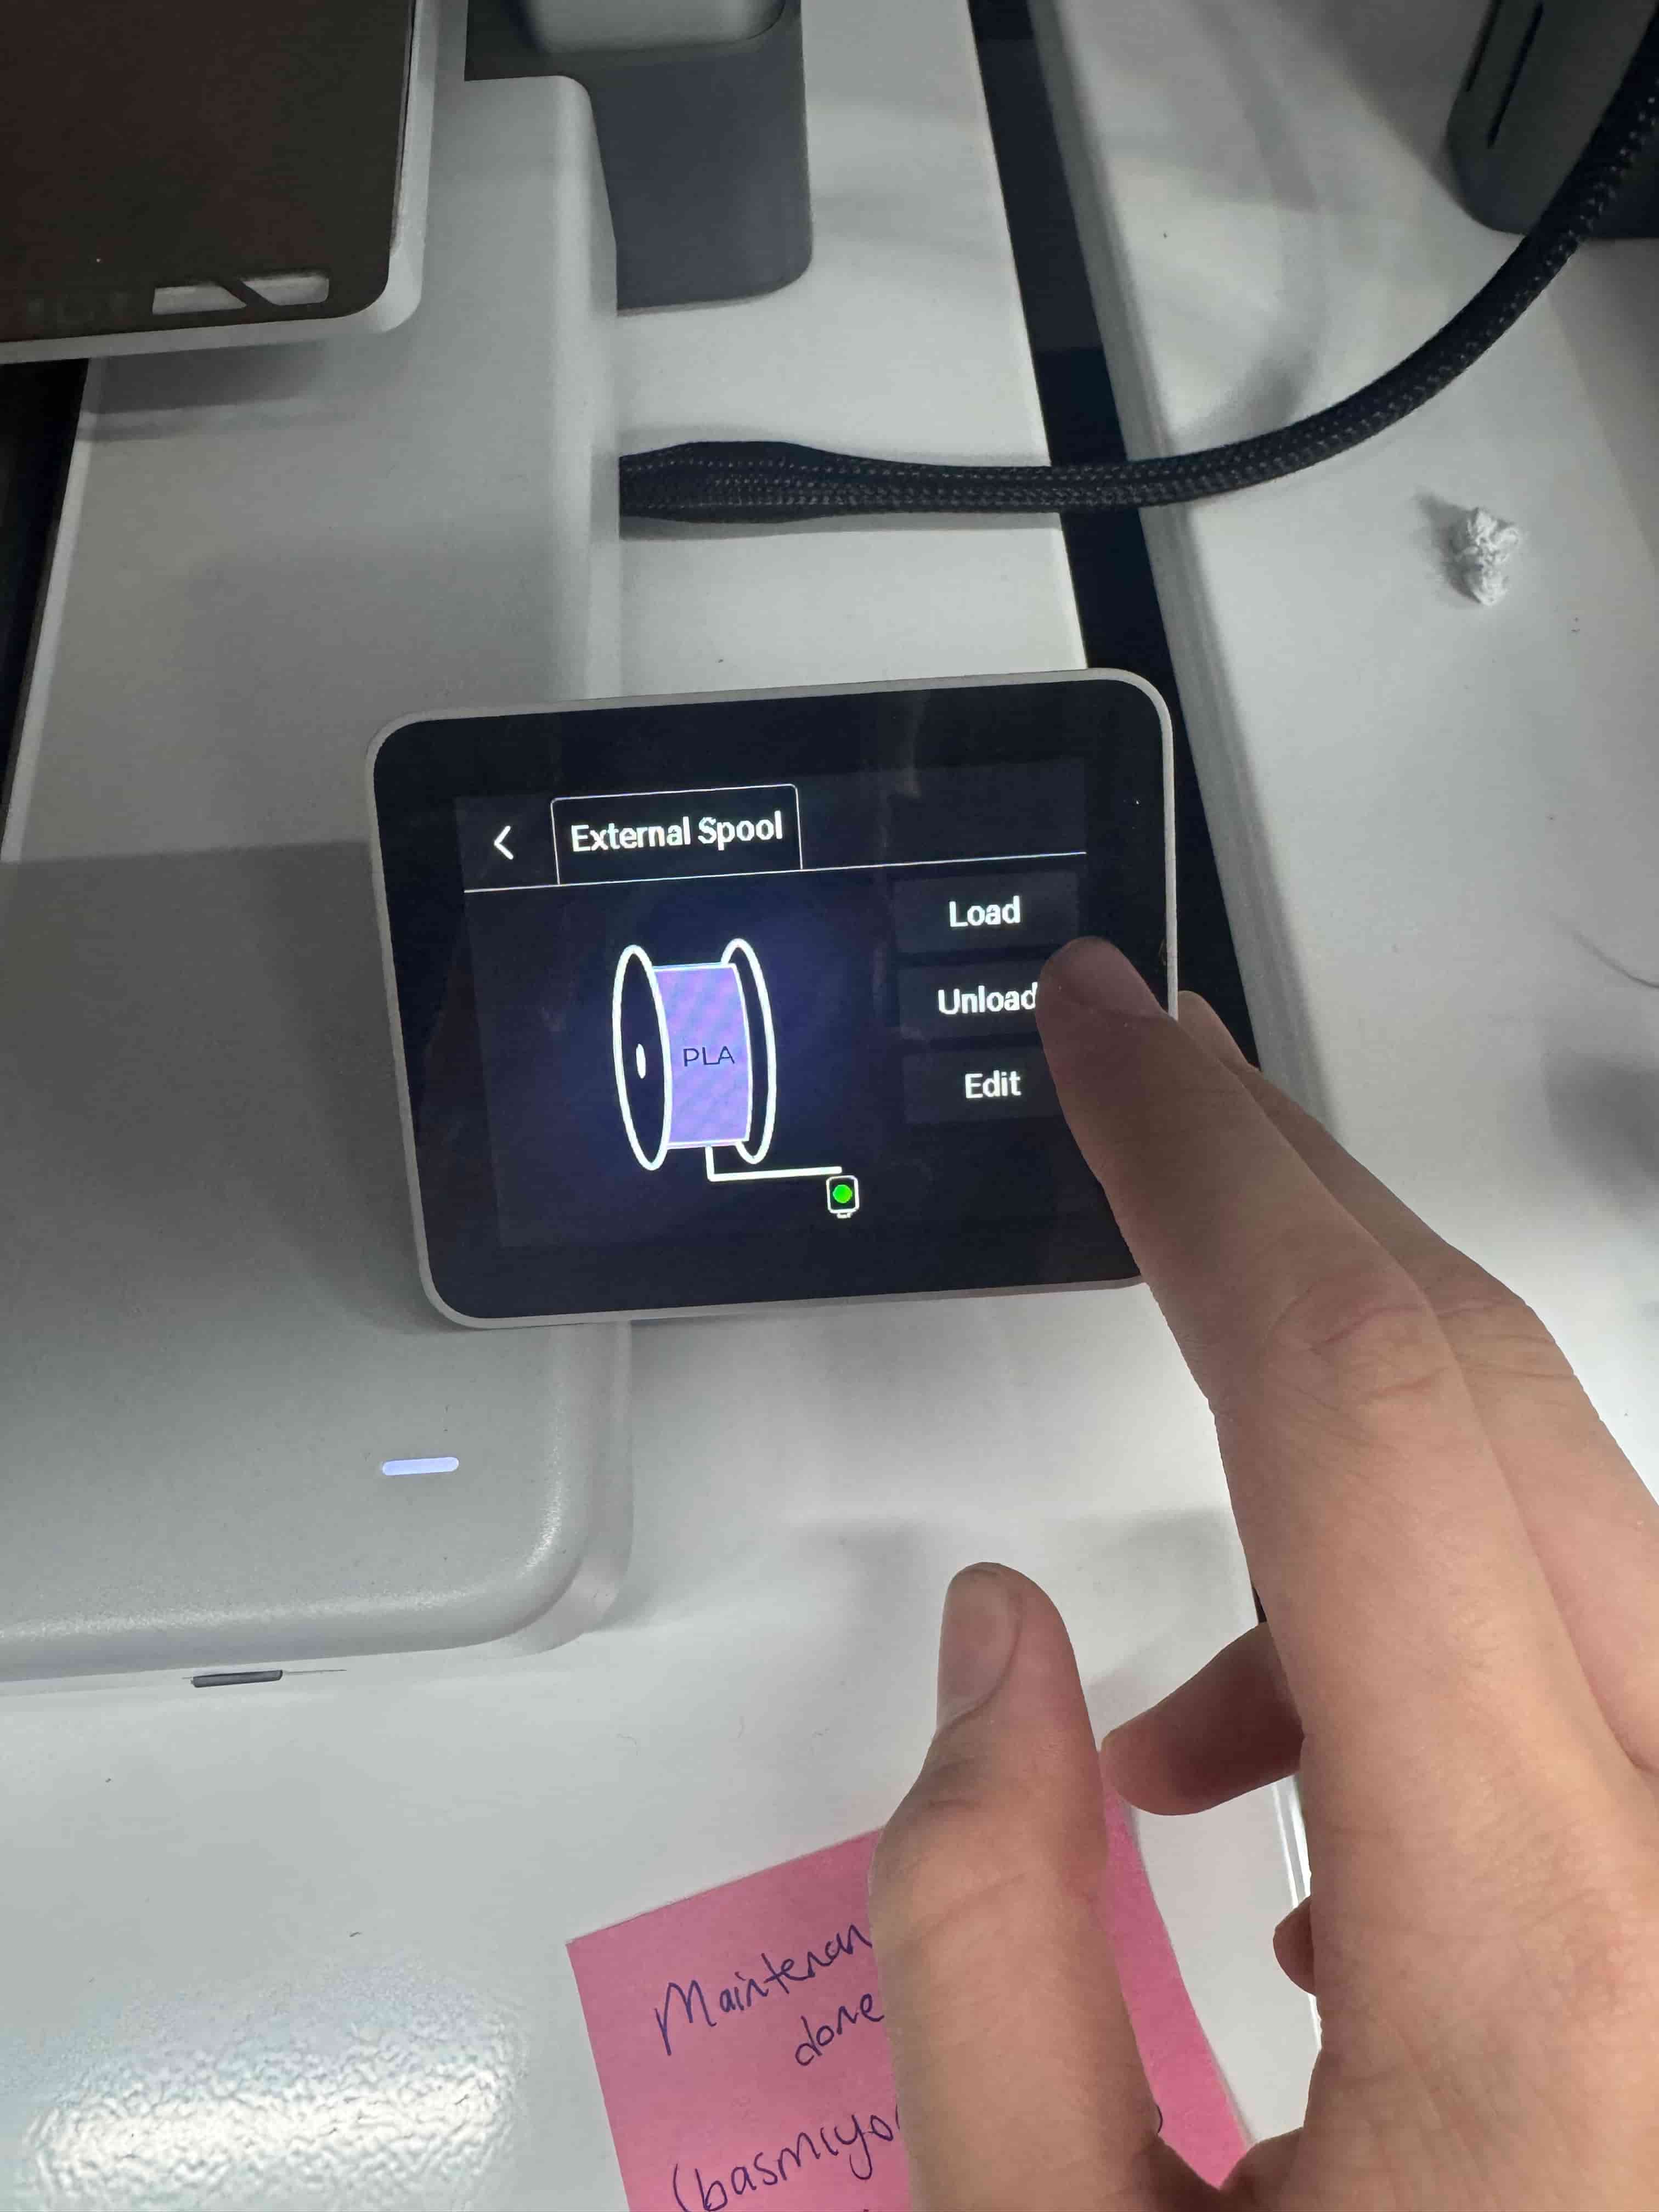
- Follow the on-screen prompts and remove the filament when reminded.

This is the basic workflow for loading/unloading on the Bambu Lab A1.
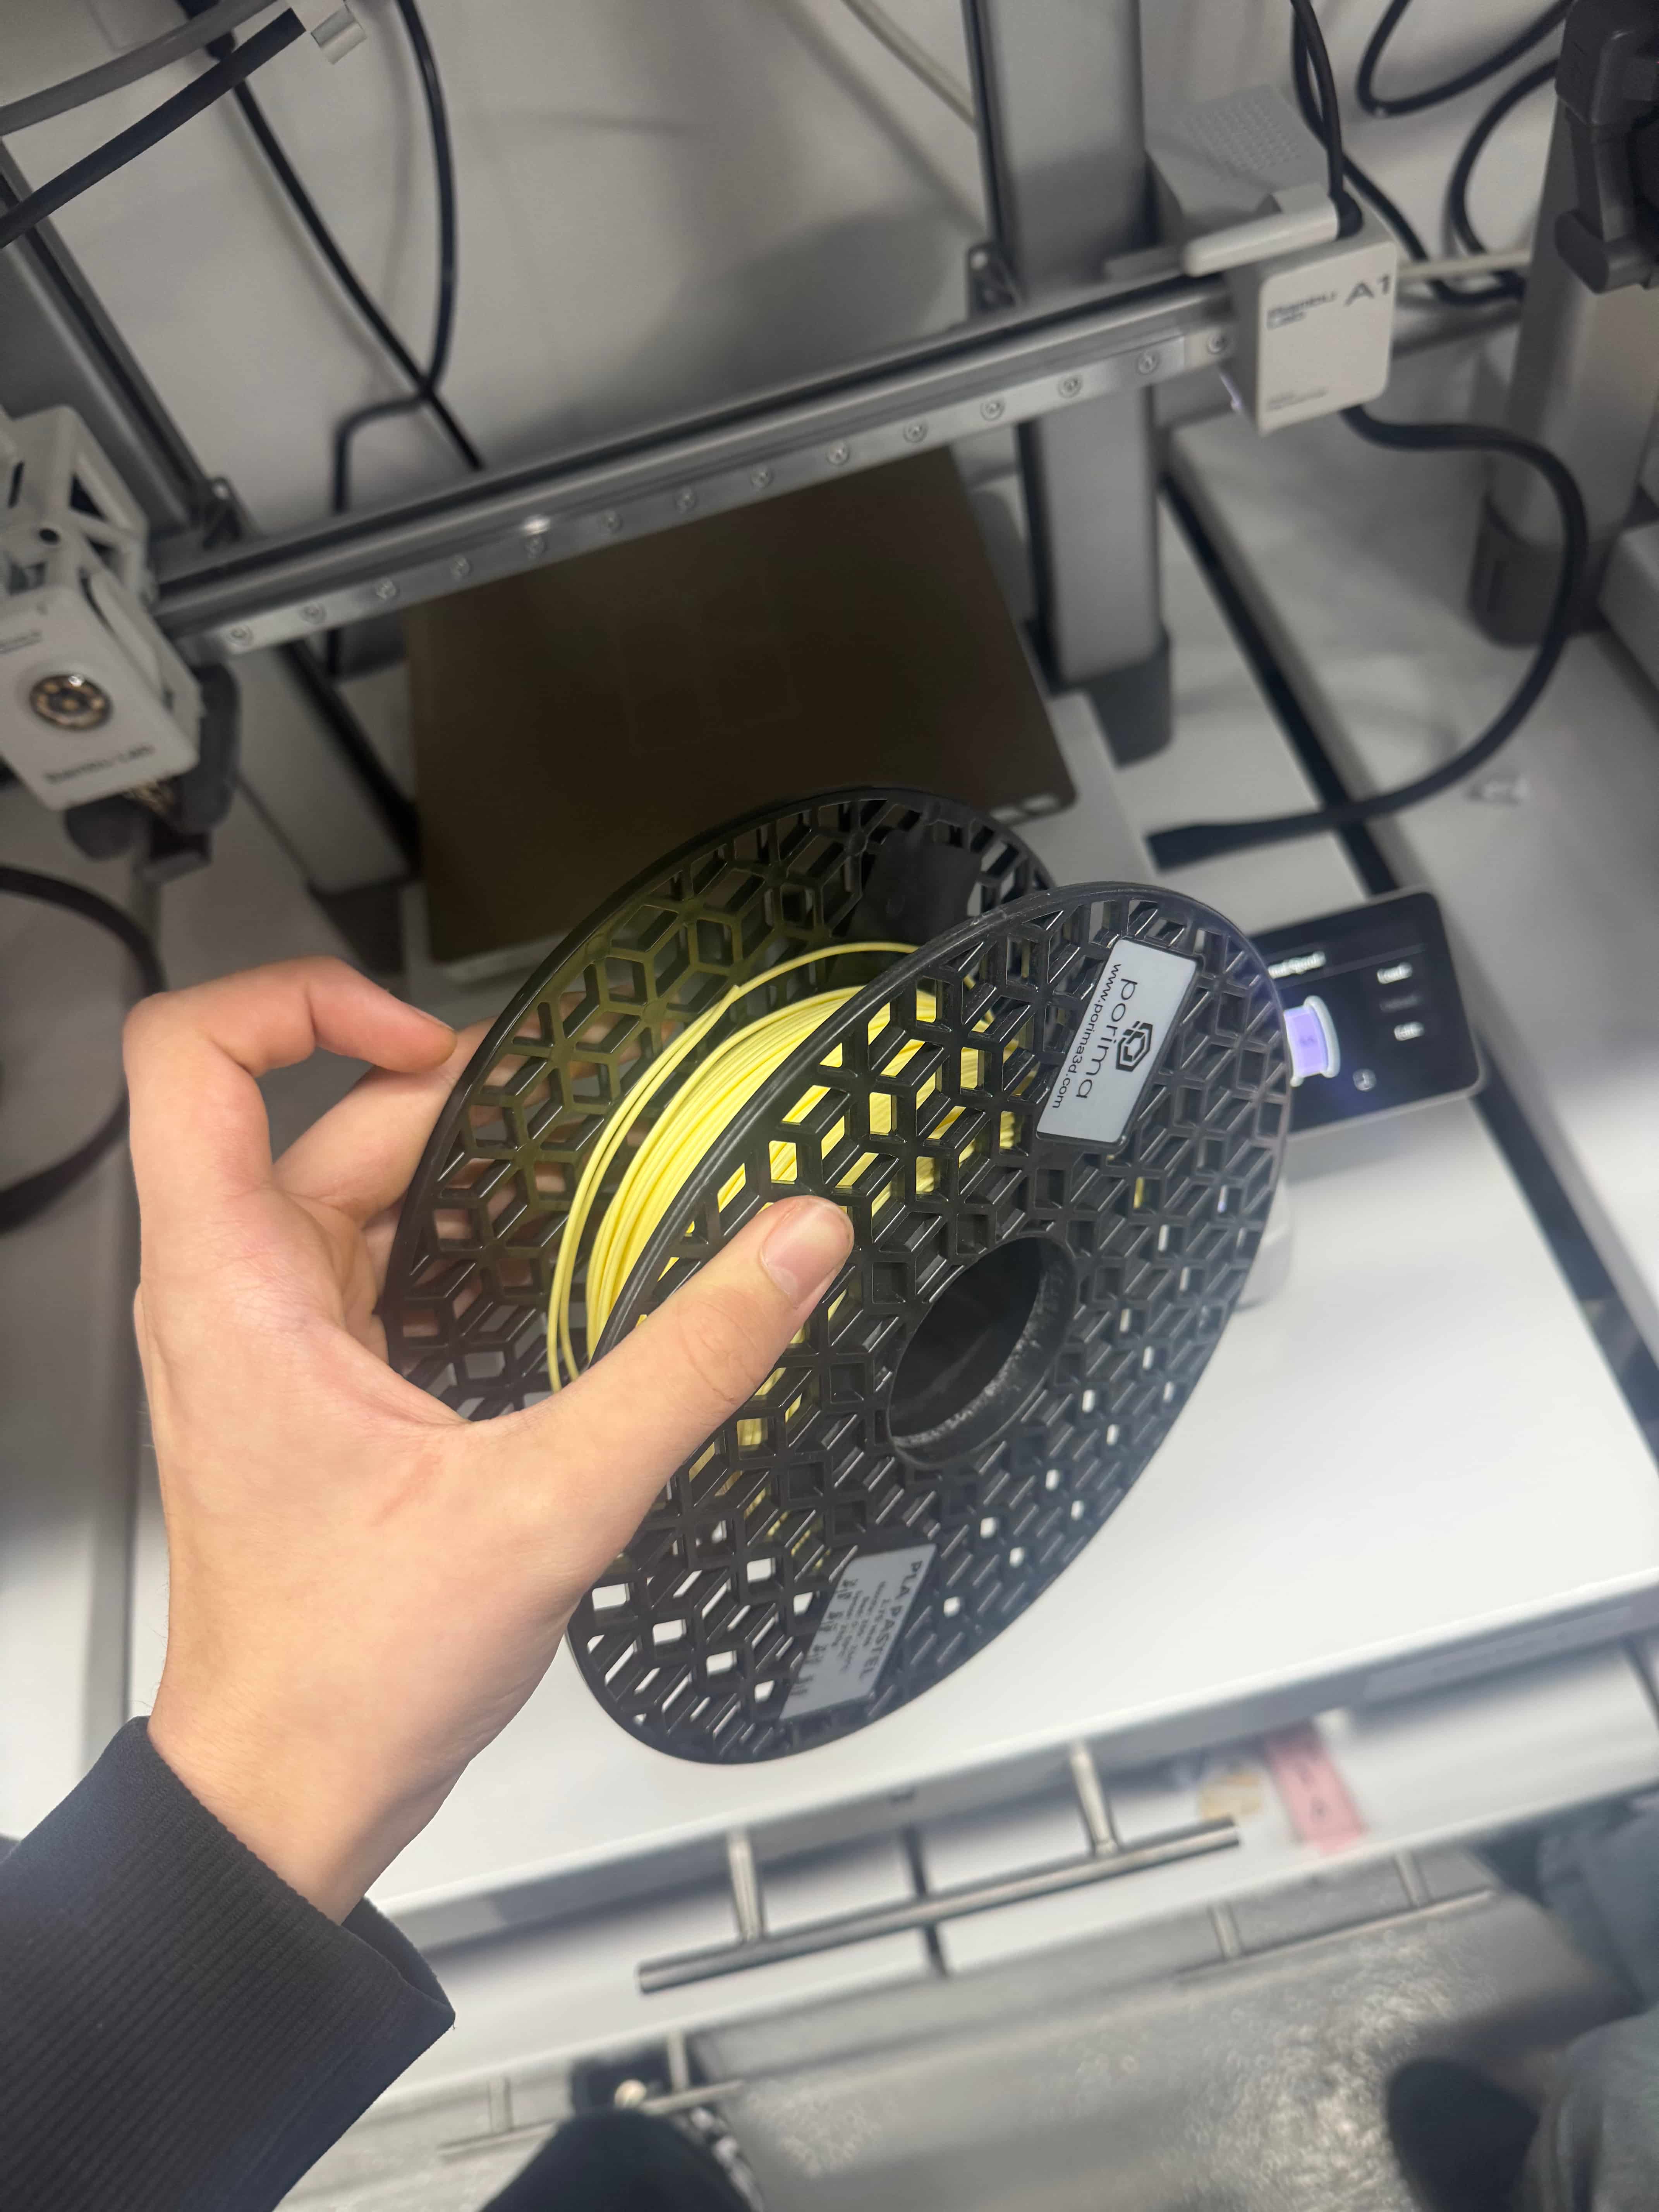
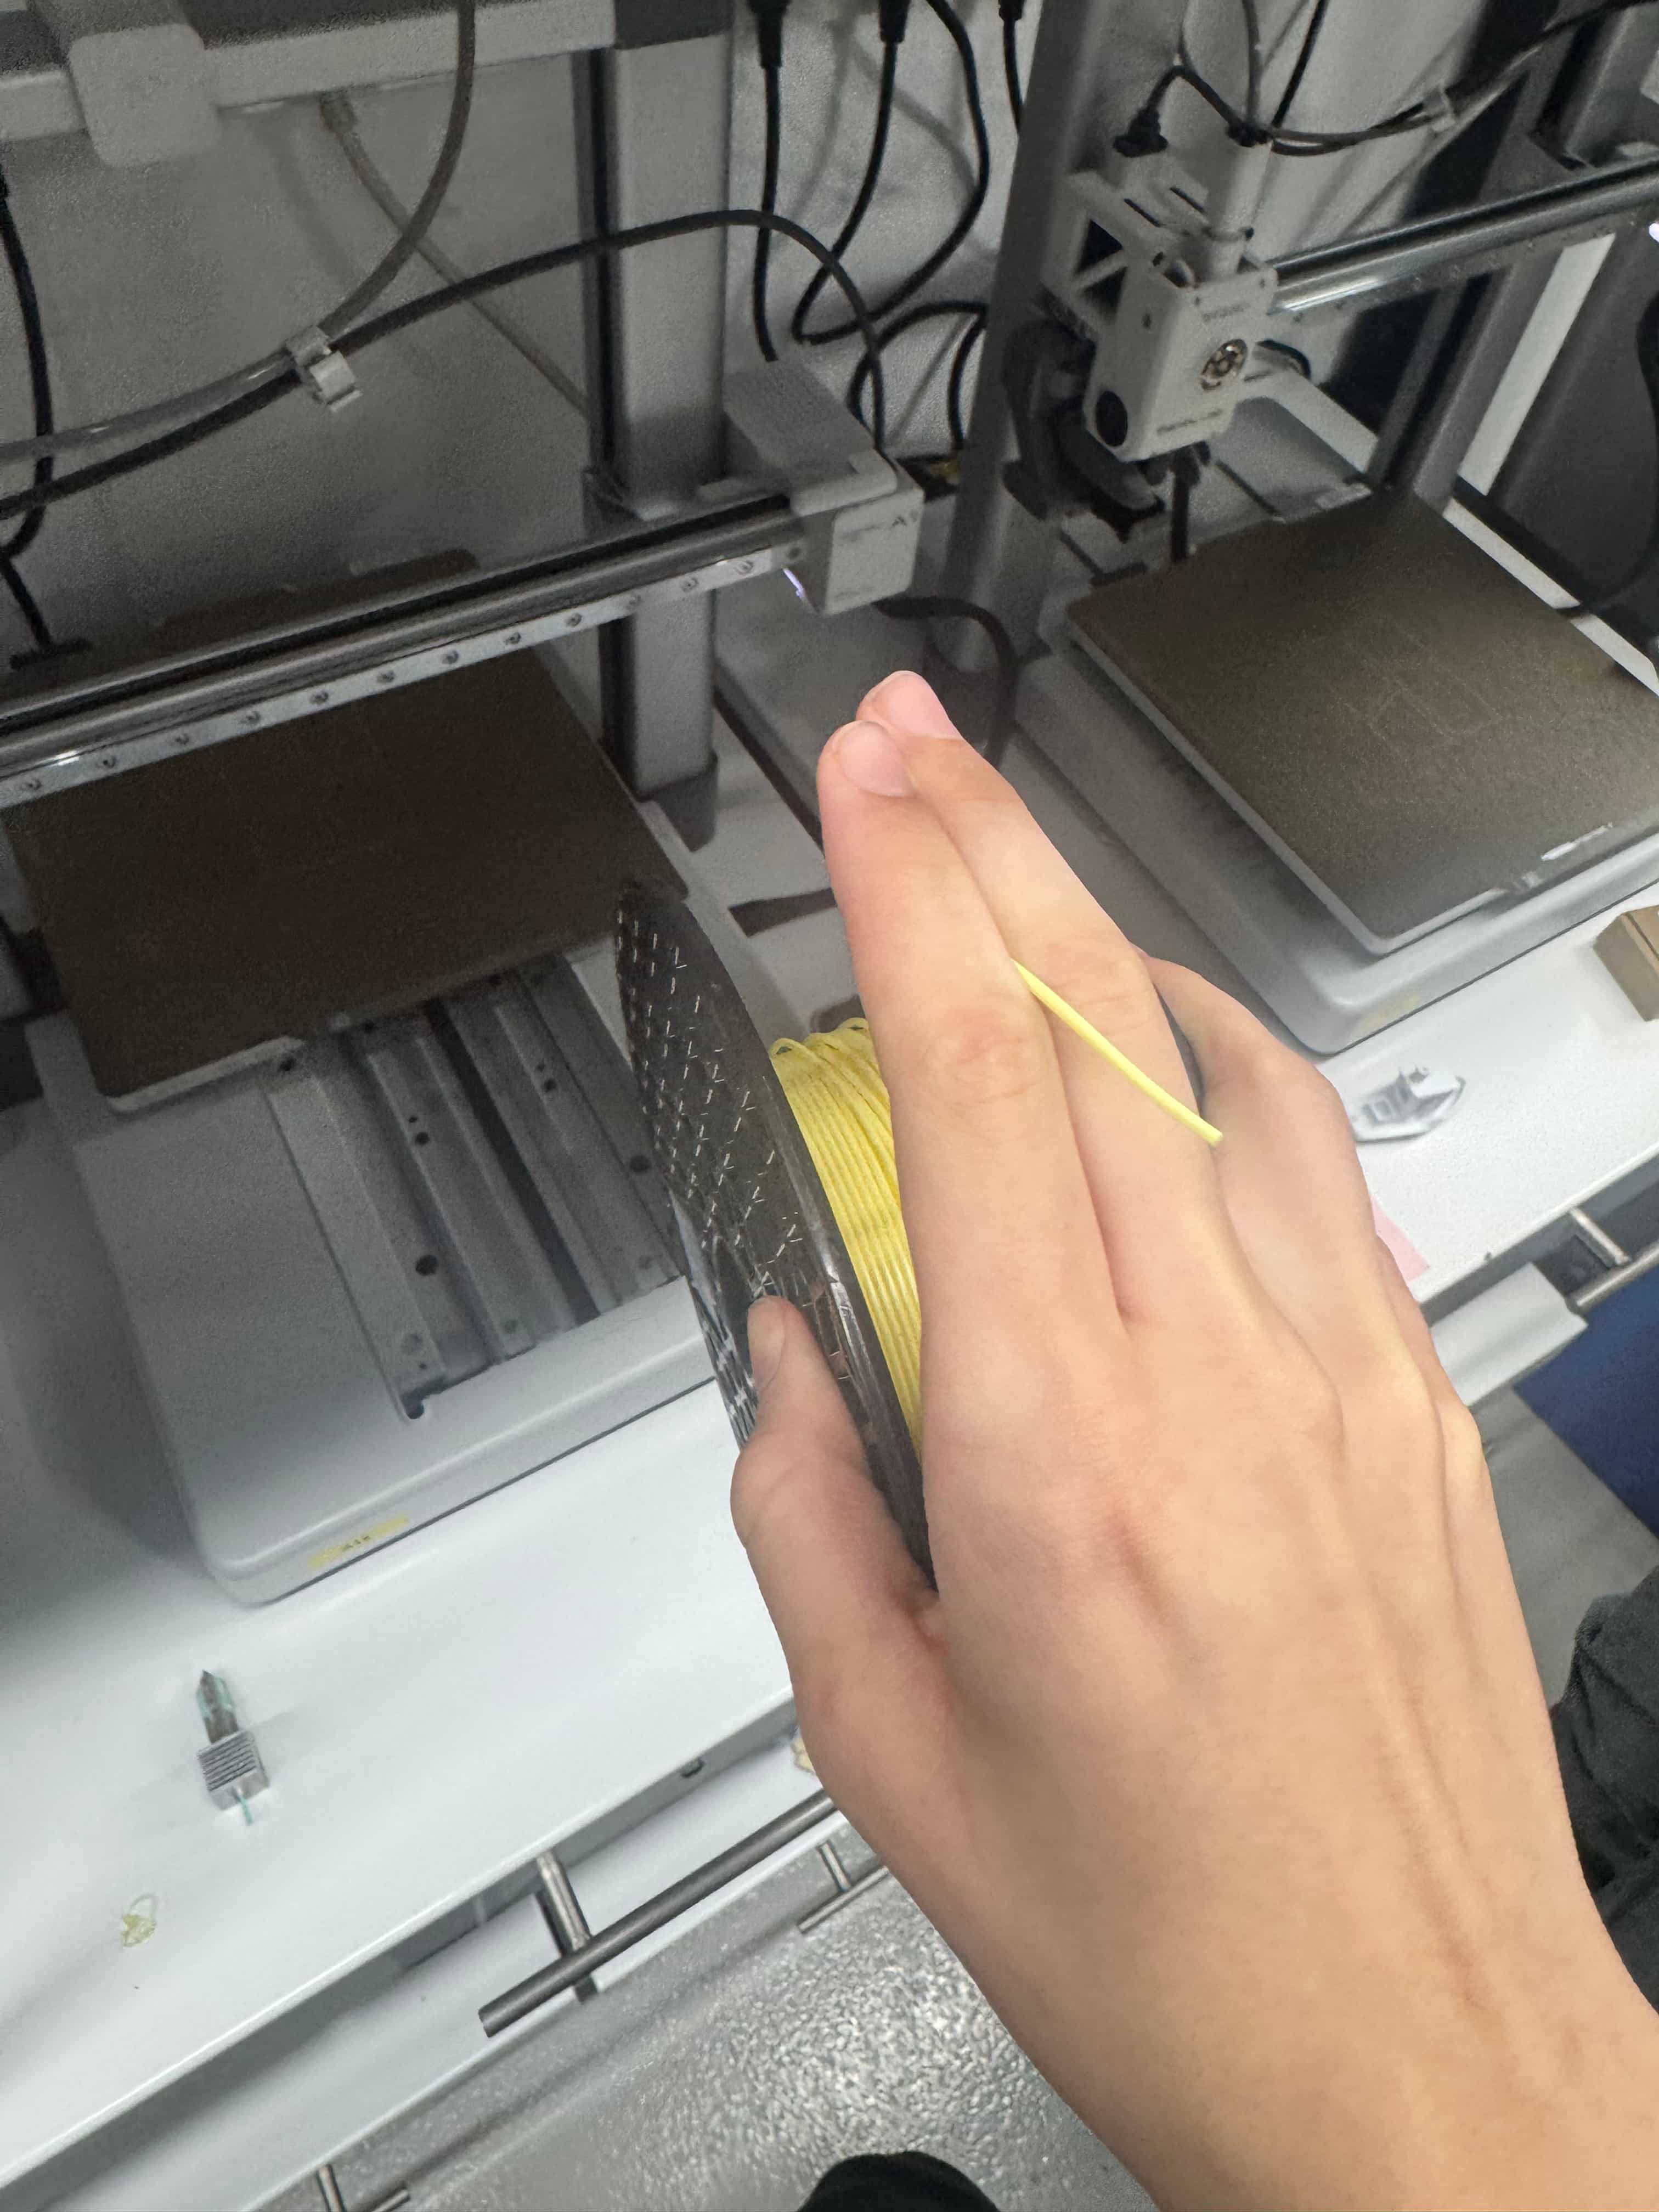
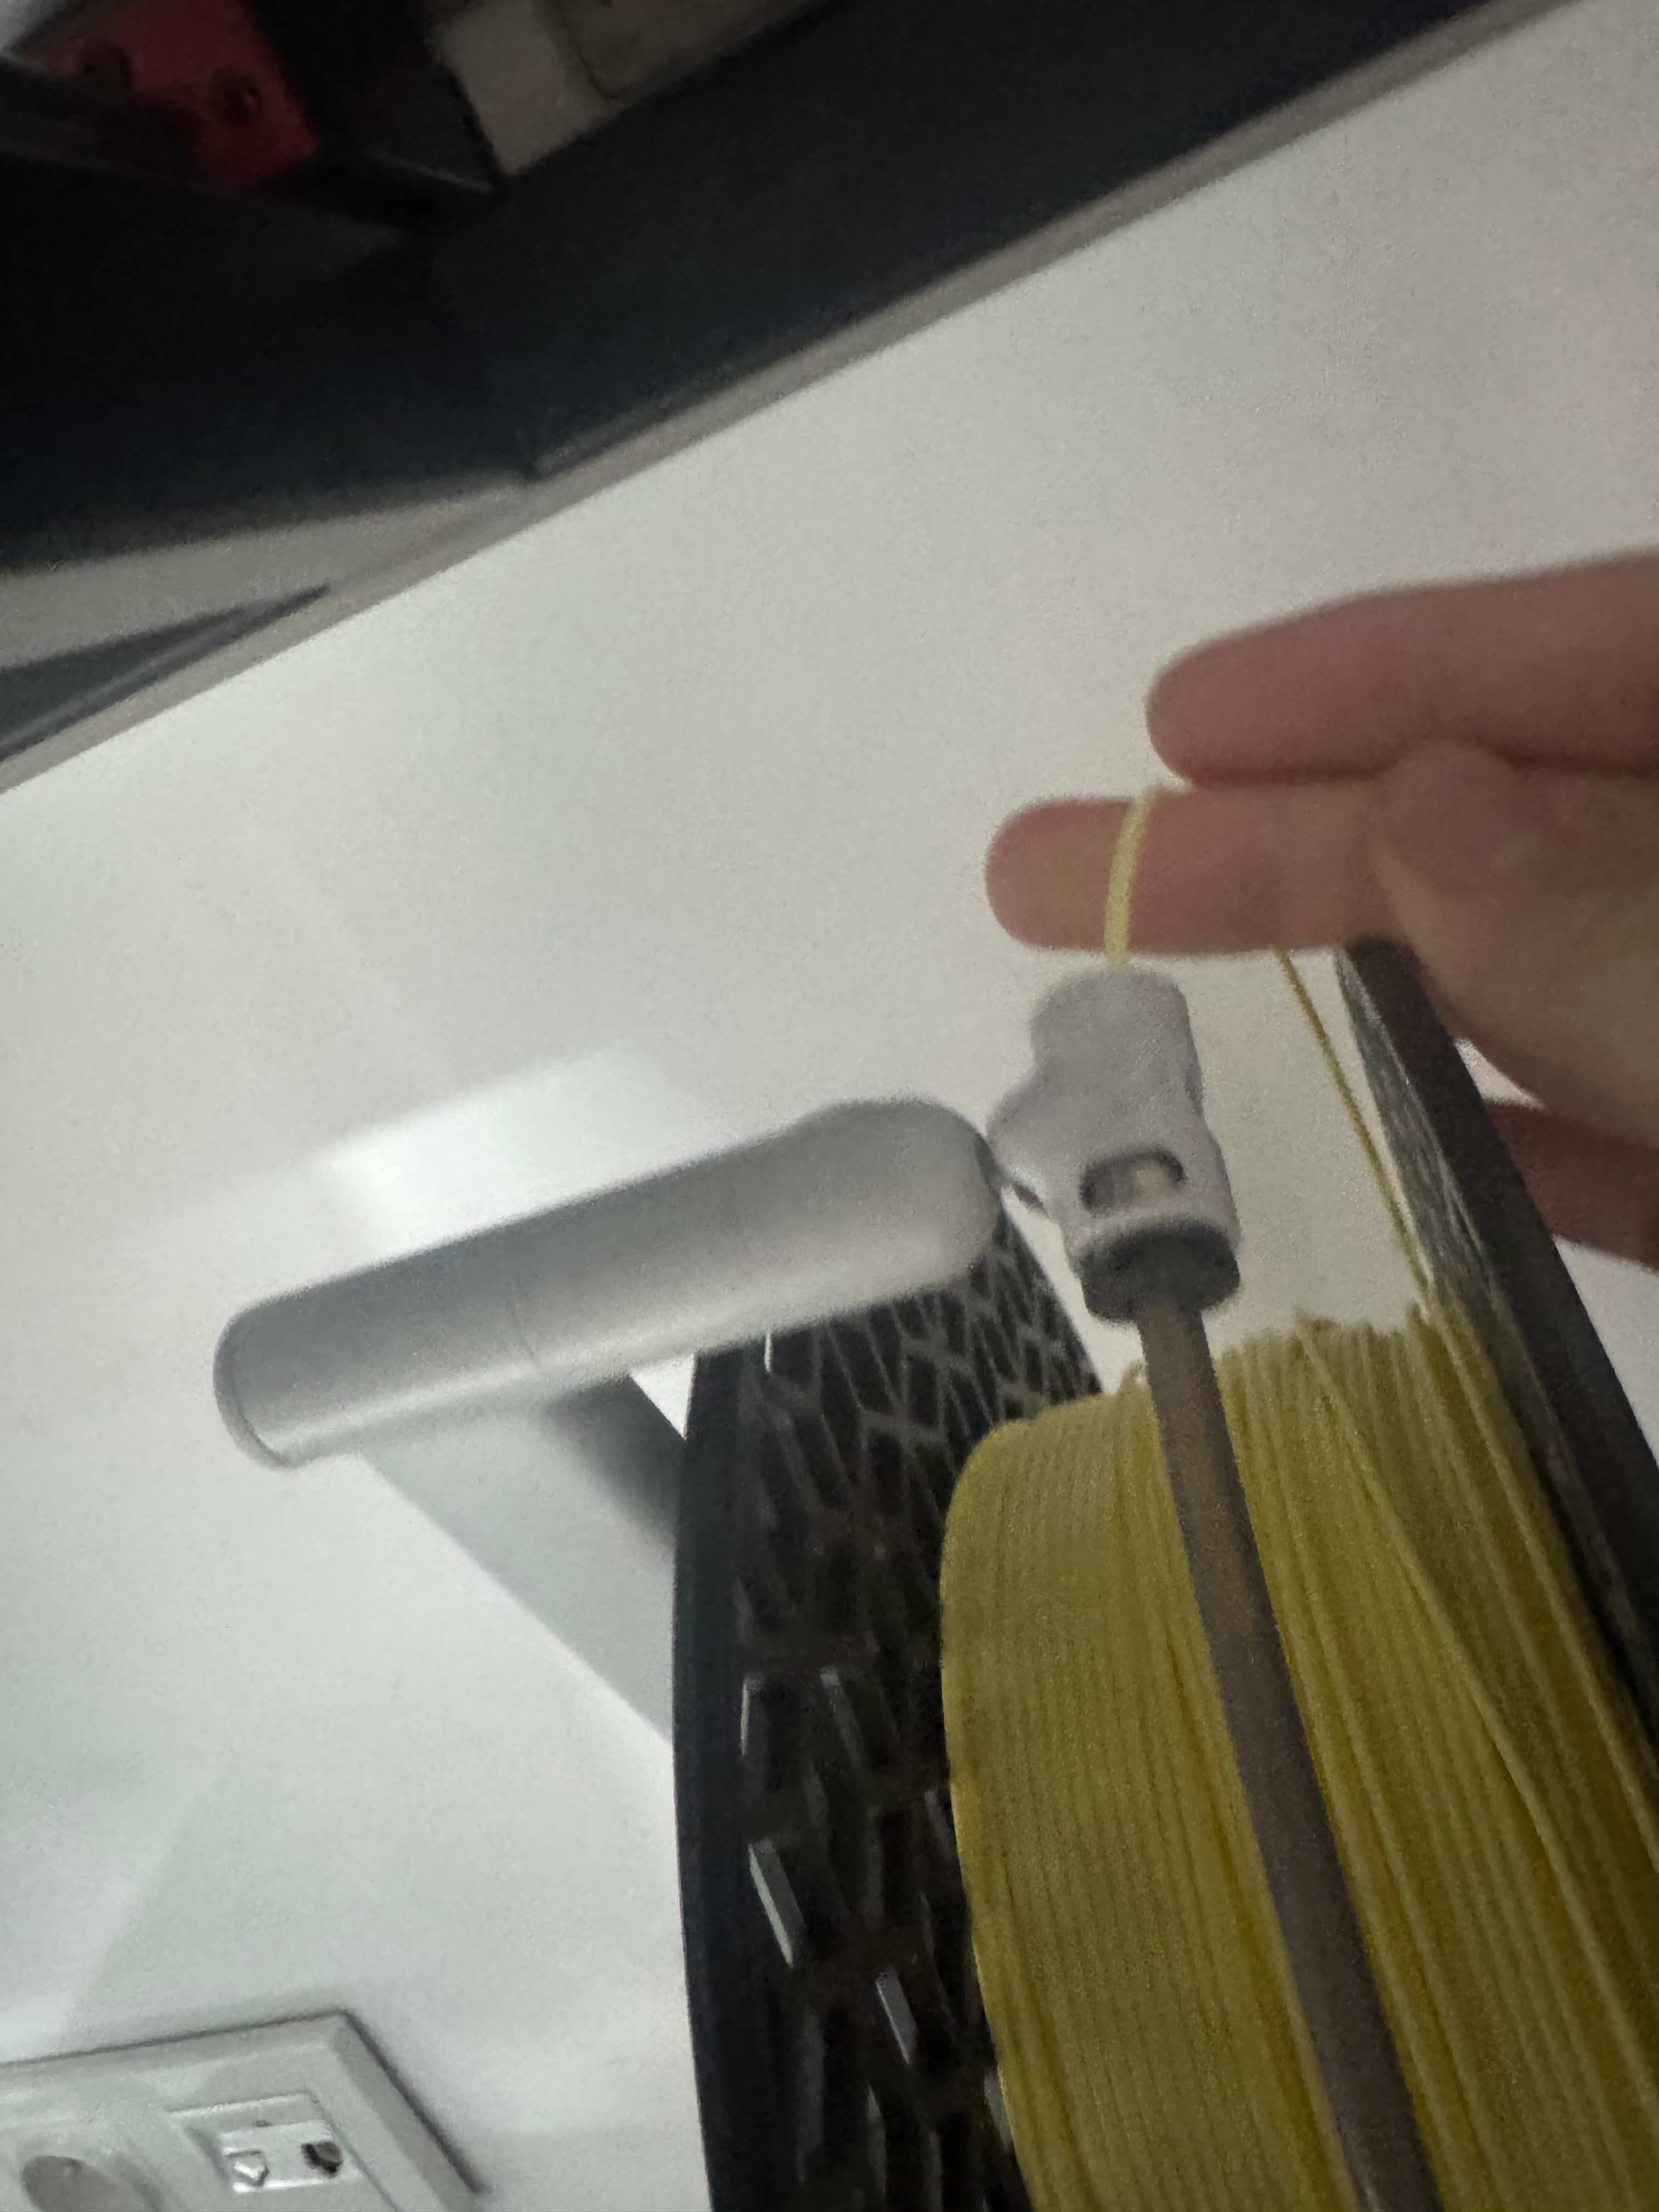
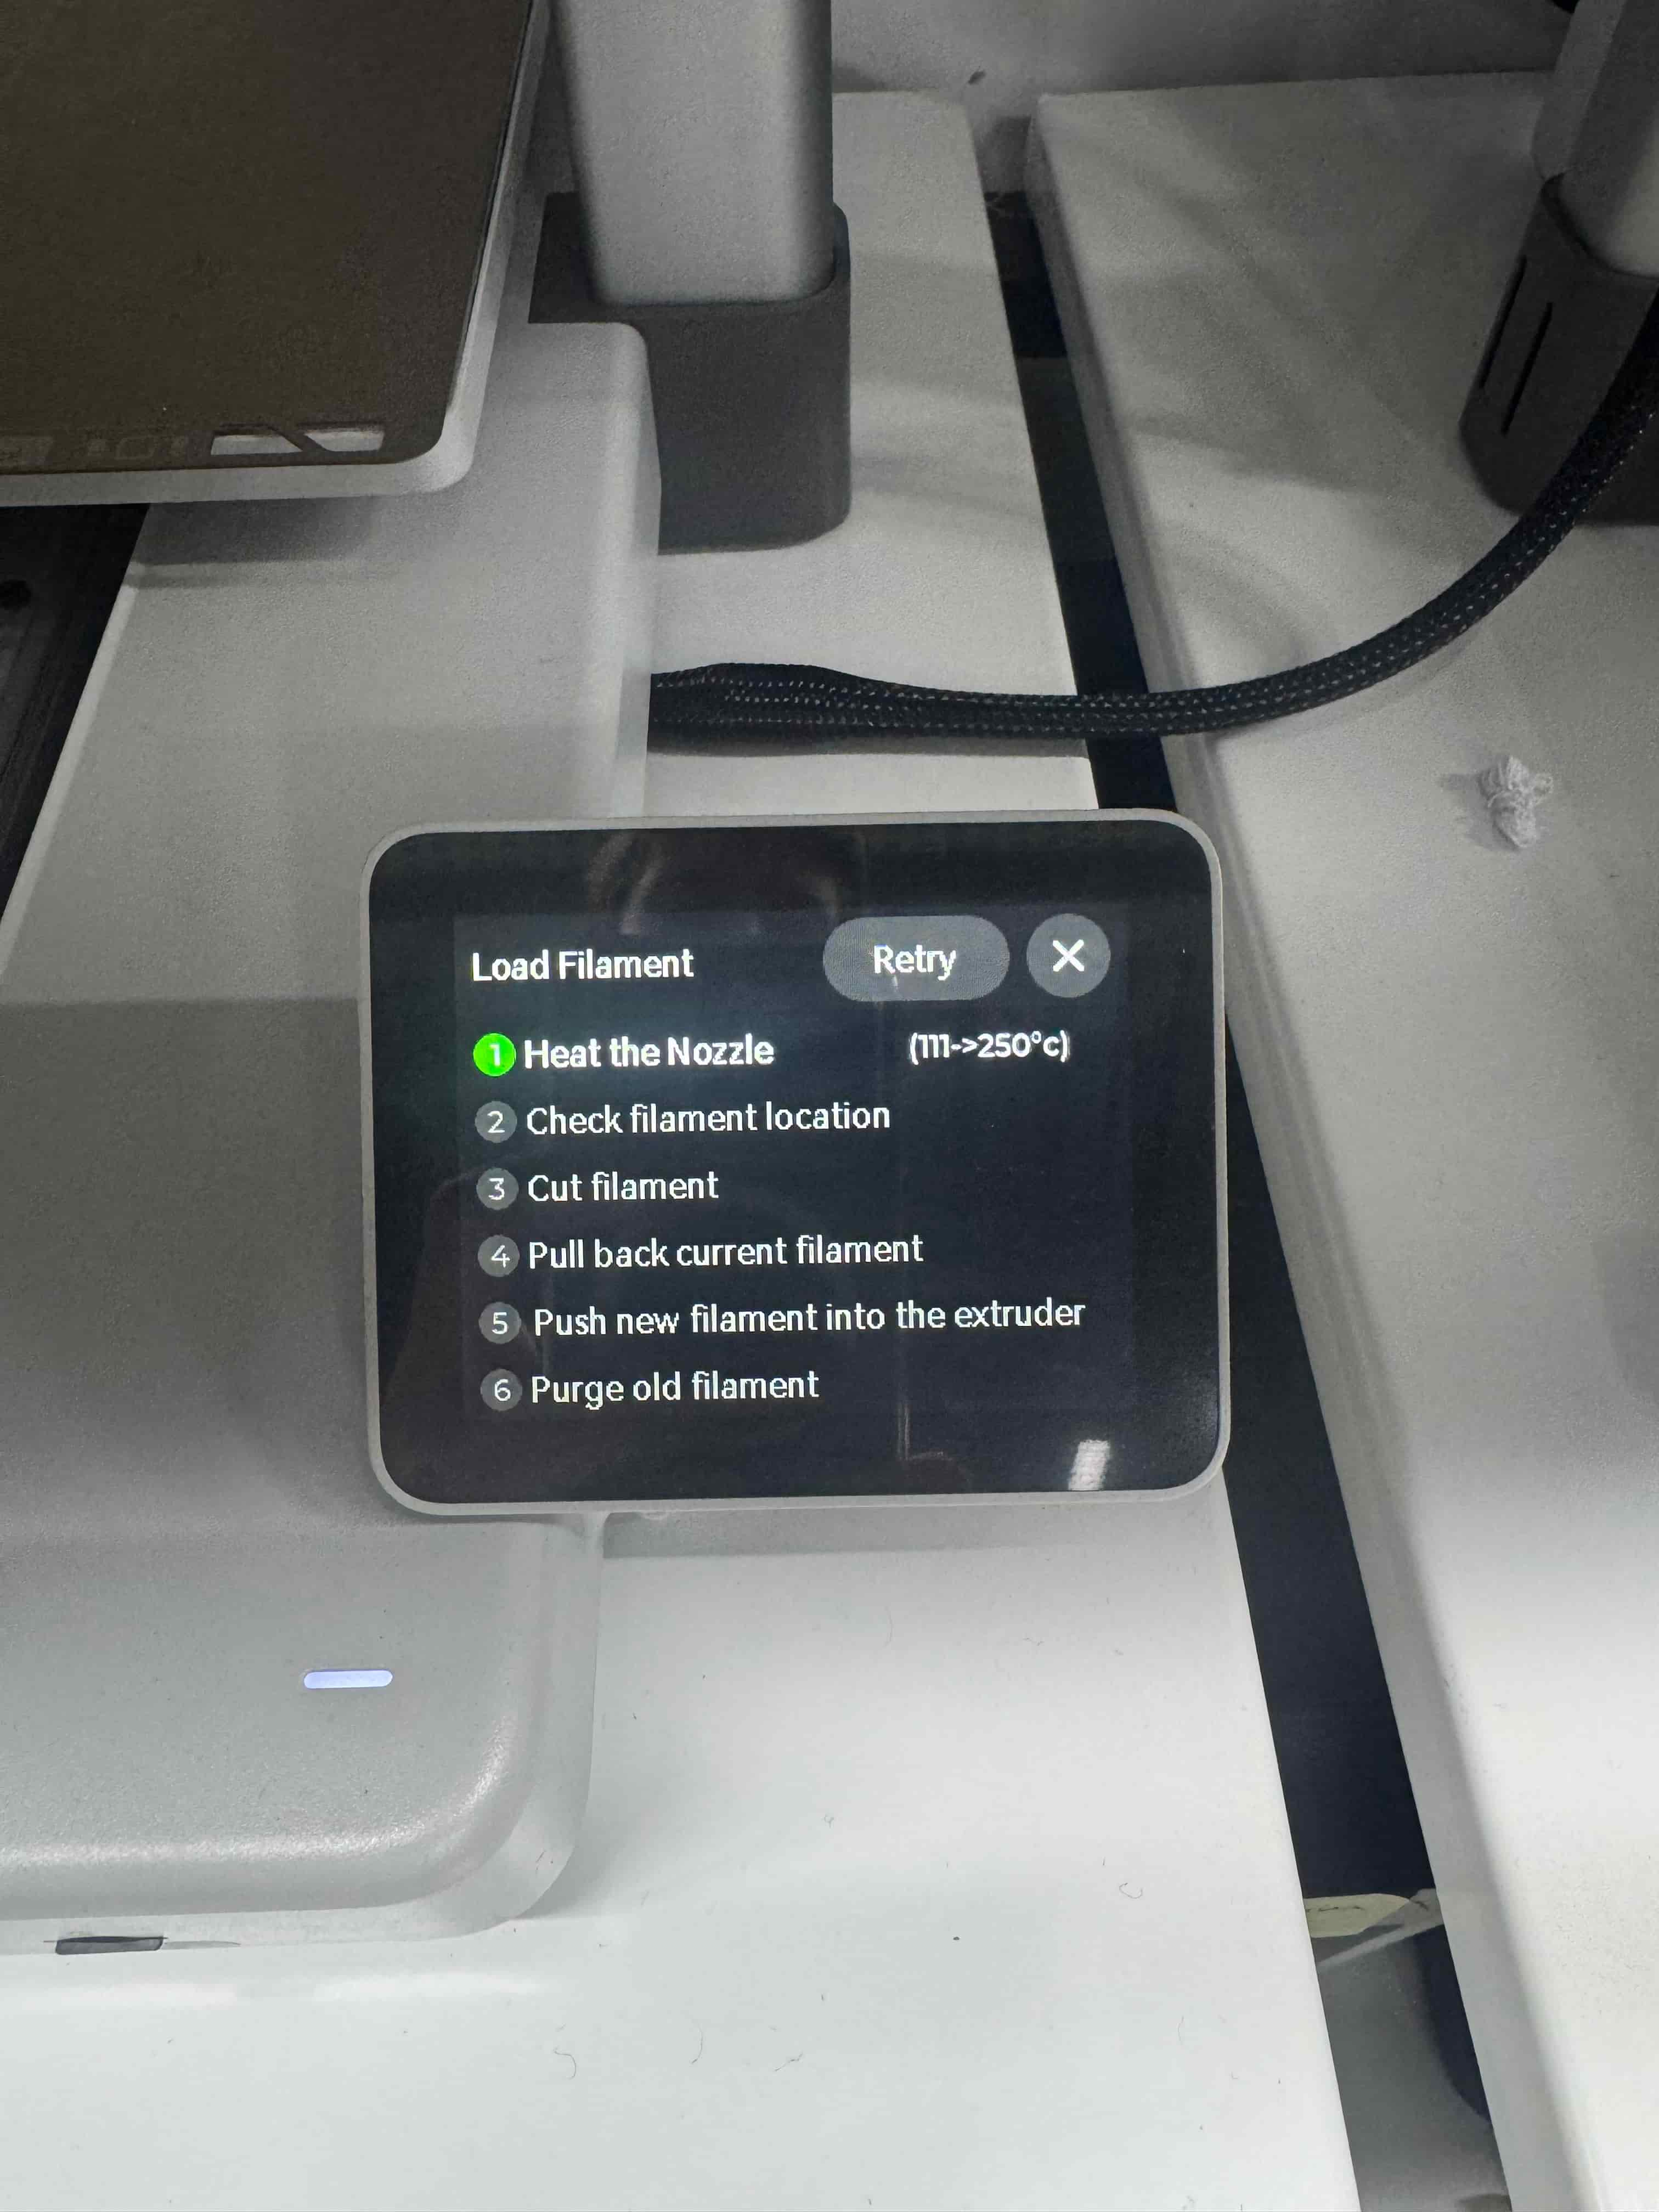
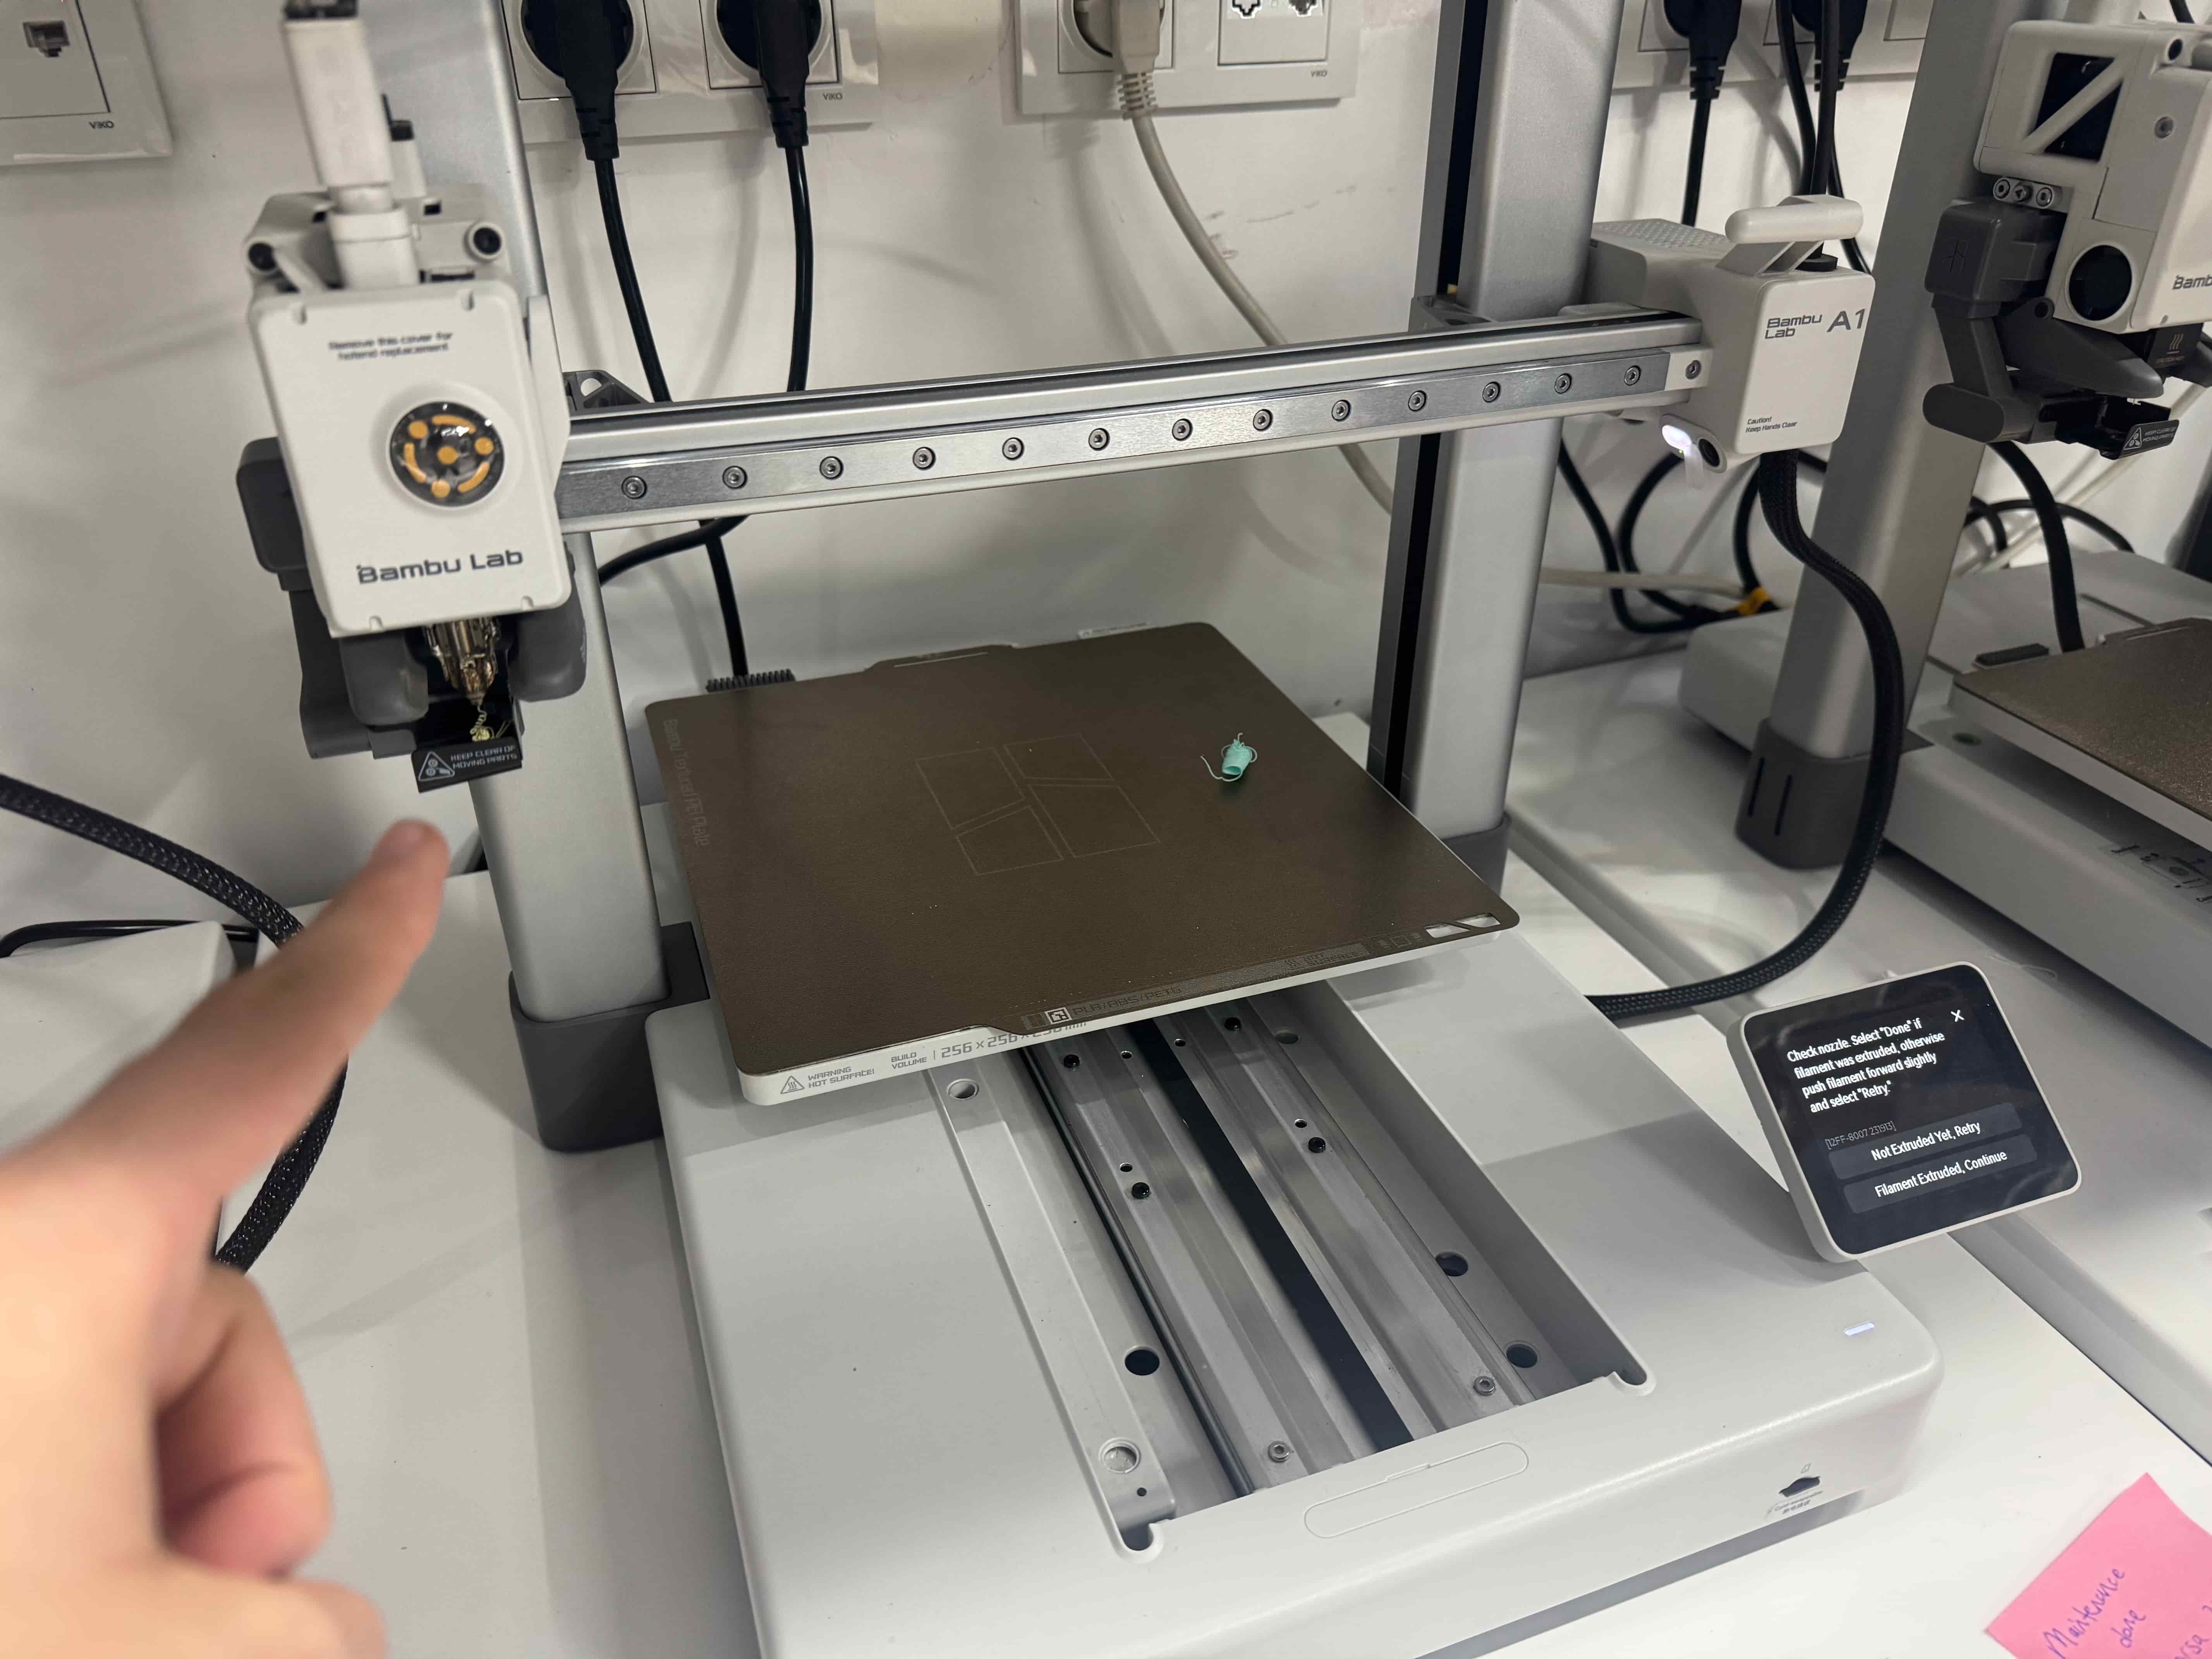
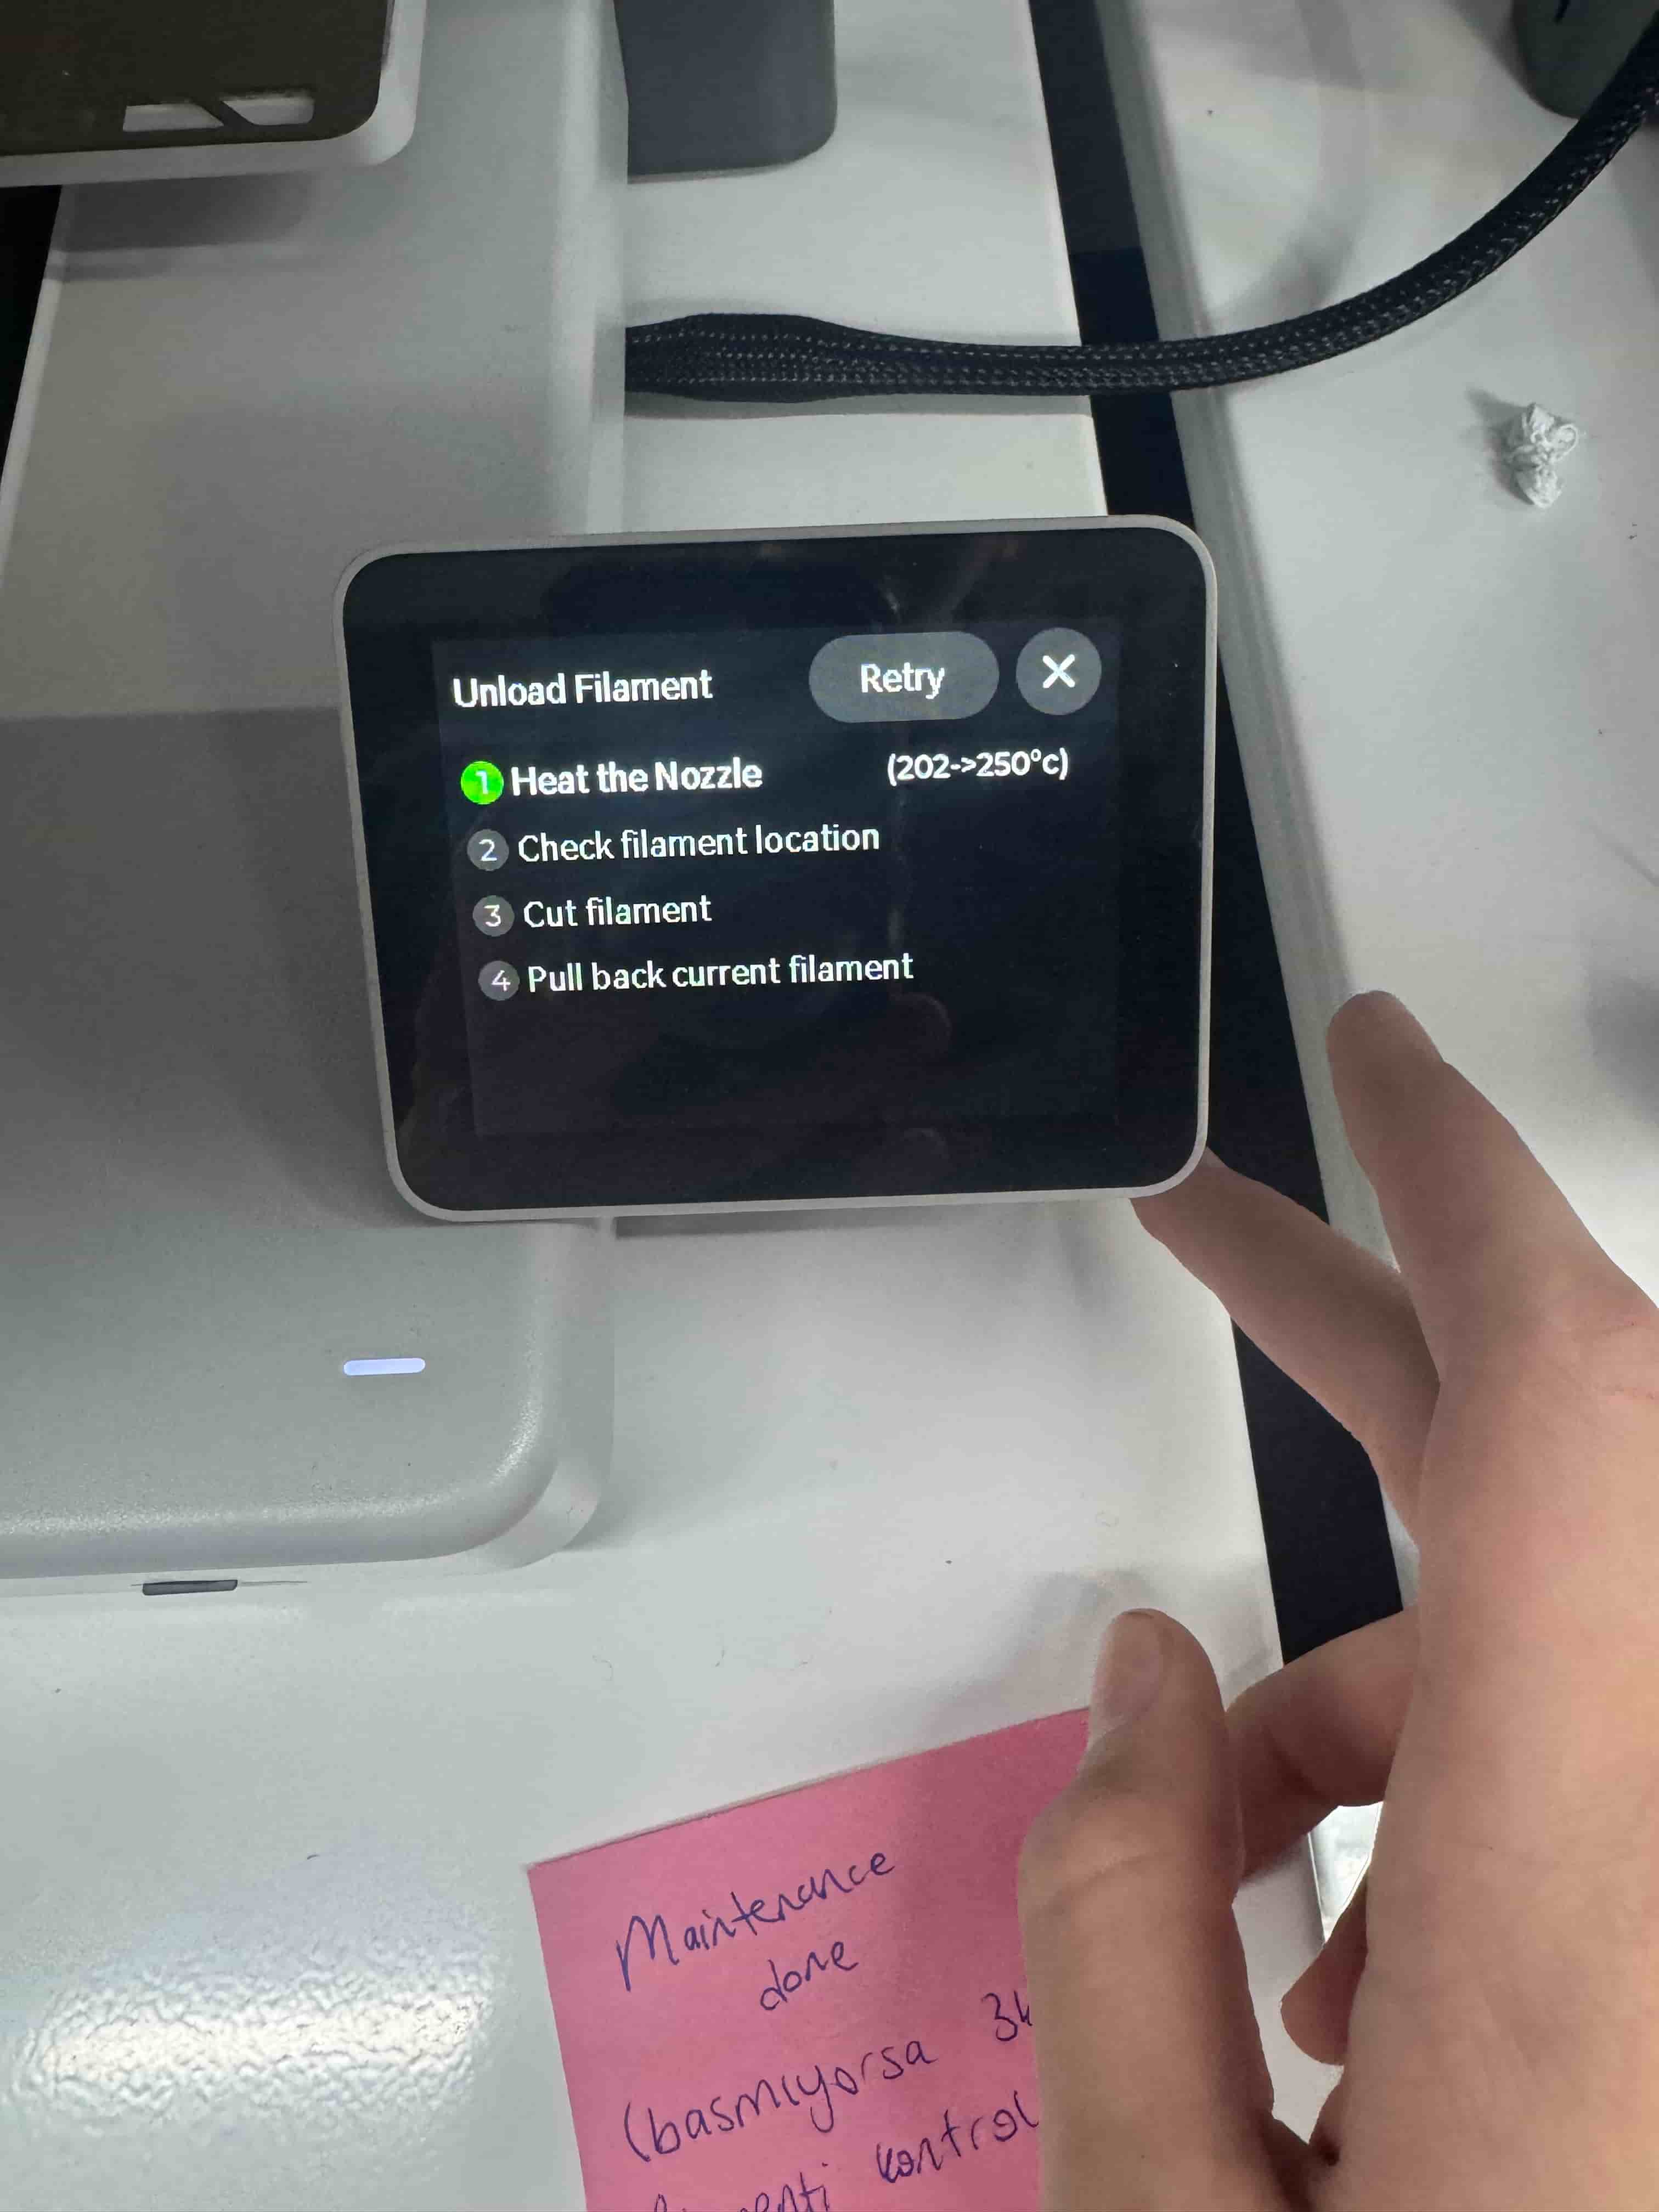
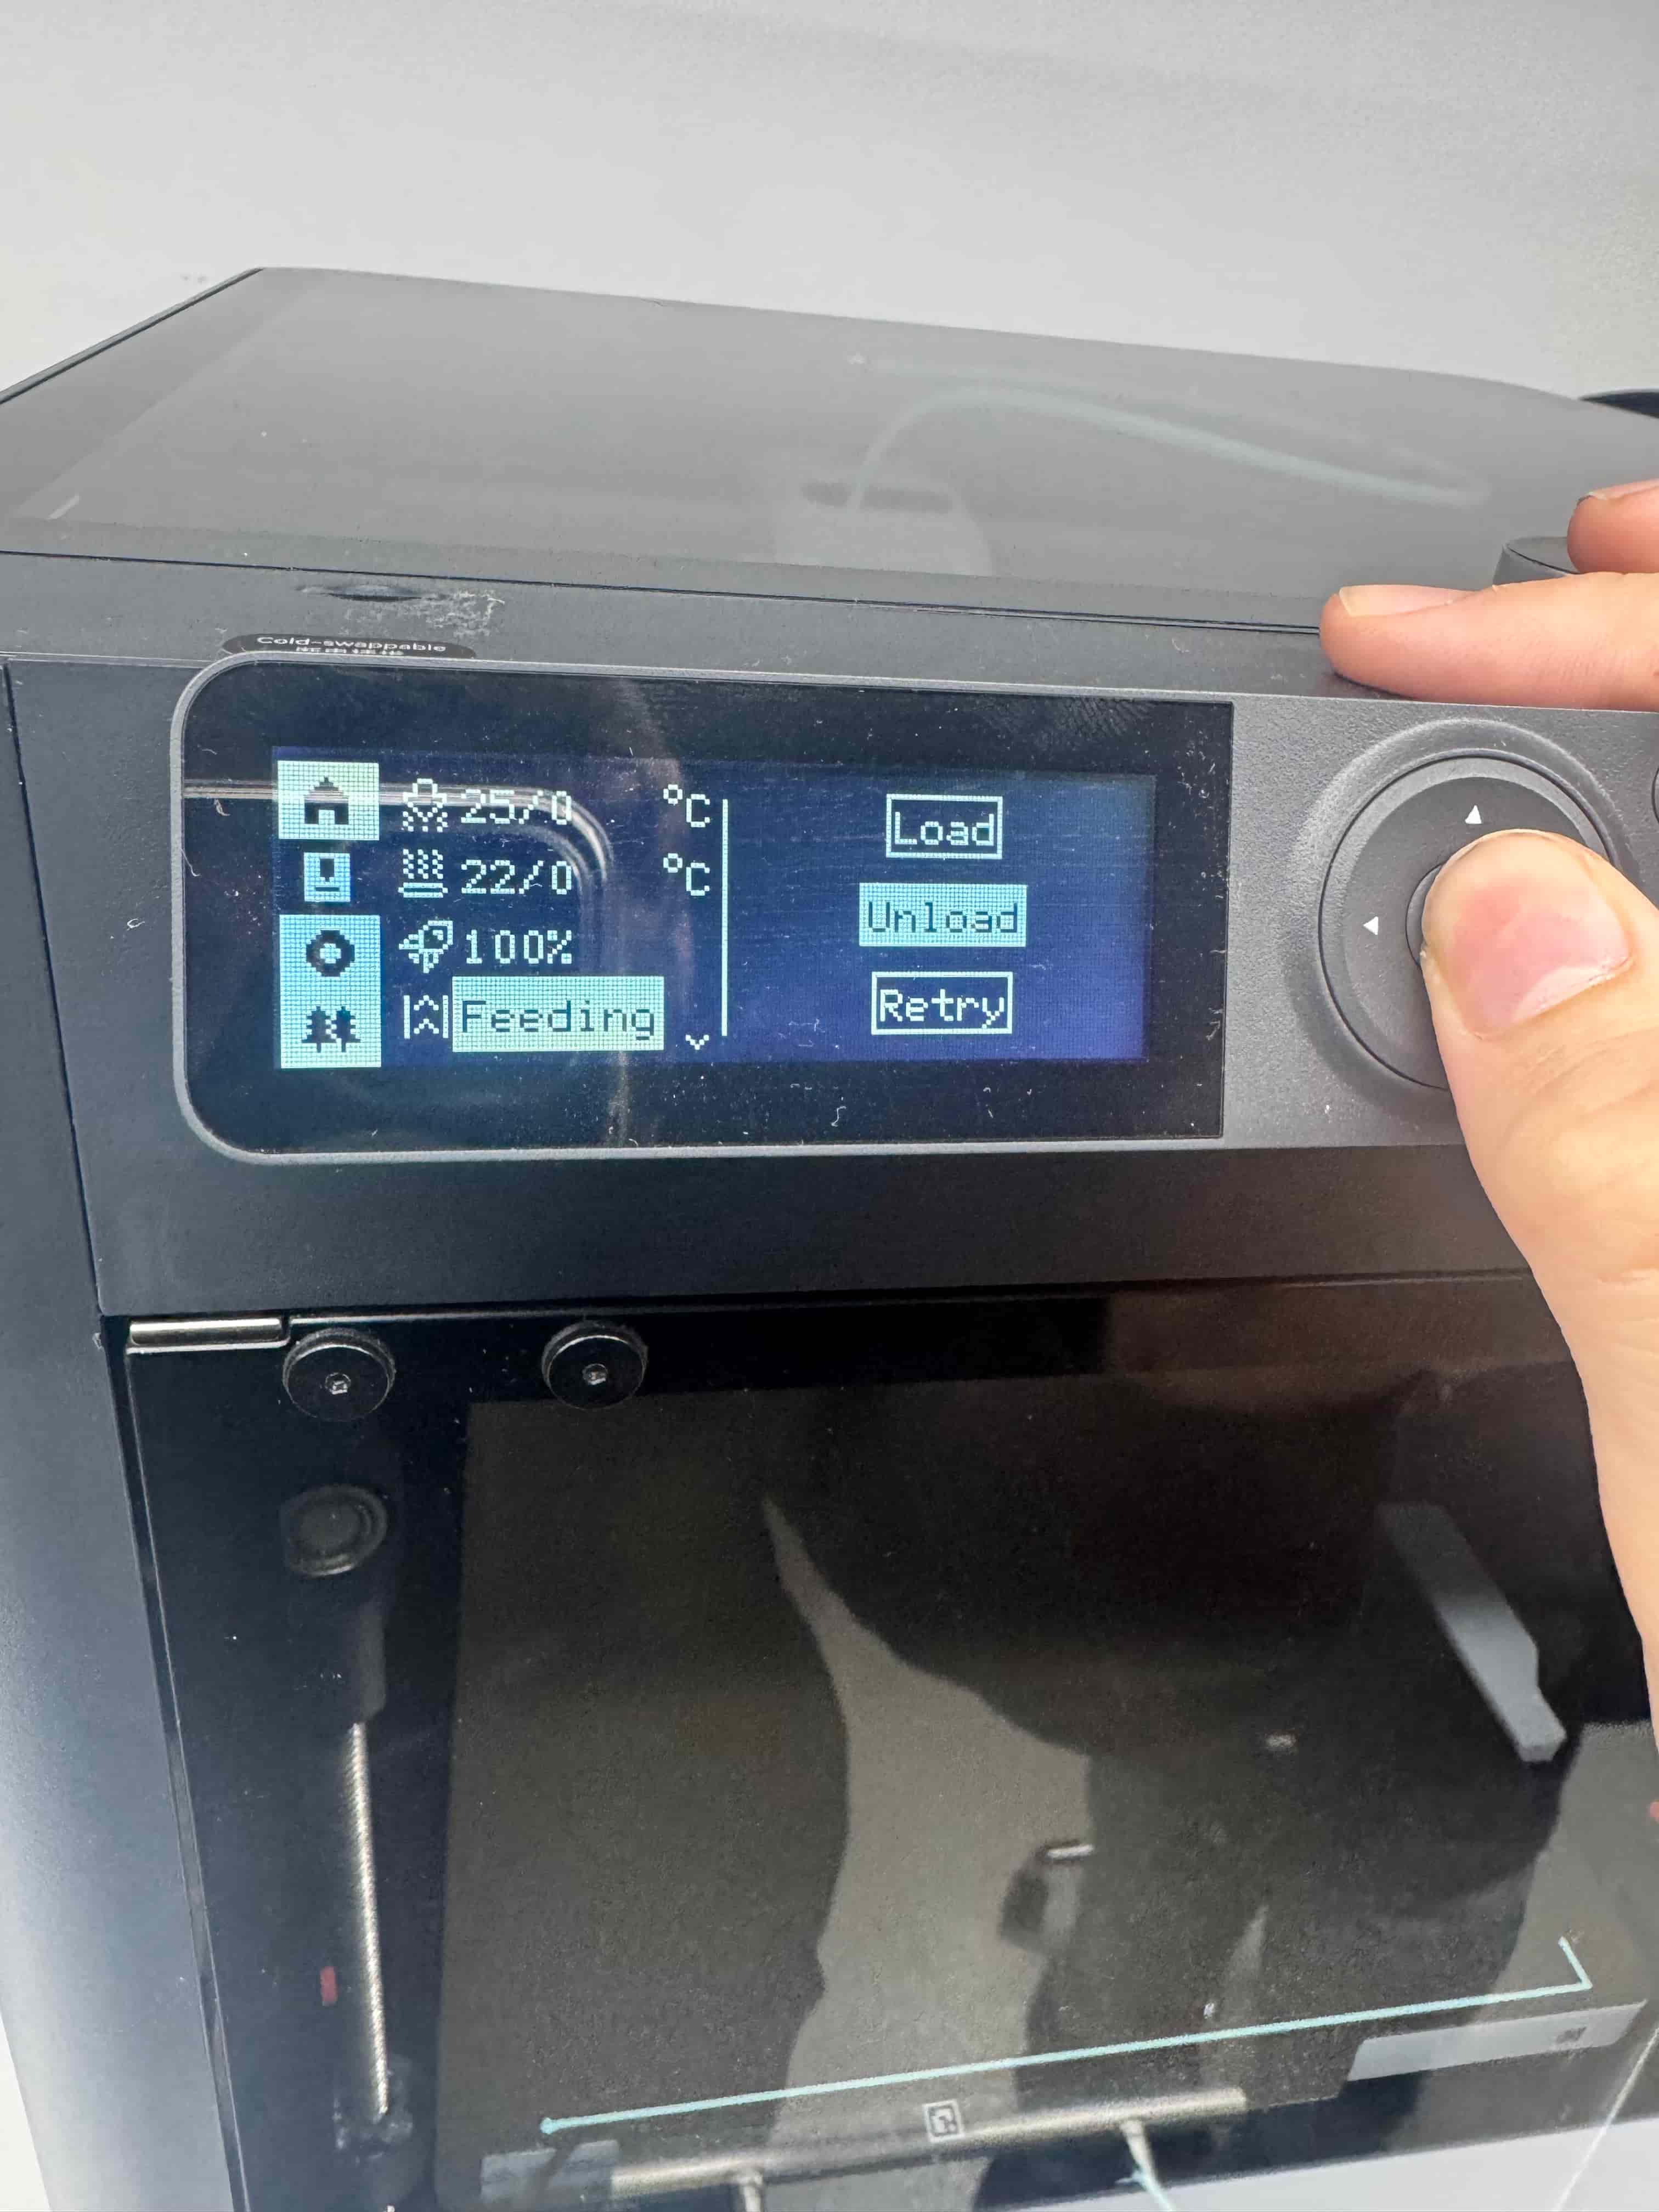
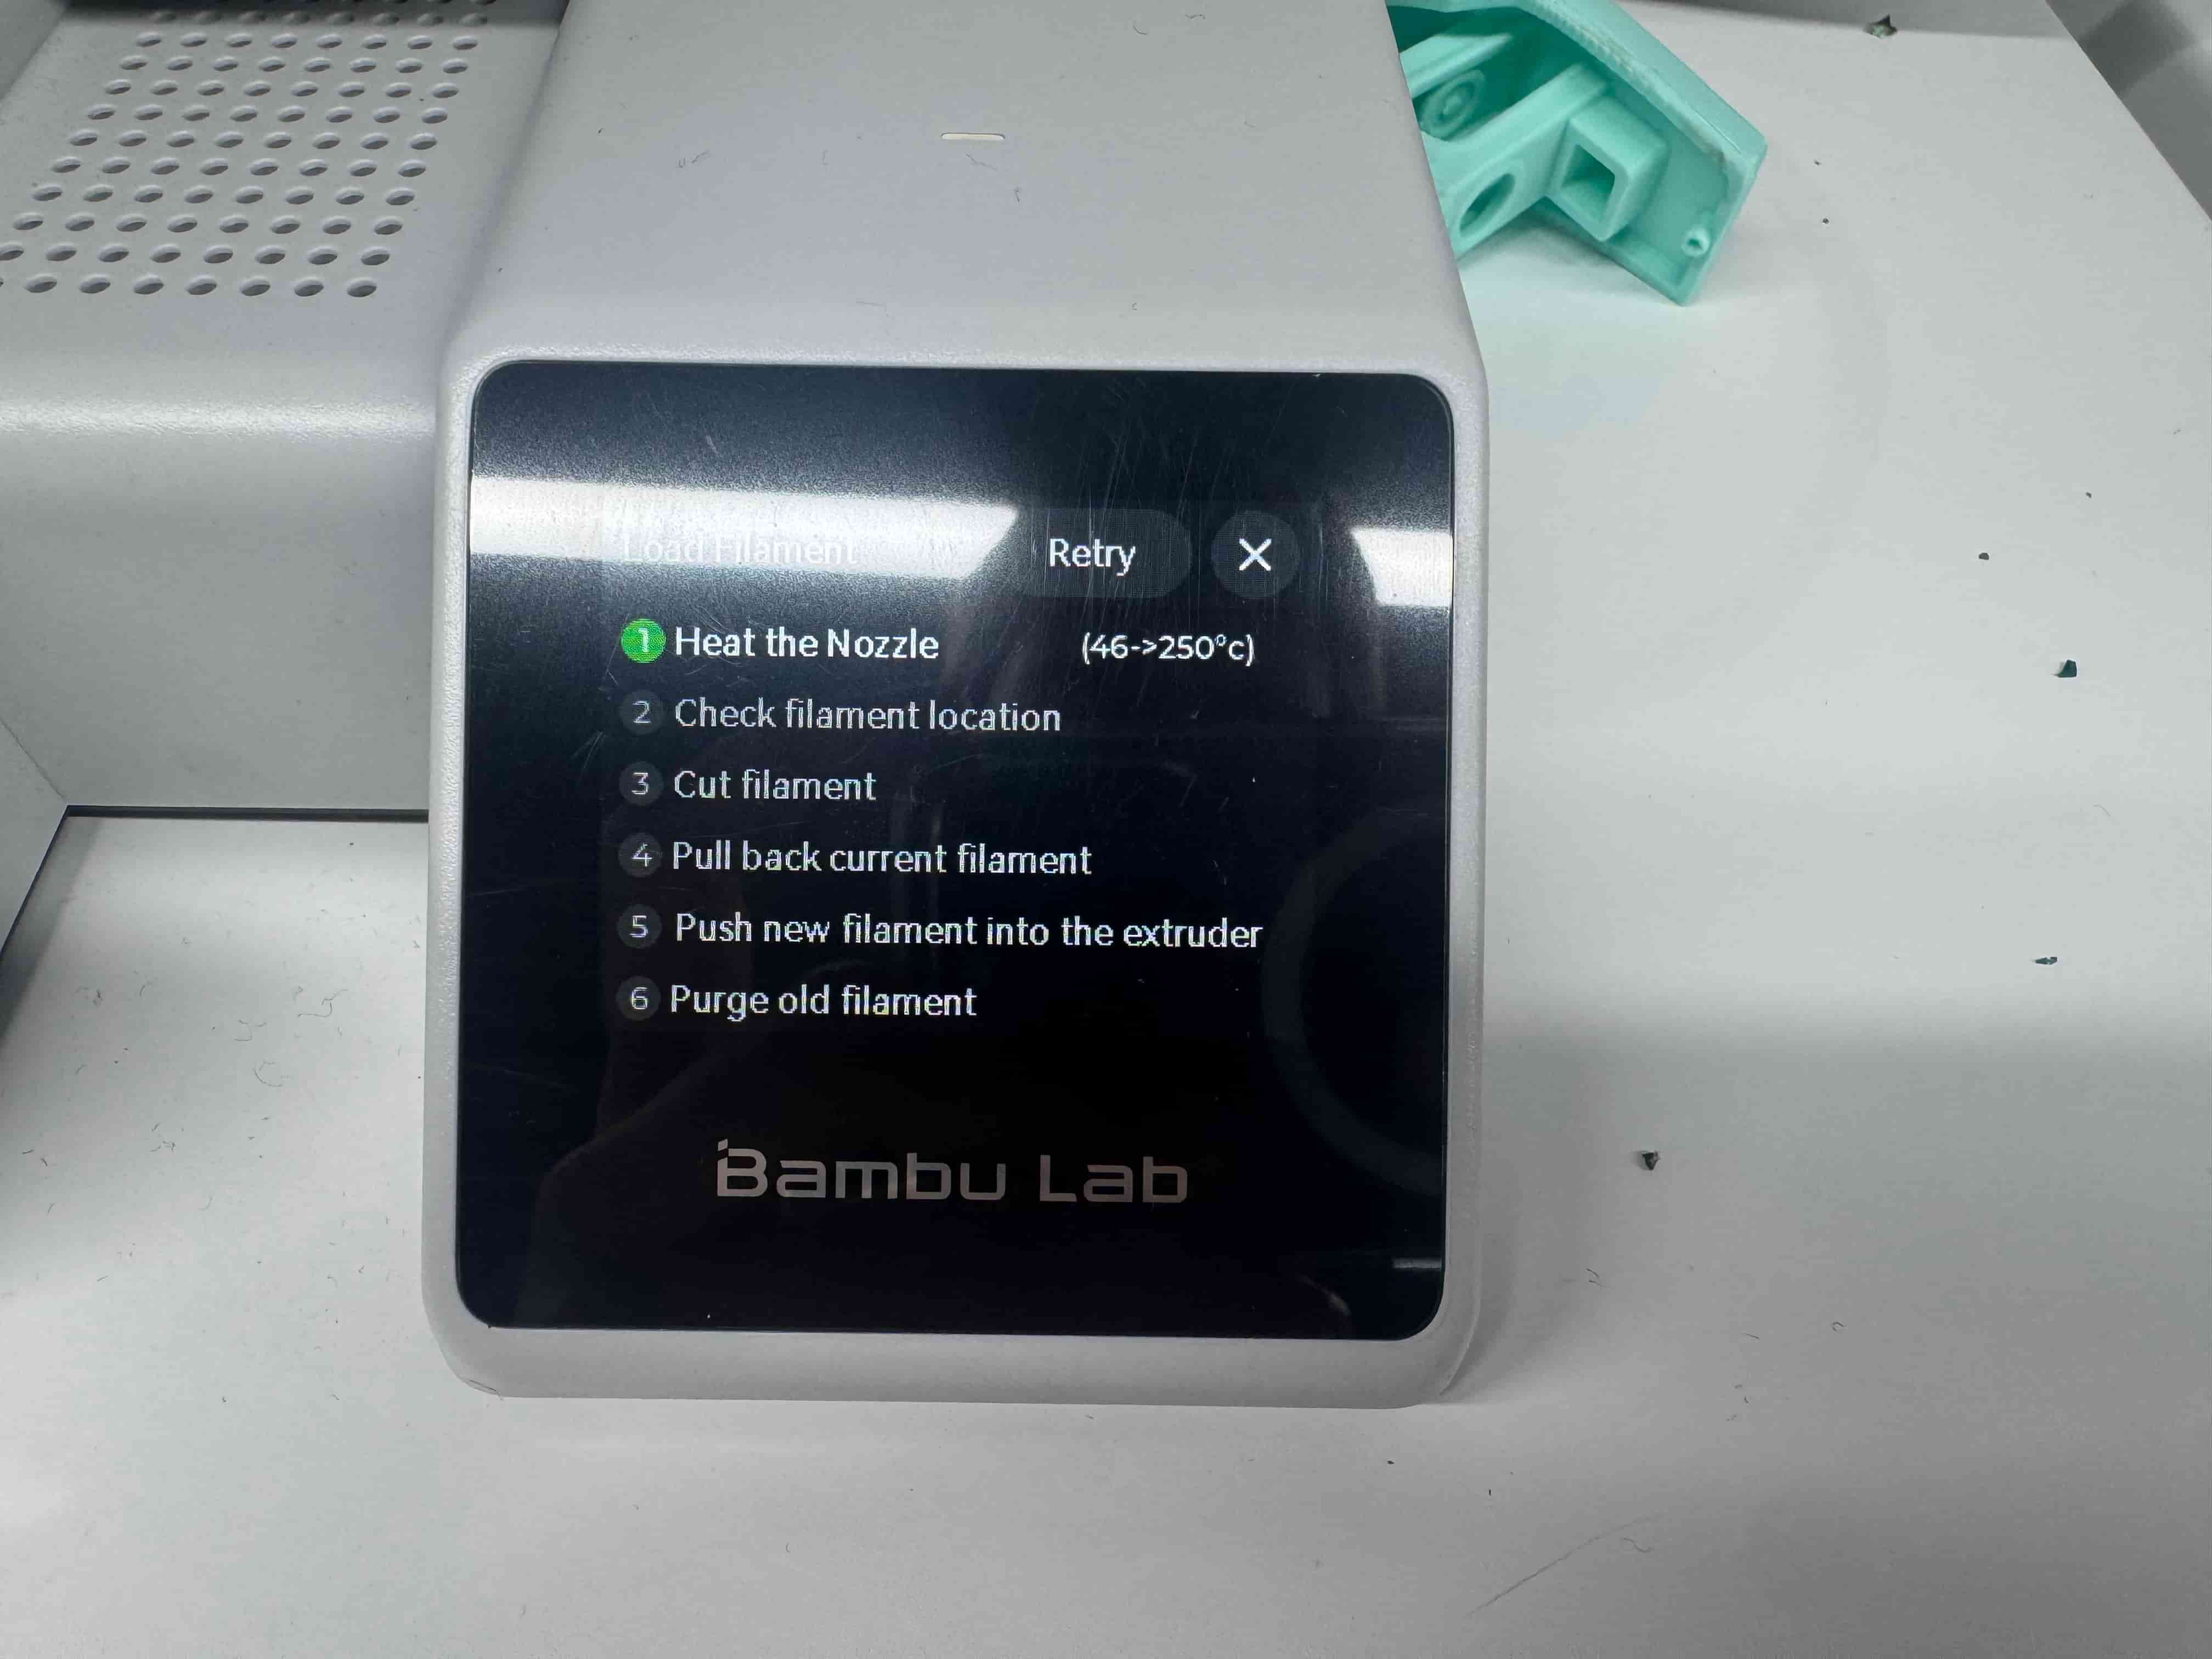
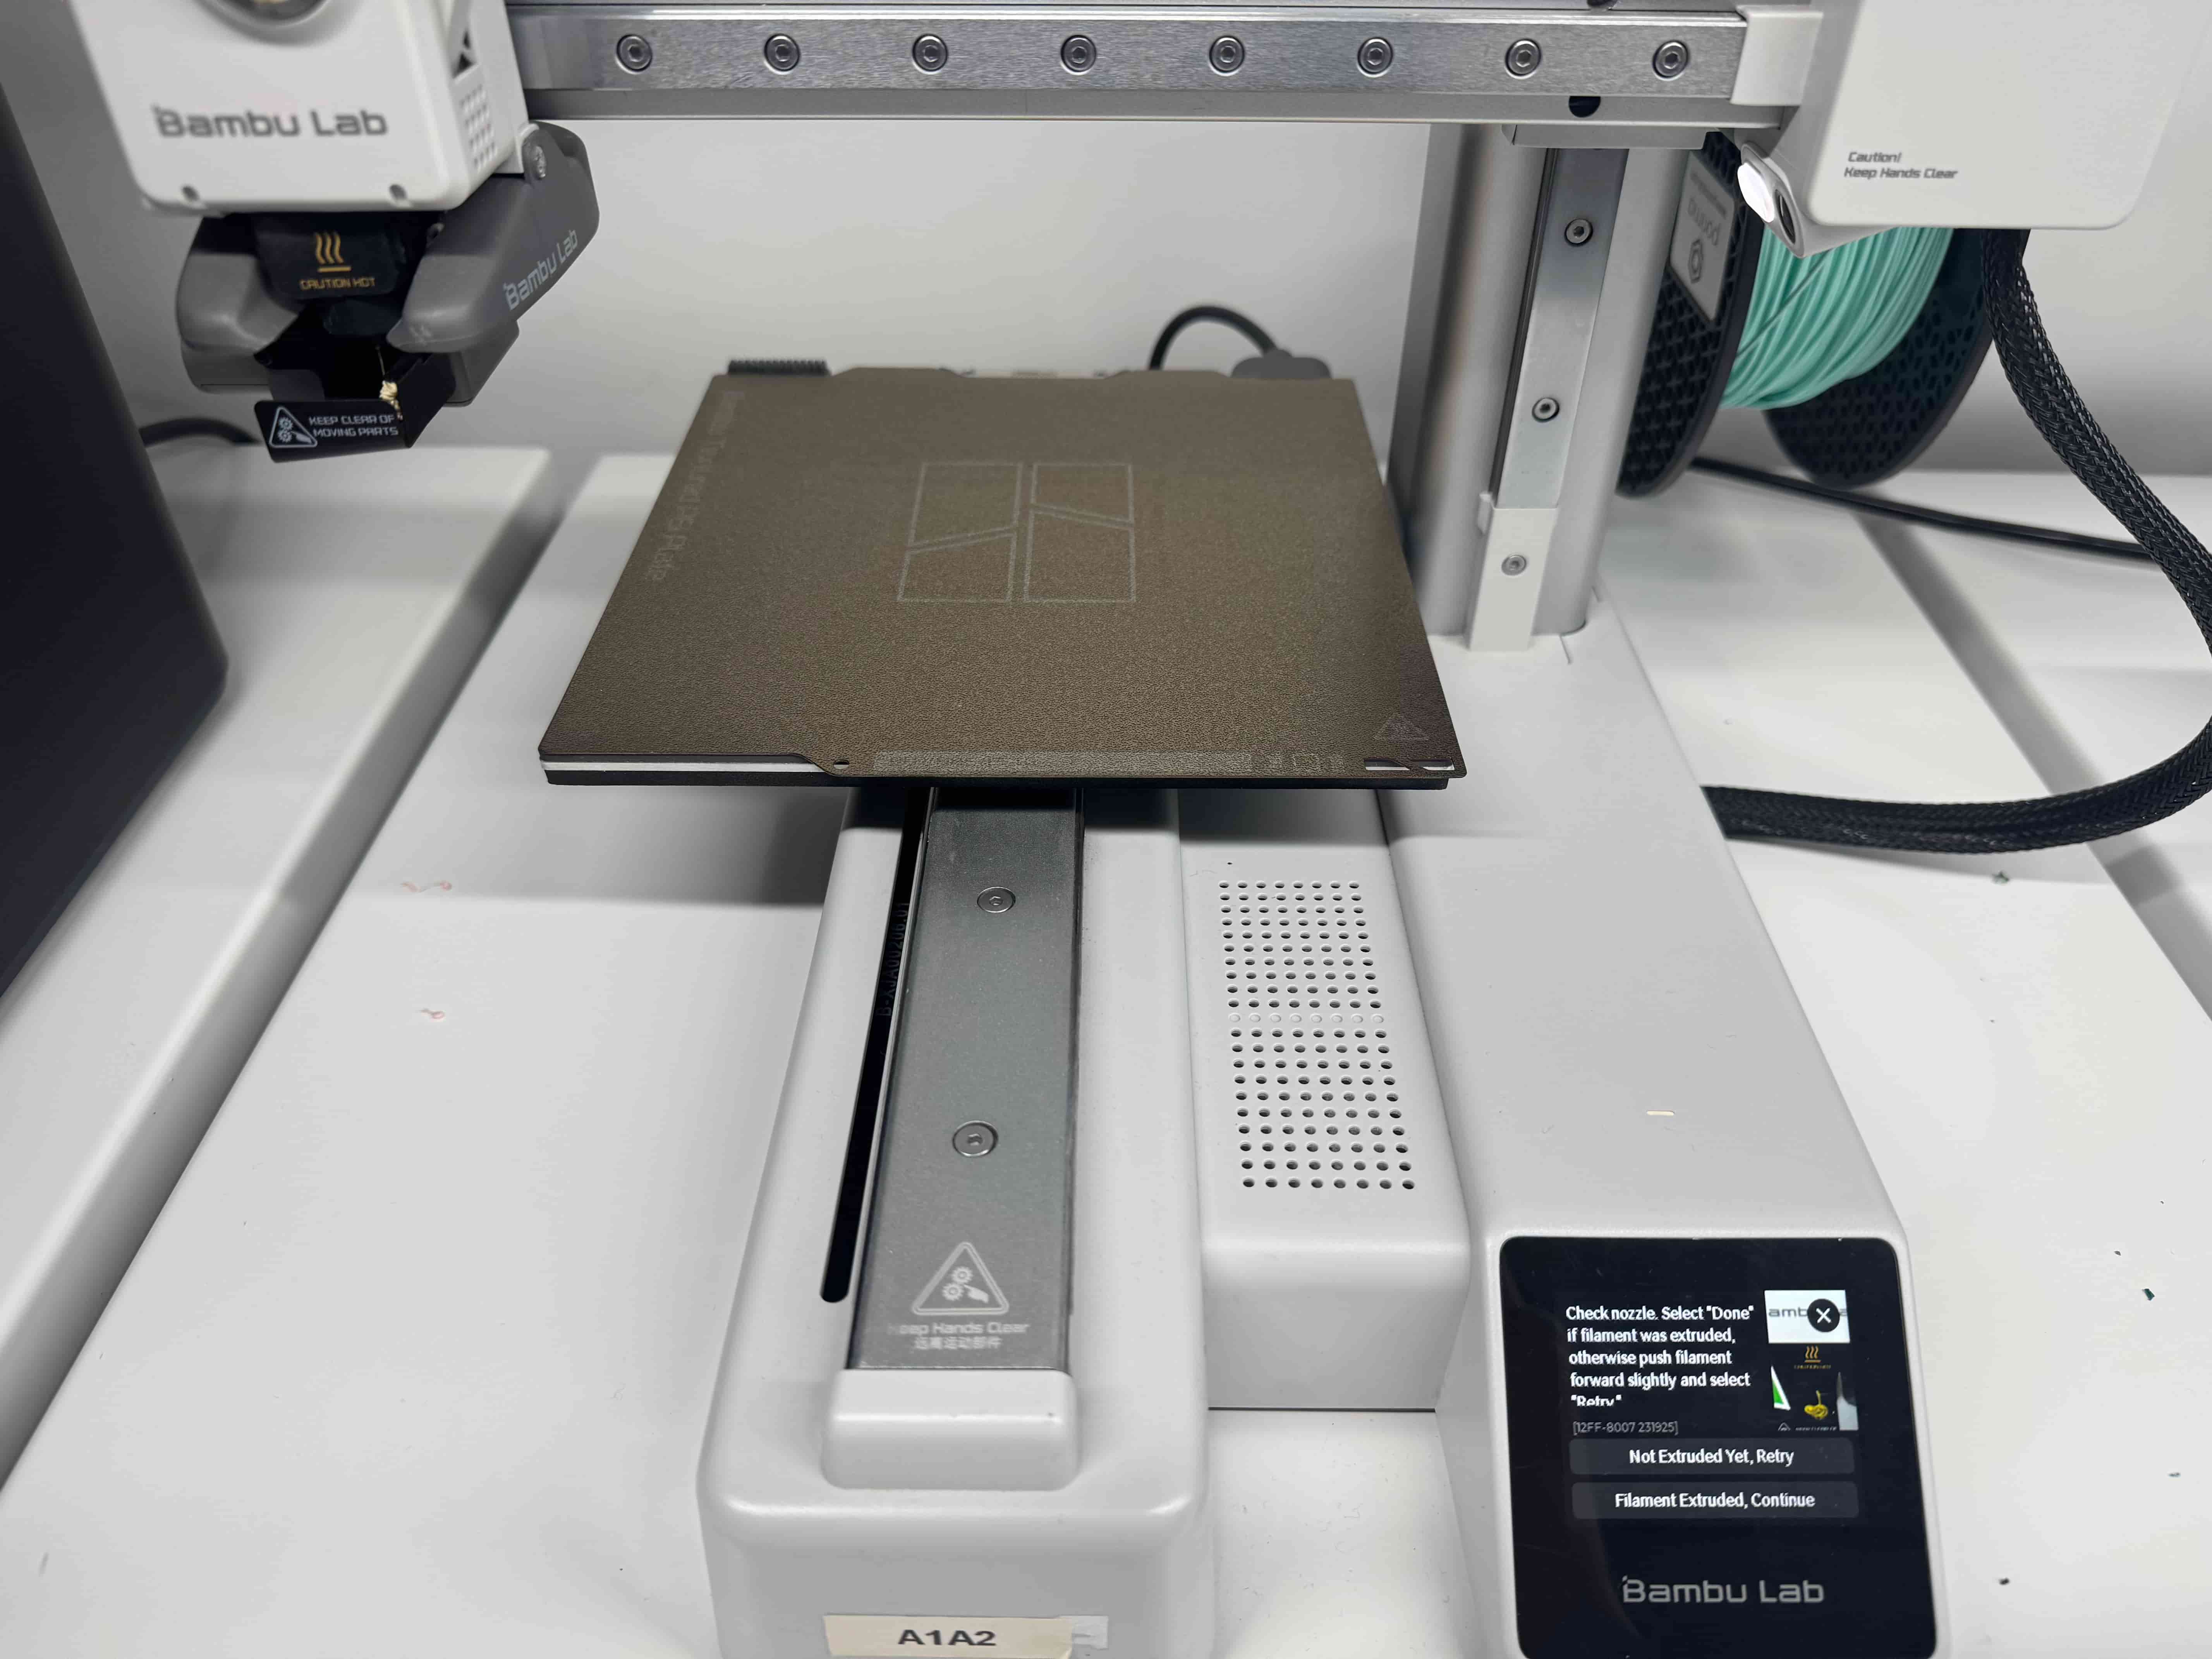
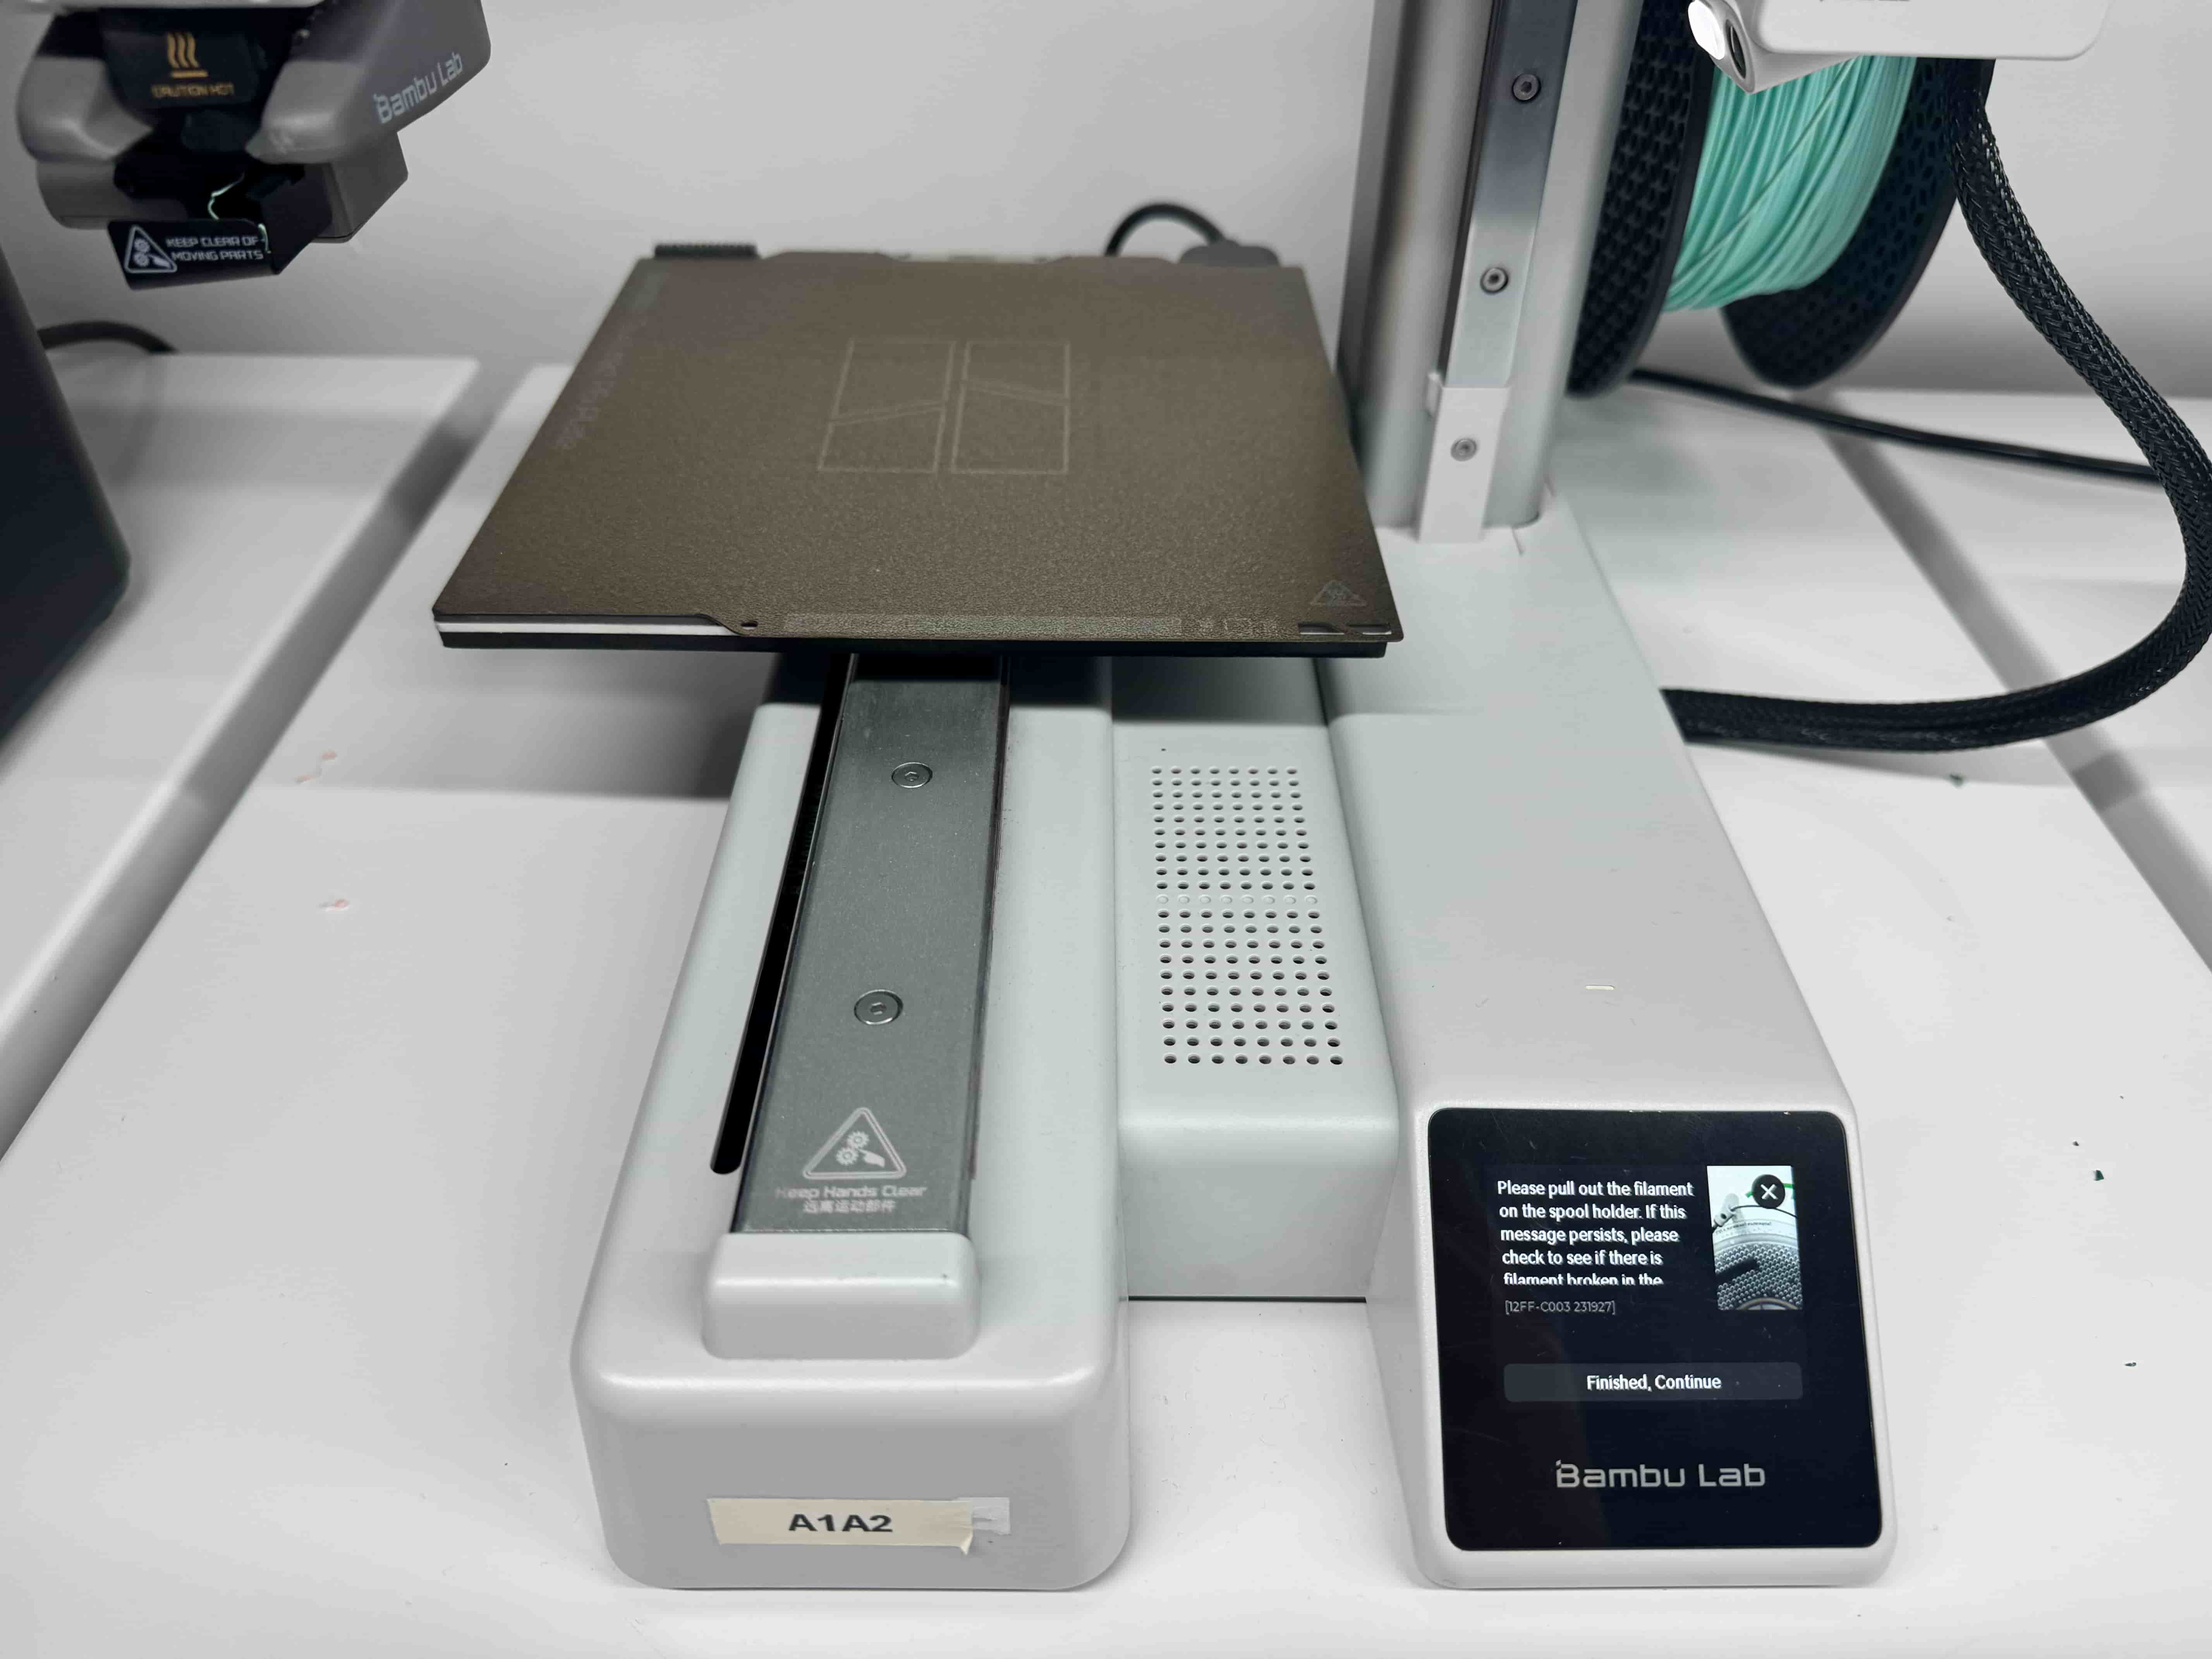
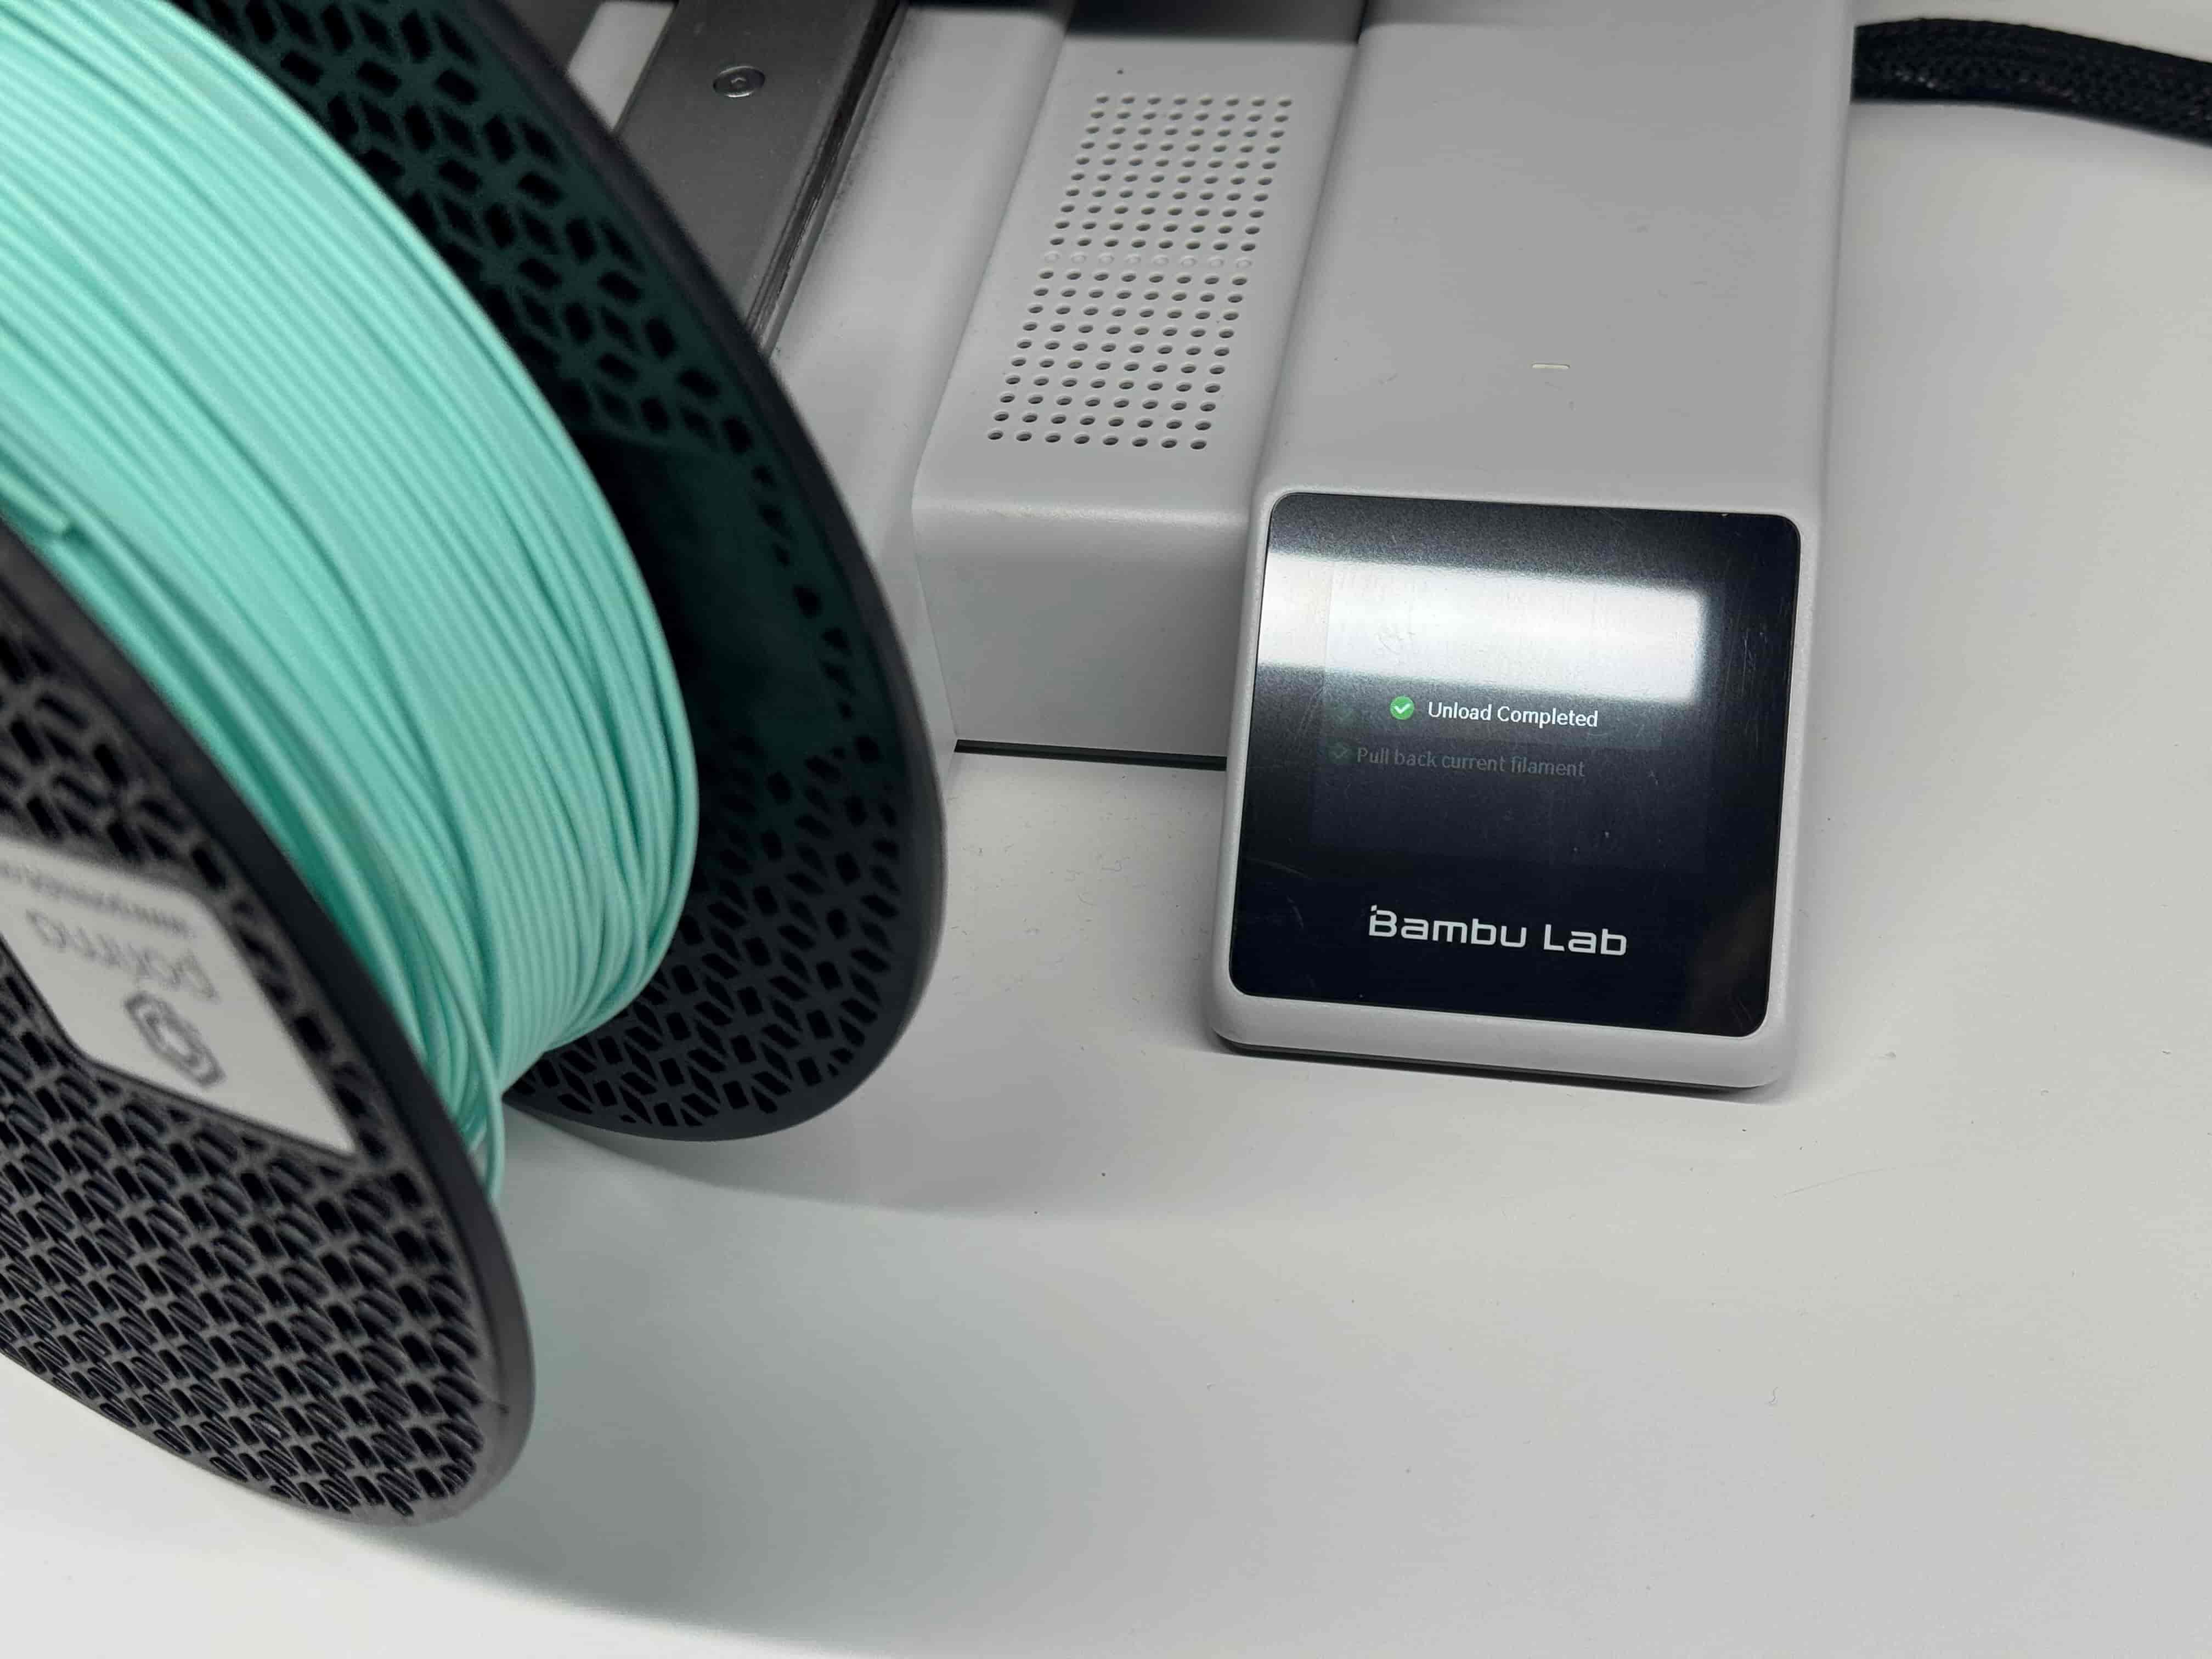
3b) Bambu Lab P1S
Similar to A1, but the screen interface and filament placement are different.
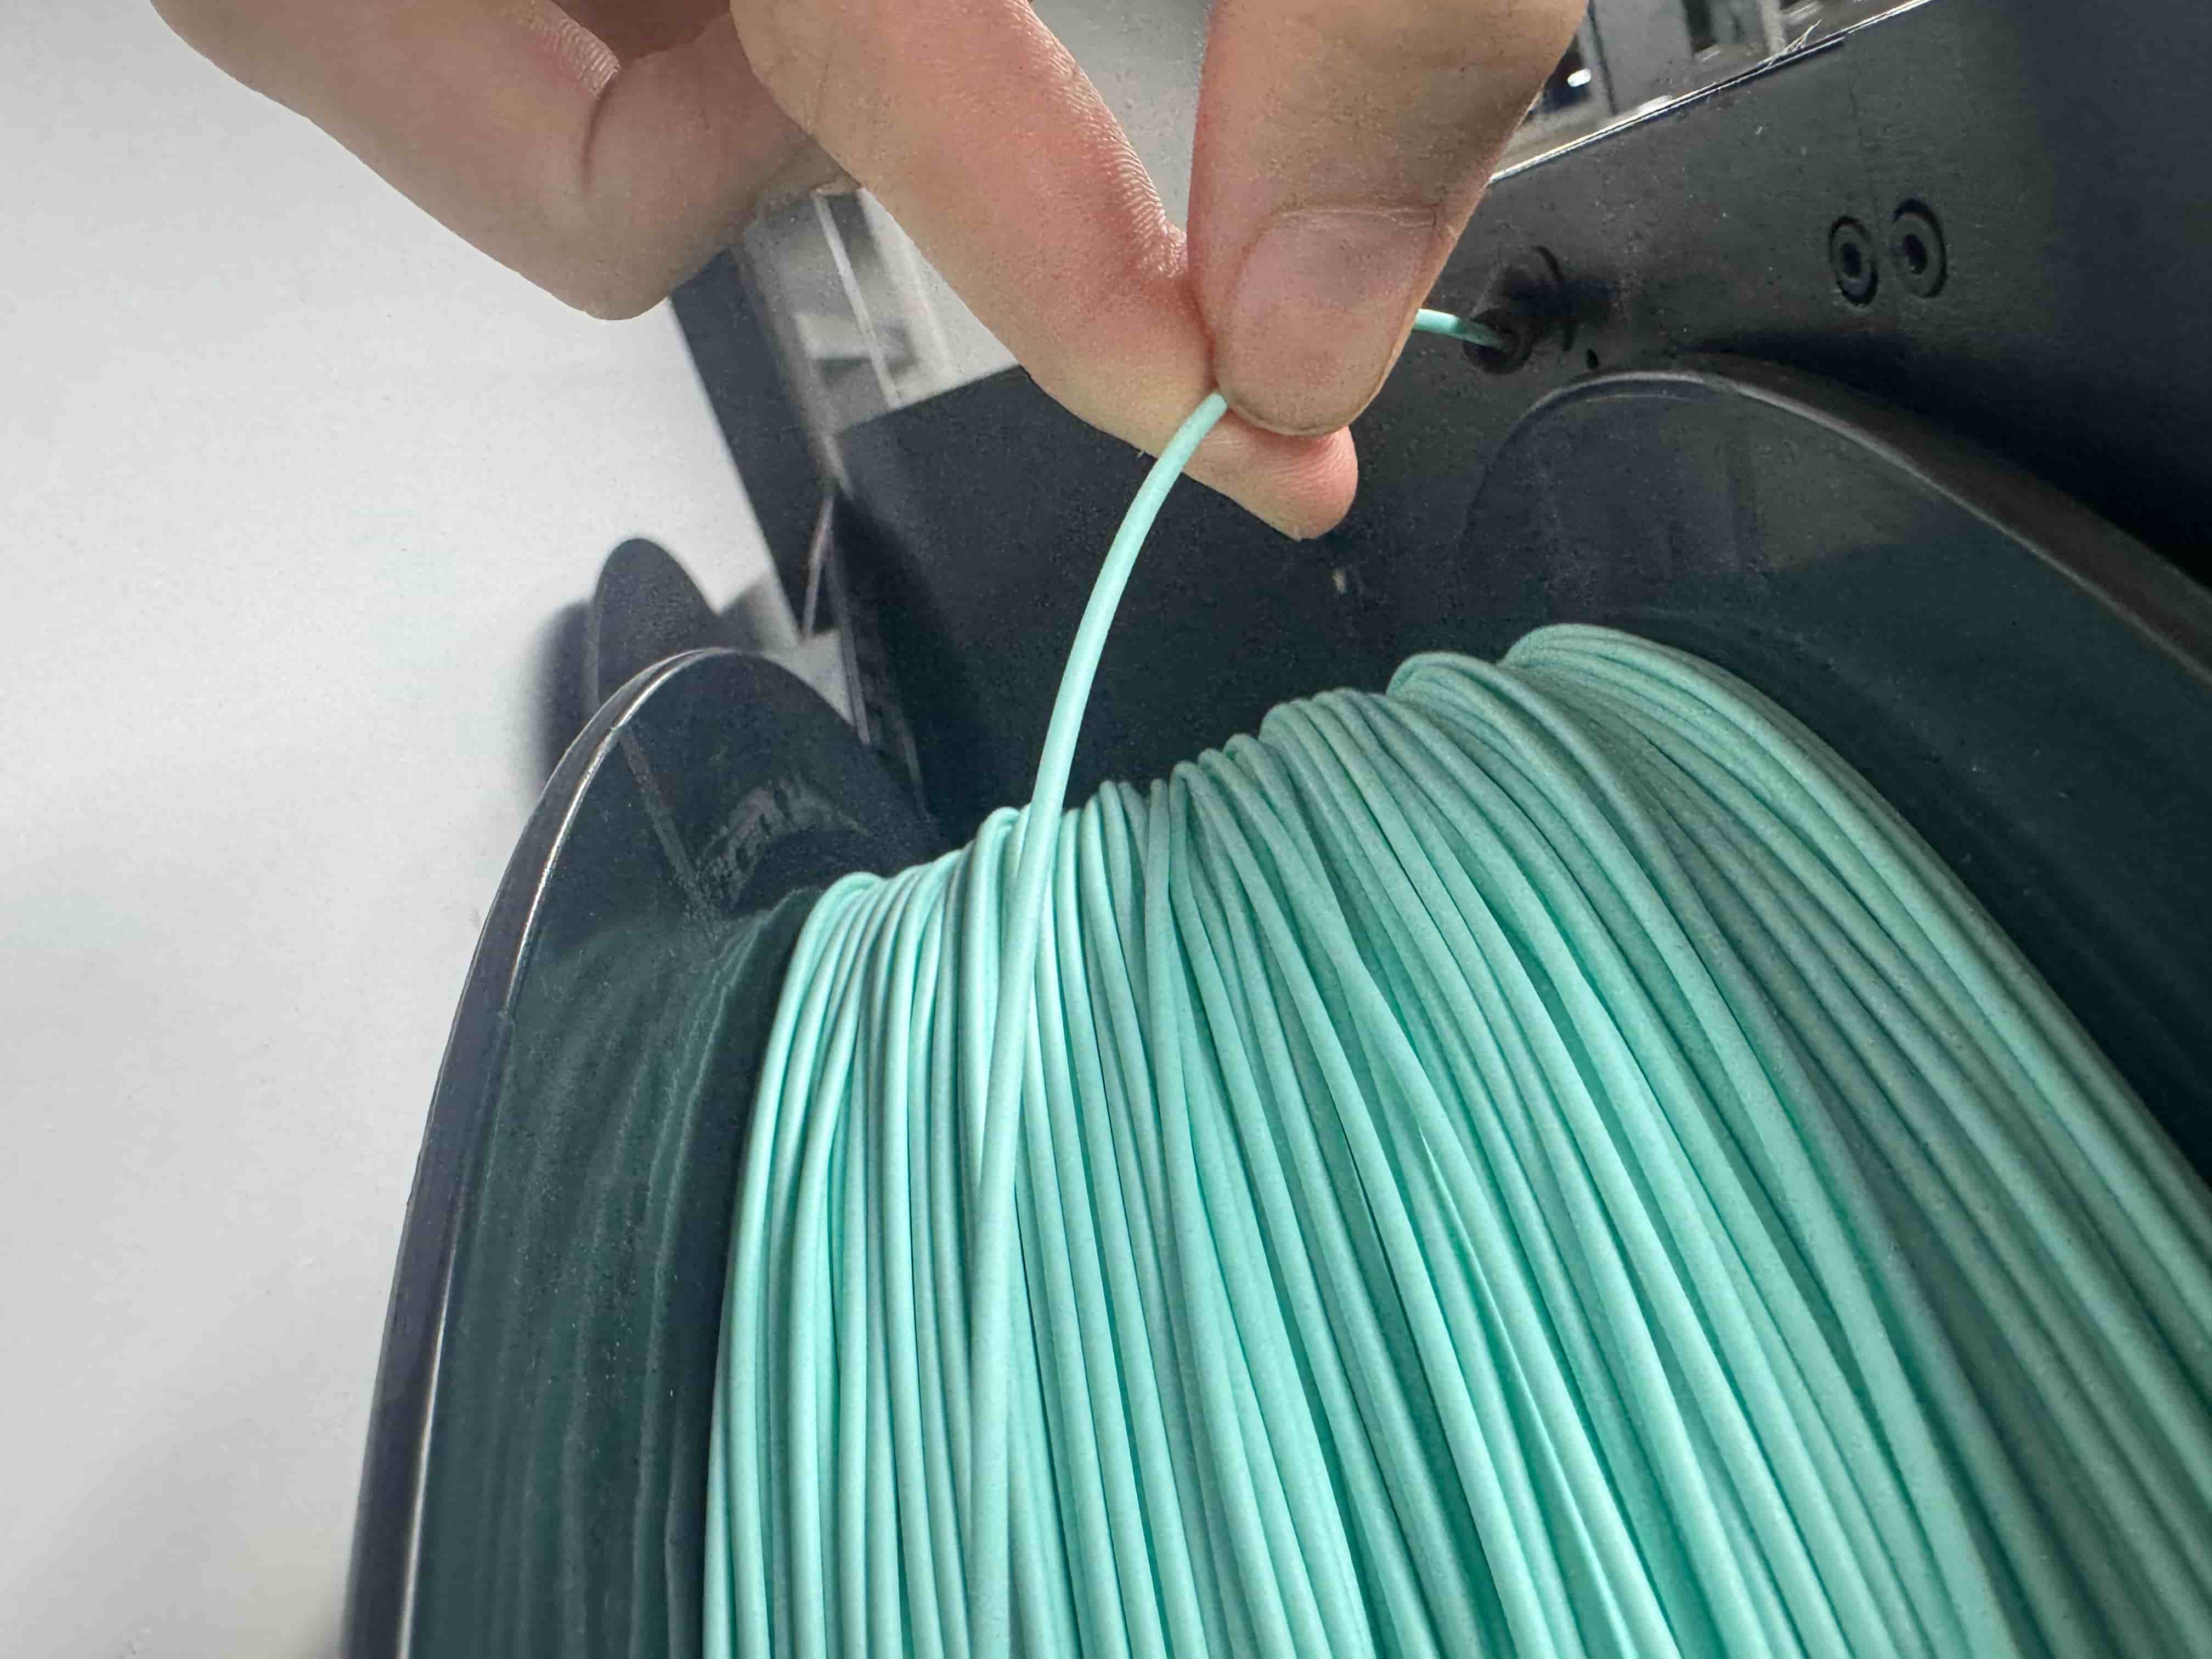
- Insert filament from the back of the machine (top goes into the tube).
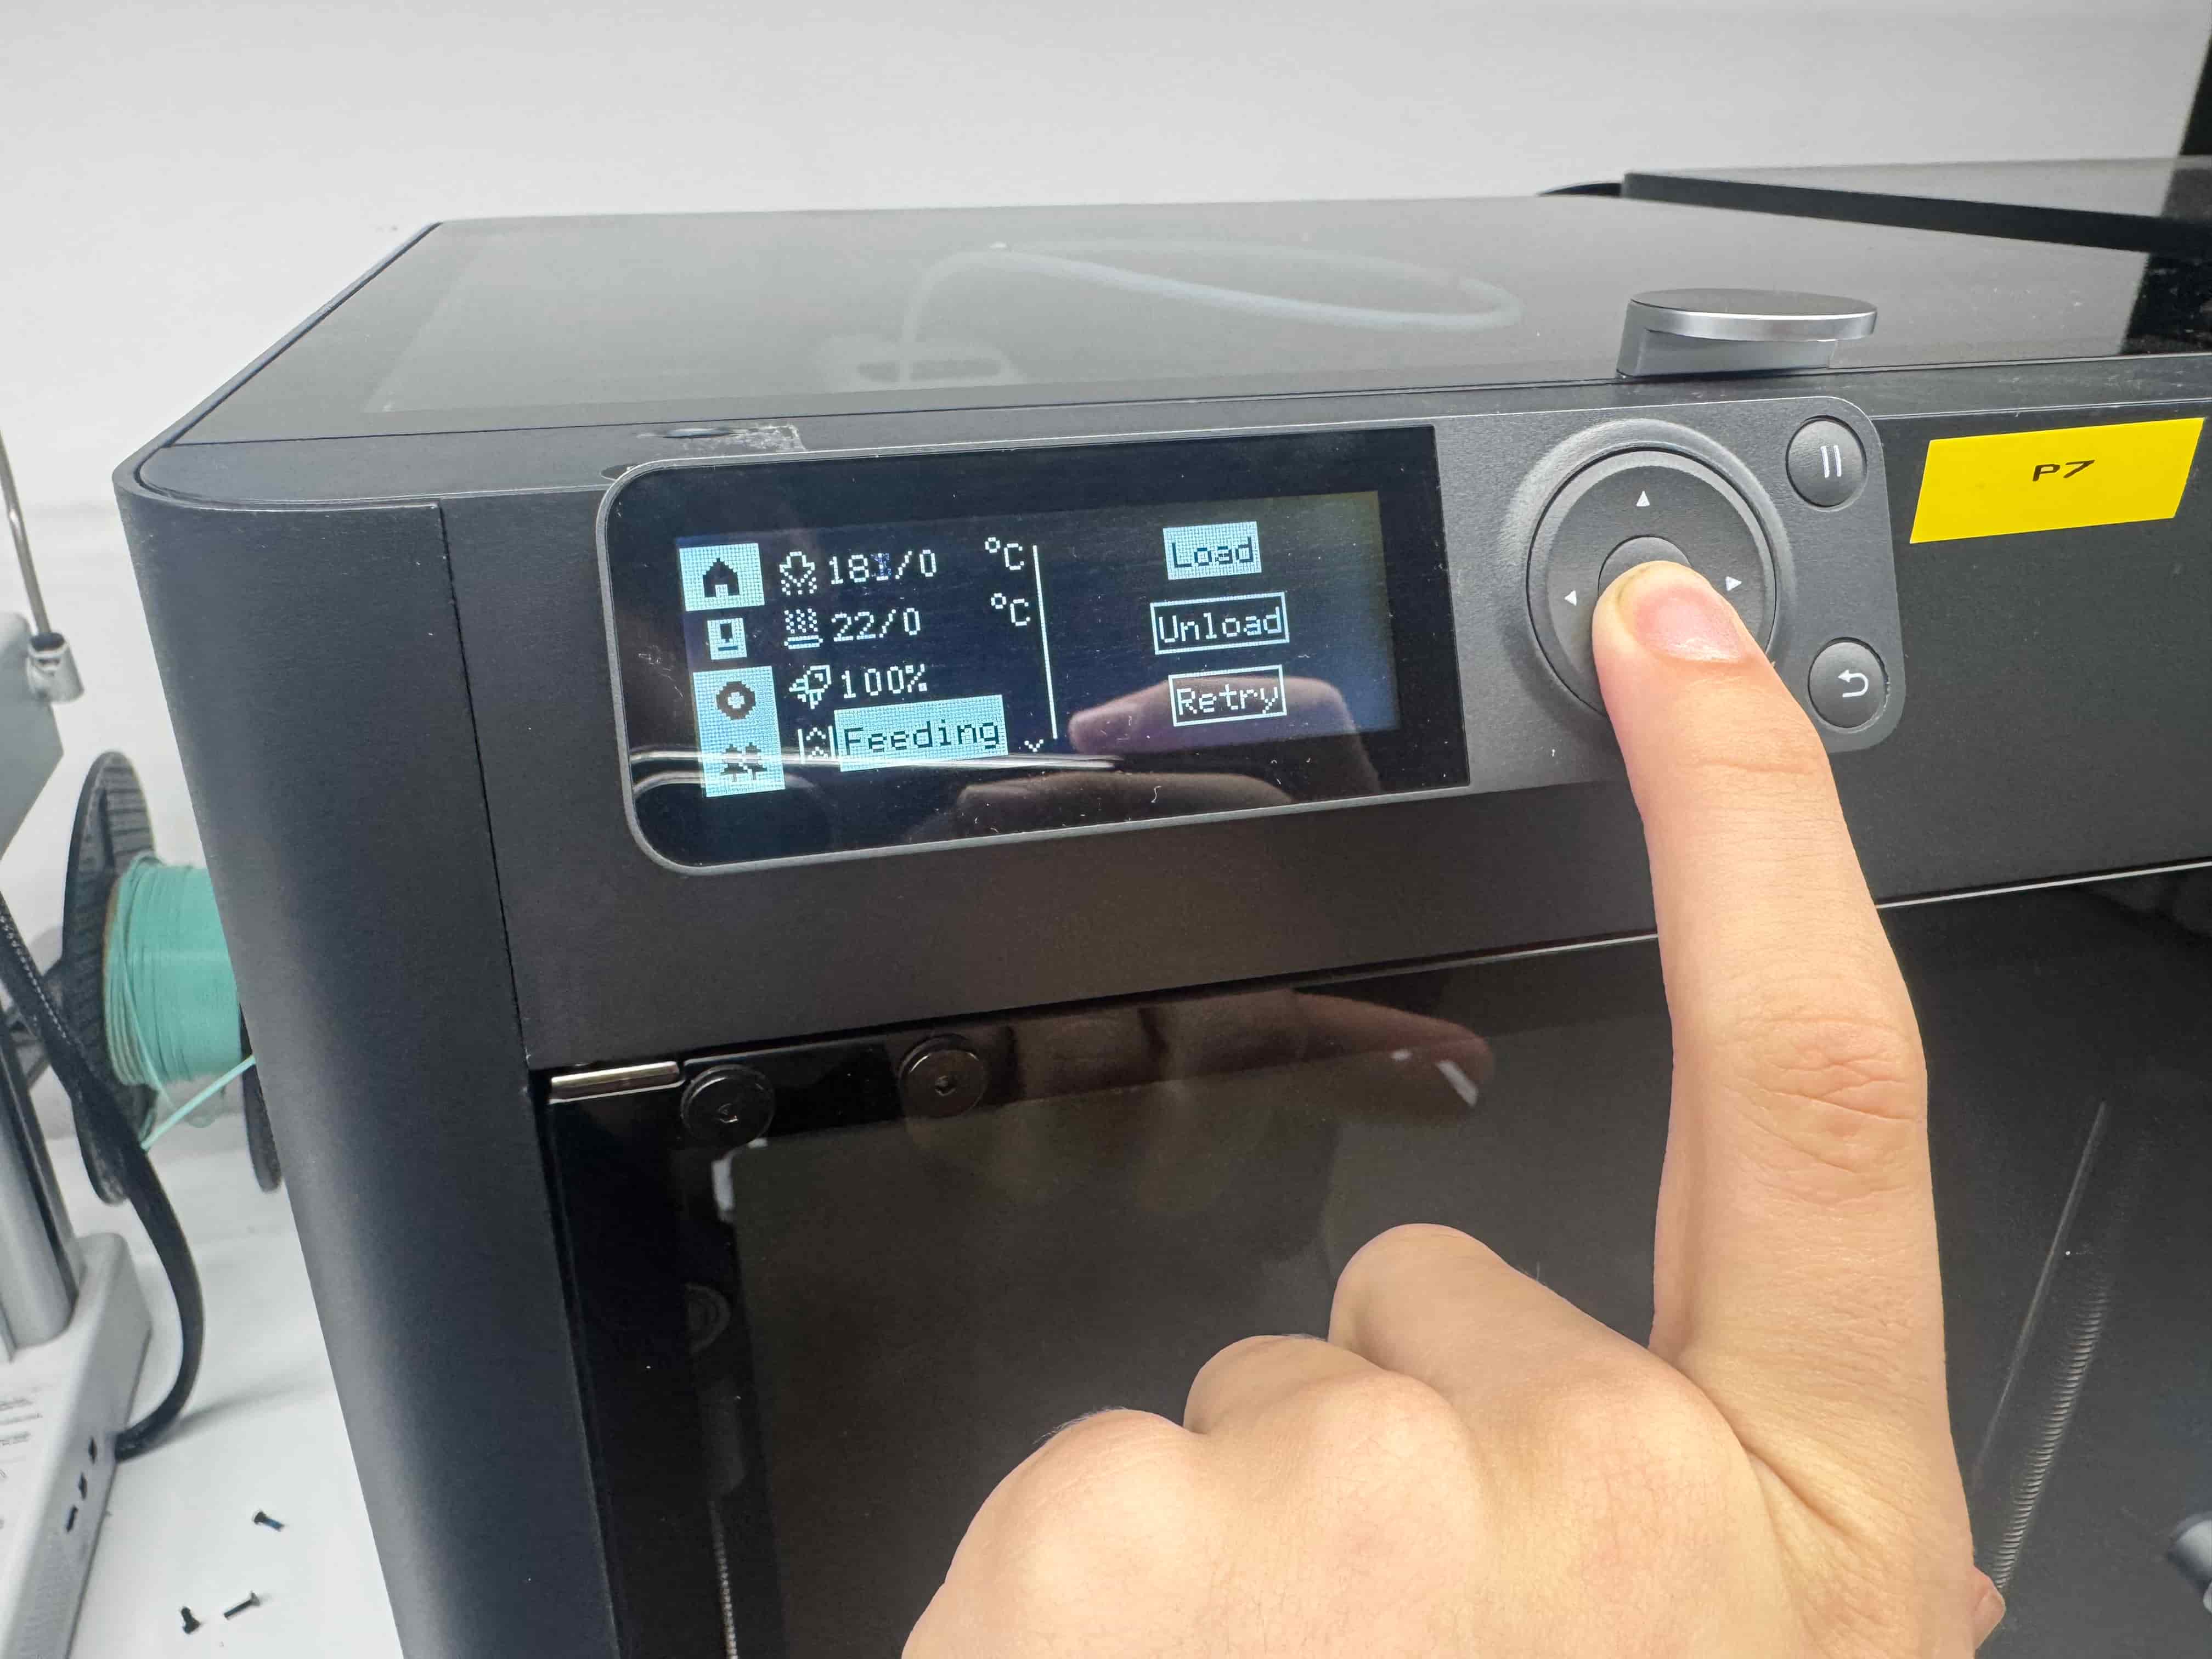
- On the screen: Feeding → Load. Use the button/arrows to navigate.
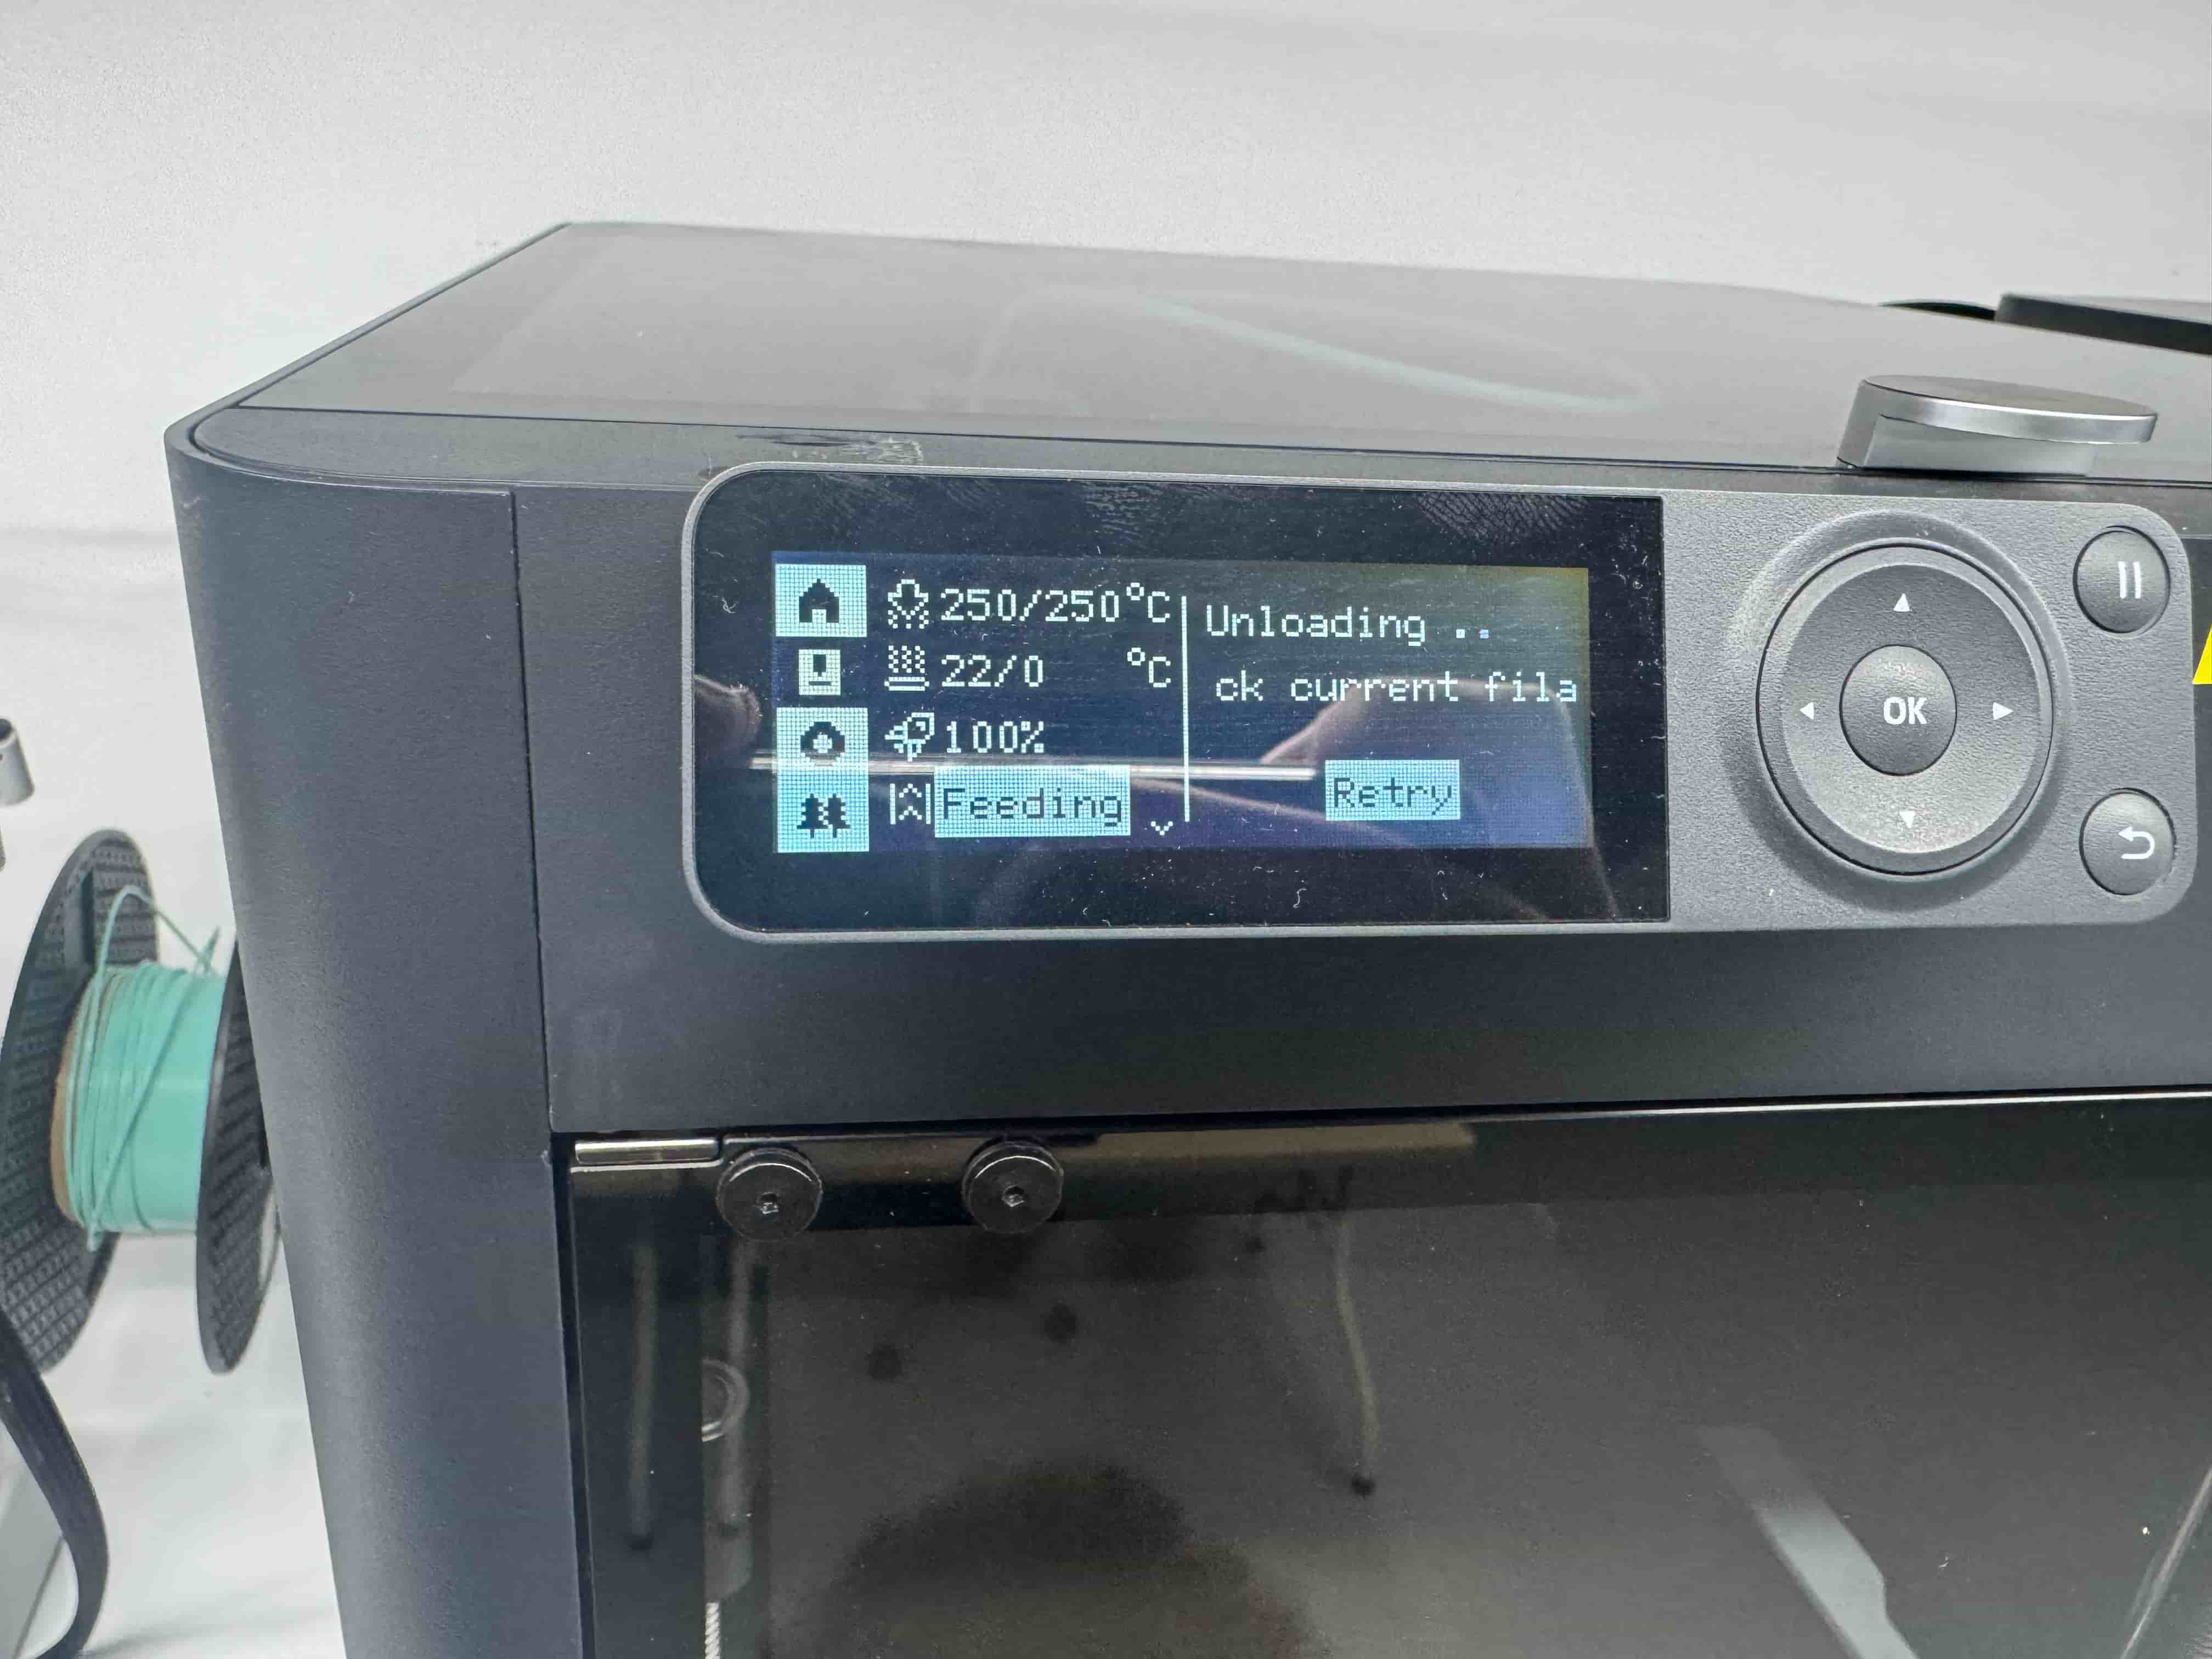
- Wait until the printer shows a message like: “Current filament is deploying.”
- Confirm filament is loaded by checking the nozzle for a small amount of filament extruding.
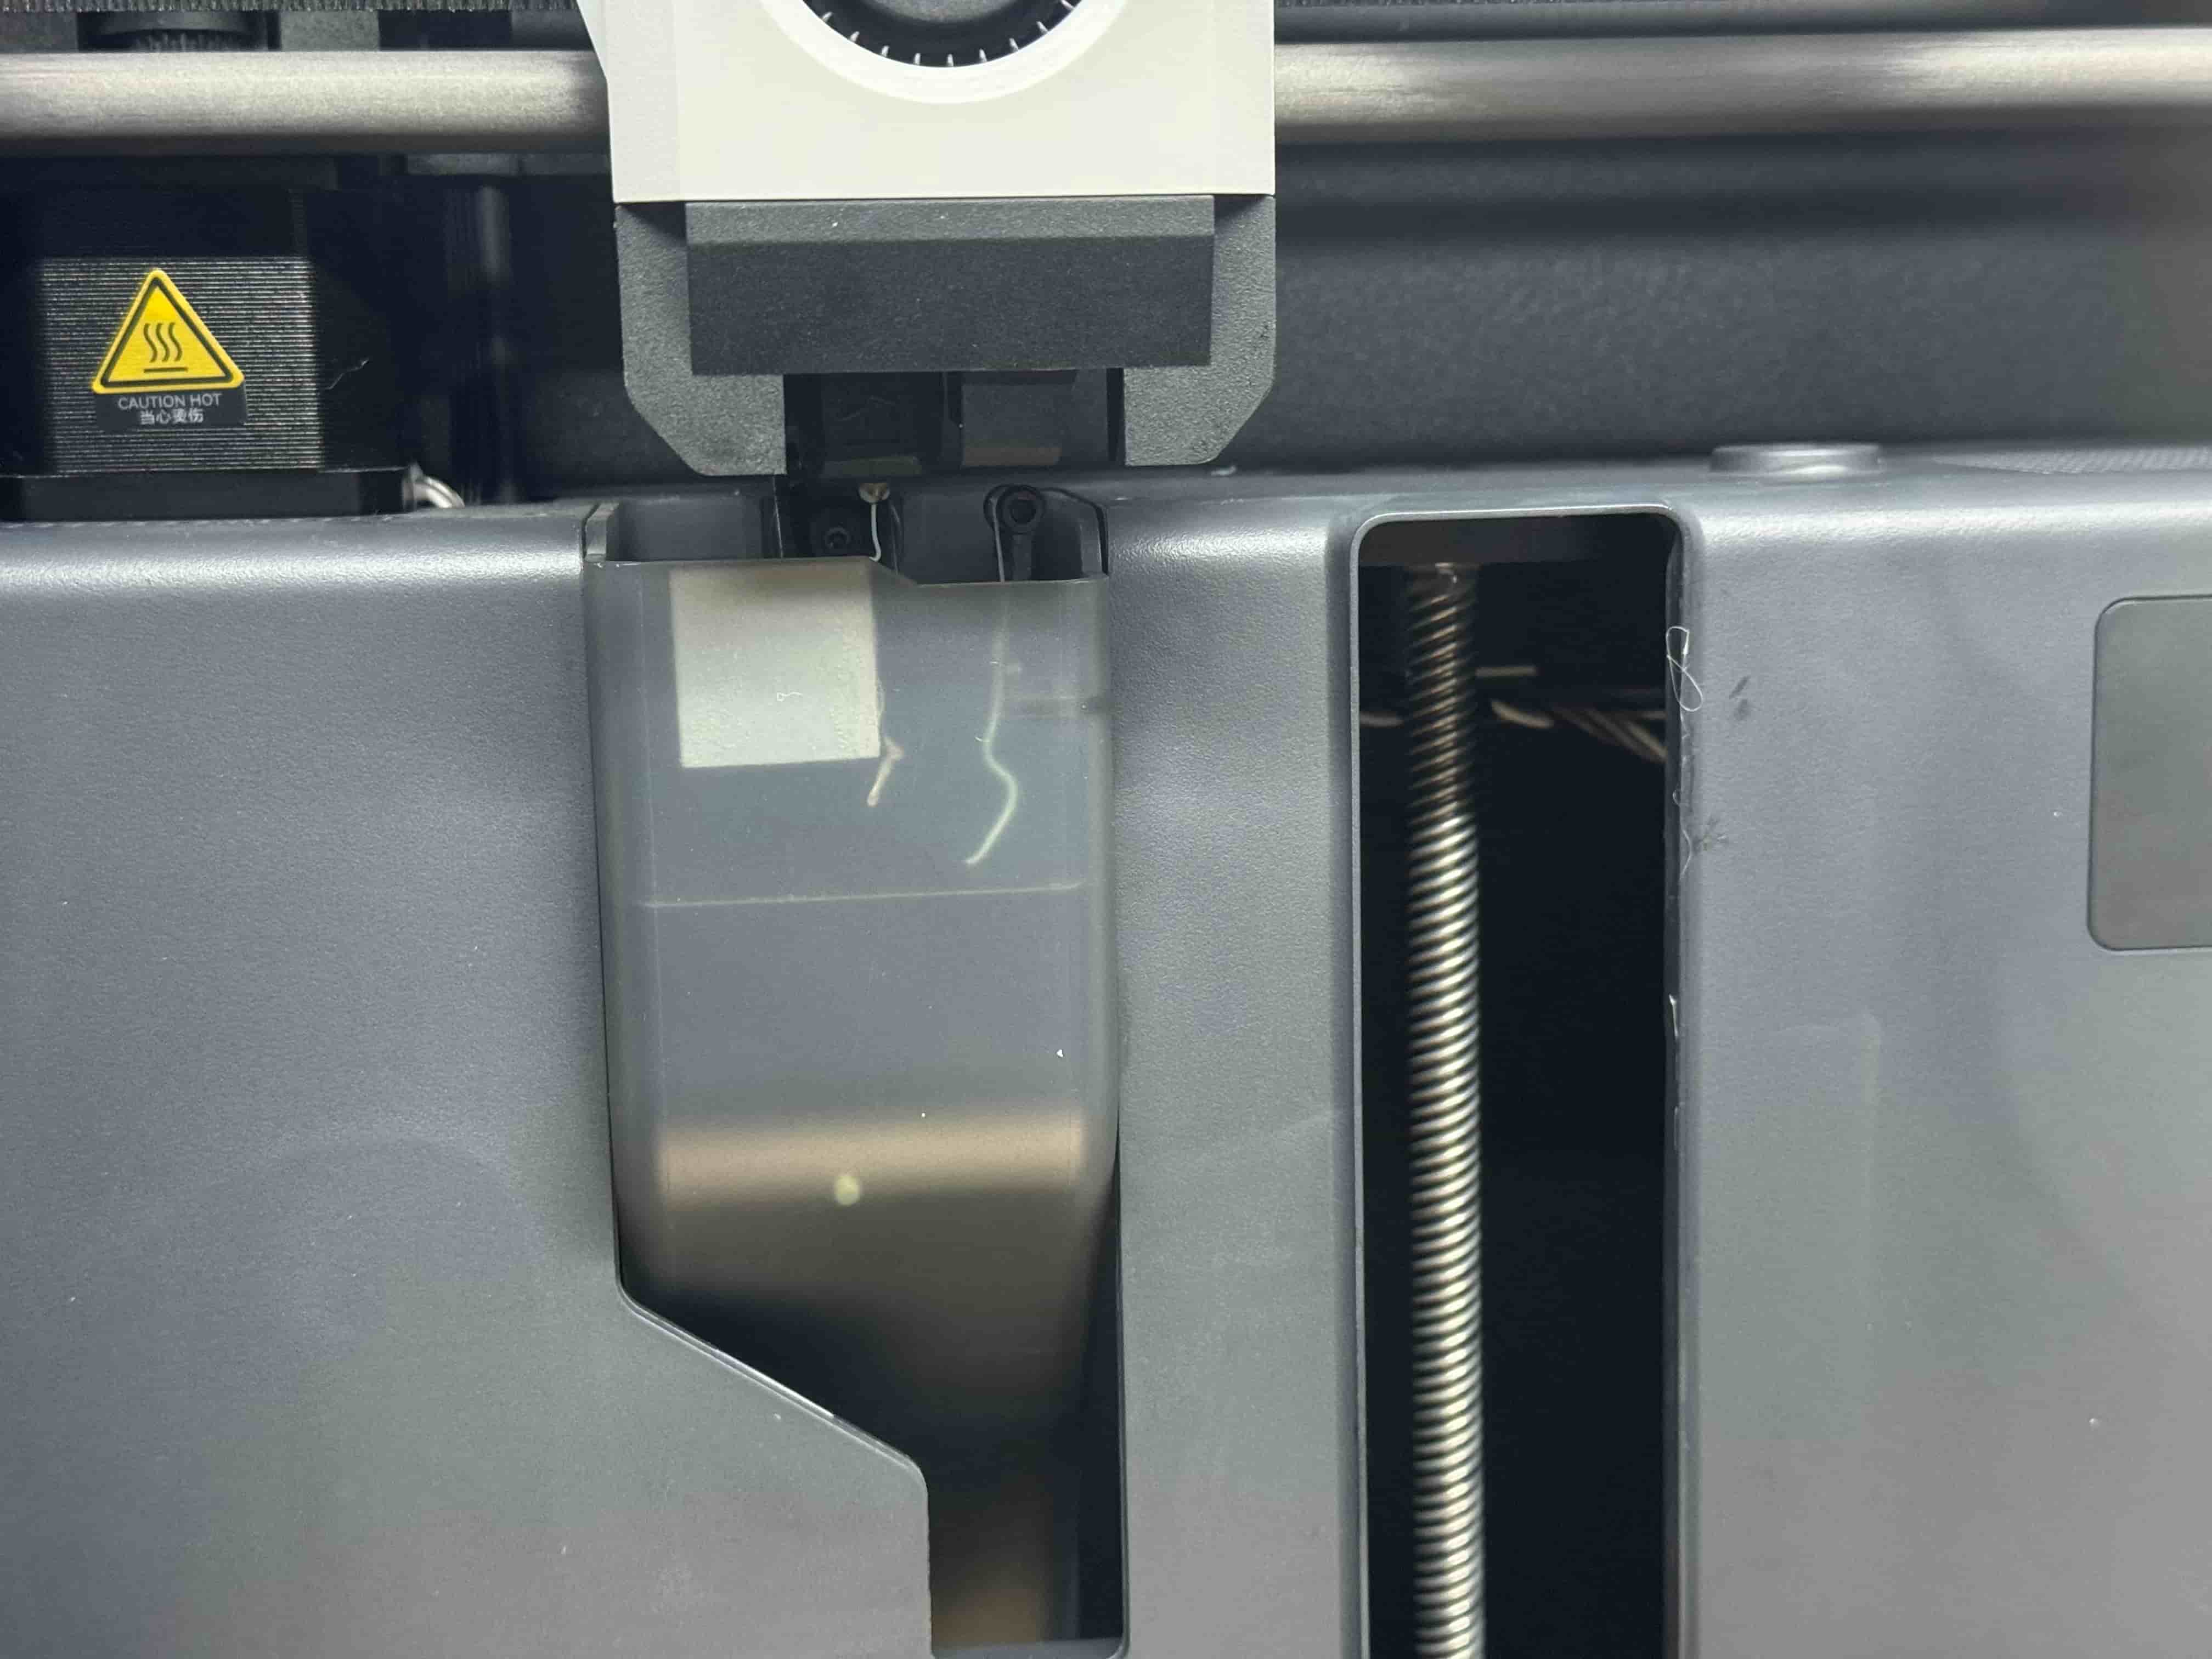
- For unload: Feeding → Unload.
- When the screen prompts you, pull the filament out of the tube.
3c) Bambu Lab A1 Mini
- Get your filament and feed it into the tube.
- On the screen: Filament → Load.
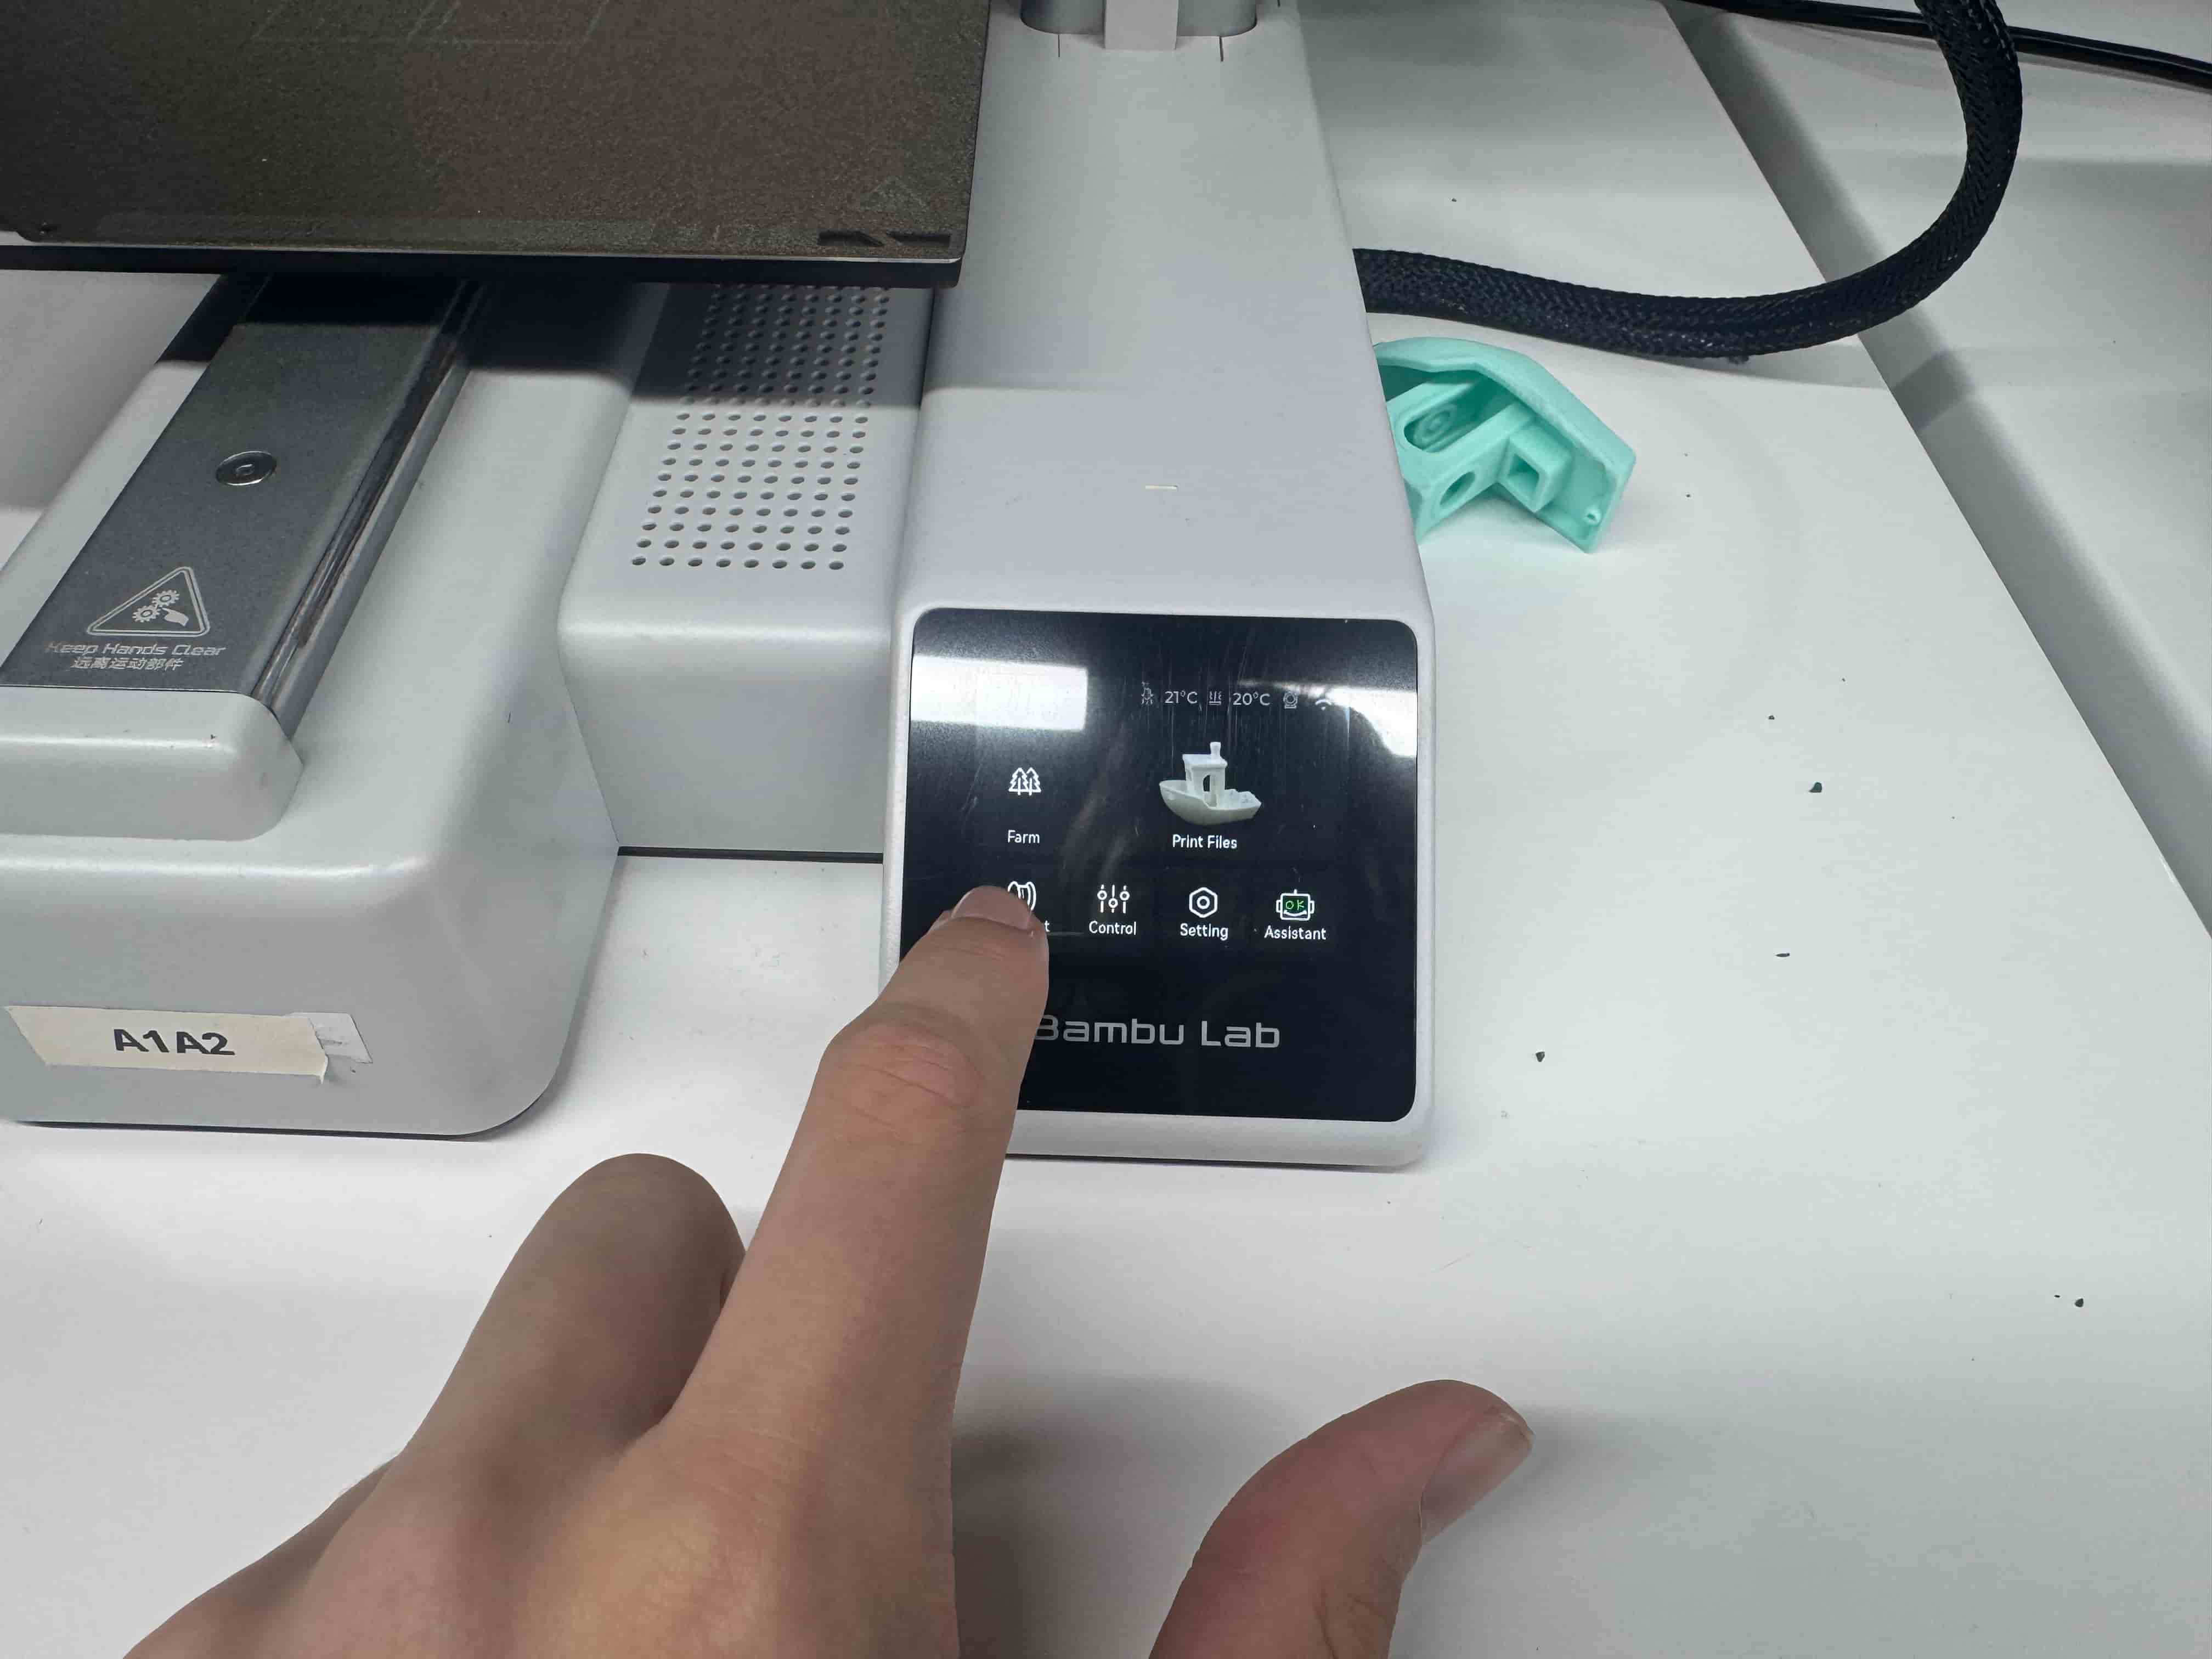
- If needed, push filament further until you see new filament from the extruder.
- For unloading: Filament → Unload.
- Pull the filament out and you should see a final confirmation screen.
3 Extra) Changing the Hotend Heater + Hotend (Bambu Lab A1 Mini)
1) Safety and Preparation
- Unload filament first (wait for “unload completed”).
- Turn the printer OFF and unplug it.
- Wait until the nozzle/hotend is fully cool.
2) Open the hotend replacement cover
Open the front cover on the toolhead (hotend replacement cover). Use a small Allen key to loosen the screw, then pull the cover away carefully.
3) Remove the hotend heater
Pull the hotend heater down and out gently.


4) Change the hotend heater
Insert the new heater into the same place as the old one.


5–8) Reassemble
- Reinstall screws and make sure parts are secured.
- Insert the new hotend. Ensure it is parallel and there is no gap.
- Put the cover back to finish.


4) 3D Printing Materials
FDM printing supports many materials, each with different strengths and limitations. Below is a quick cheat sheet of common filaments.
- PLA: rigid, easy to print, good quality. Best for prototypes and decorative prints.
- ABS: tough and impact resistant. Needs higher temps and can warp; enclosure helps.
- PETG: strong and durable, easier than ABS, good chemical resistance.
- Nylon: very strong and durable but absorbs moisture; usually needs enclosure/heated bed.
- TPU: flexible and elastic; can be harder to print.
Note: We used only PLA during the design rule tests because ABS releases fumes which is not ideal in a lab environment.
| Material | Advantages | Disadvantages | Typical Temps | Hardware |
|---|---|---|---|---|
| PLA | Cheap, easy, good surface quality | Brittle, degrades outdoors | Bed: 50–60°C Extruder: 190–220°C |
Standard FDM printer |
| ABS | Impact resistant, durable, low cost | Warping, adhesion issues, fumes | Nozzle: 230–250°C Bed: 80–110°C |
Heated enclosure recommended |
| PETG | Strong, durable, easier than ABS | Can have imperfect layer behavior | Nozzle: 230–250°C Bed: 70–80°C |
Standard FDM printer |
| Nylon | Excellent mechanical properties, low friction | Absorbs moisture | Nozzle: 240–260°C Bed: 70–100°C |
Often needs hardened nozzle / enclosure |
| TPU | Rubber-like flexibility | Harder to print, can be expensive | Nozzle: 210–230°C Bed: 20–60°C |
Direct drive preferred |
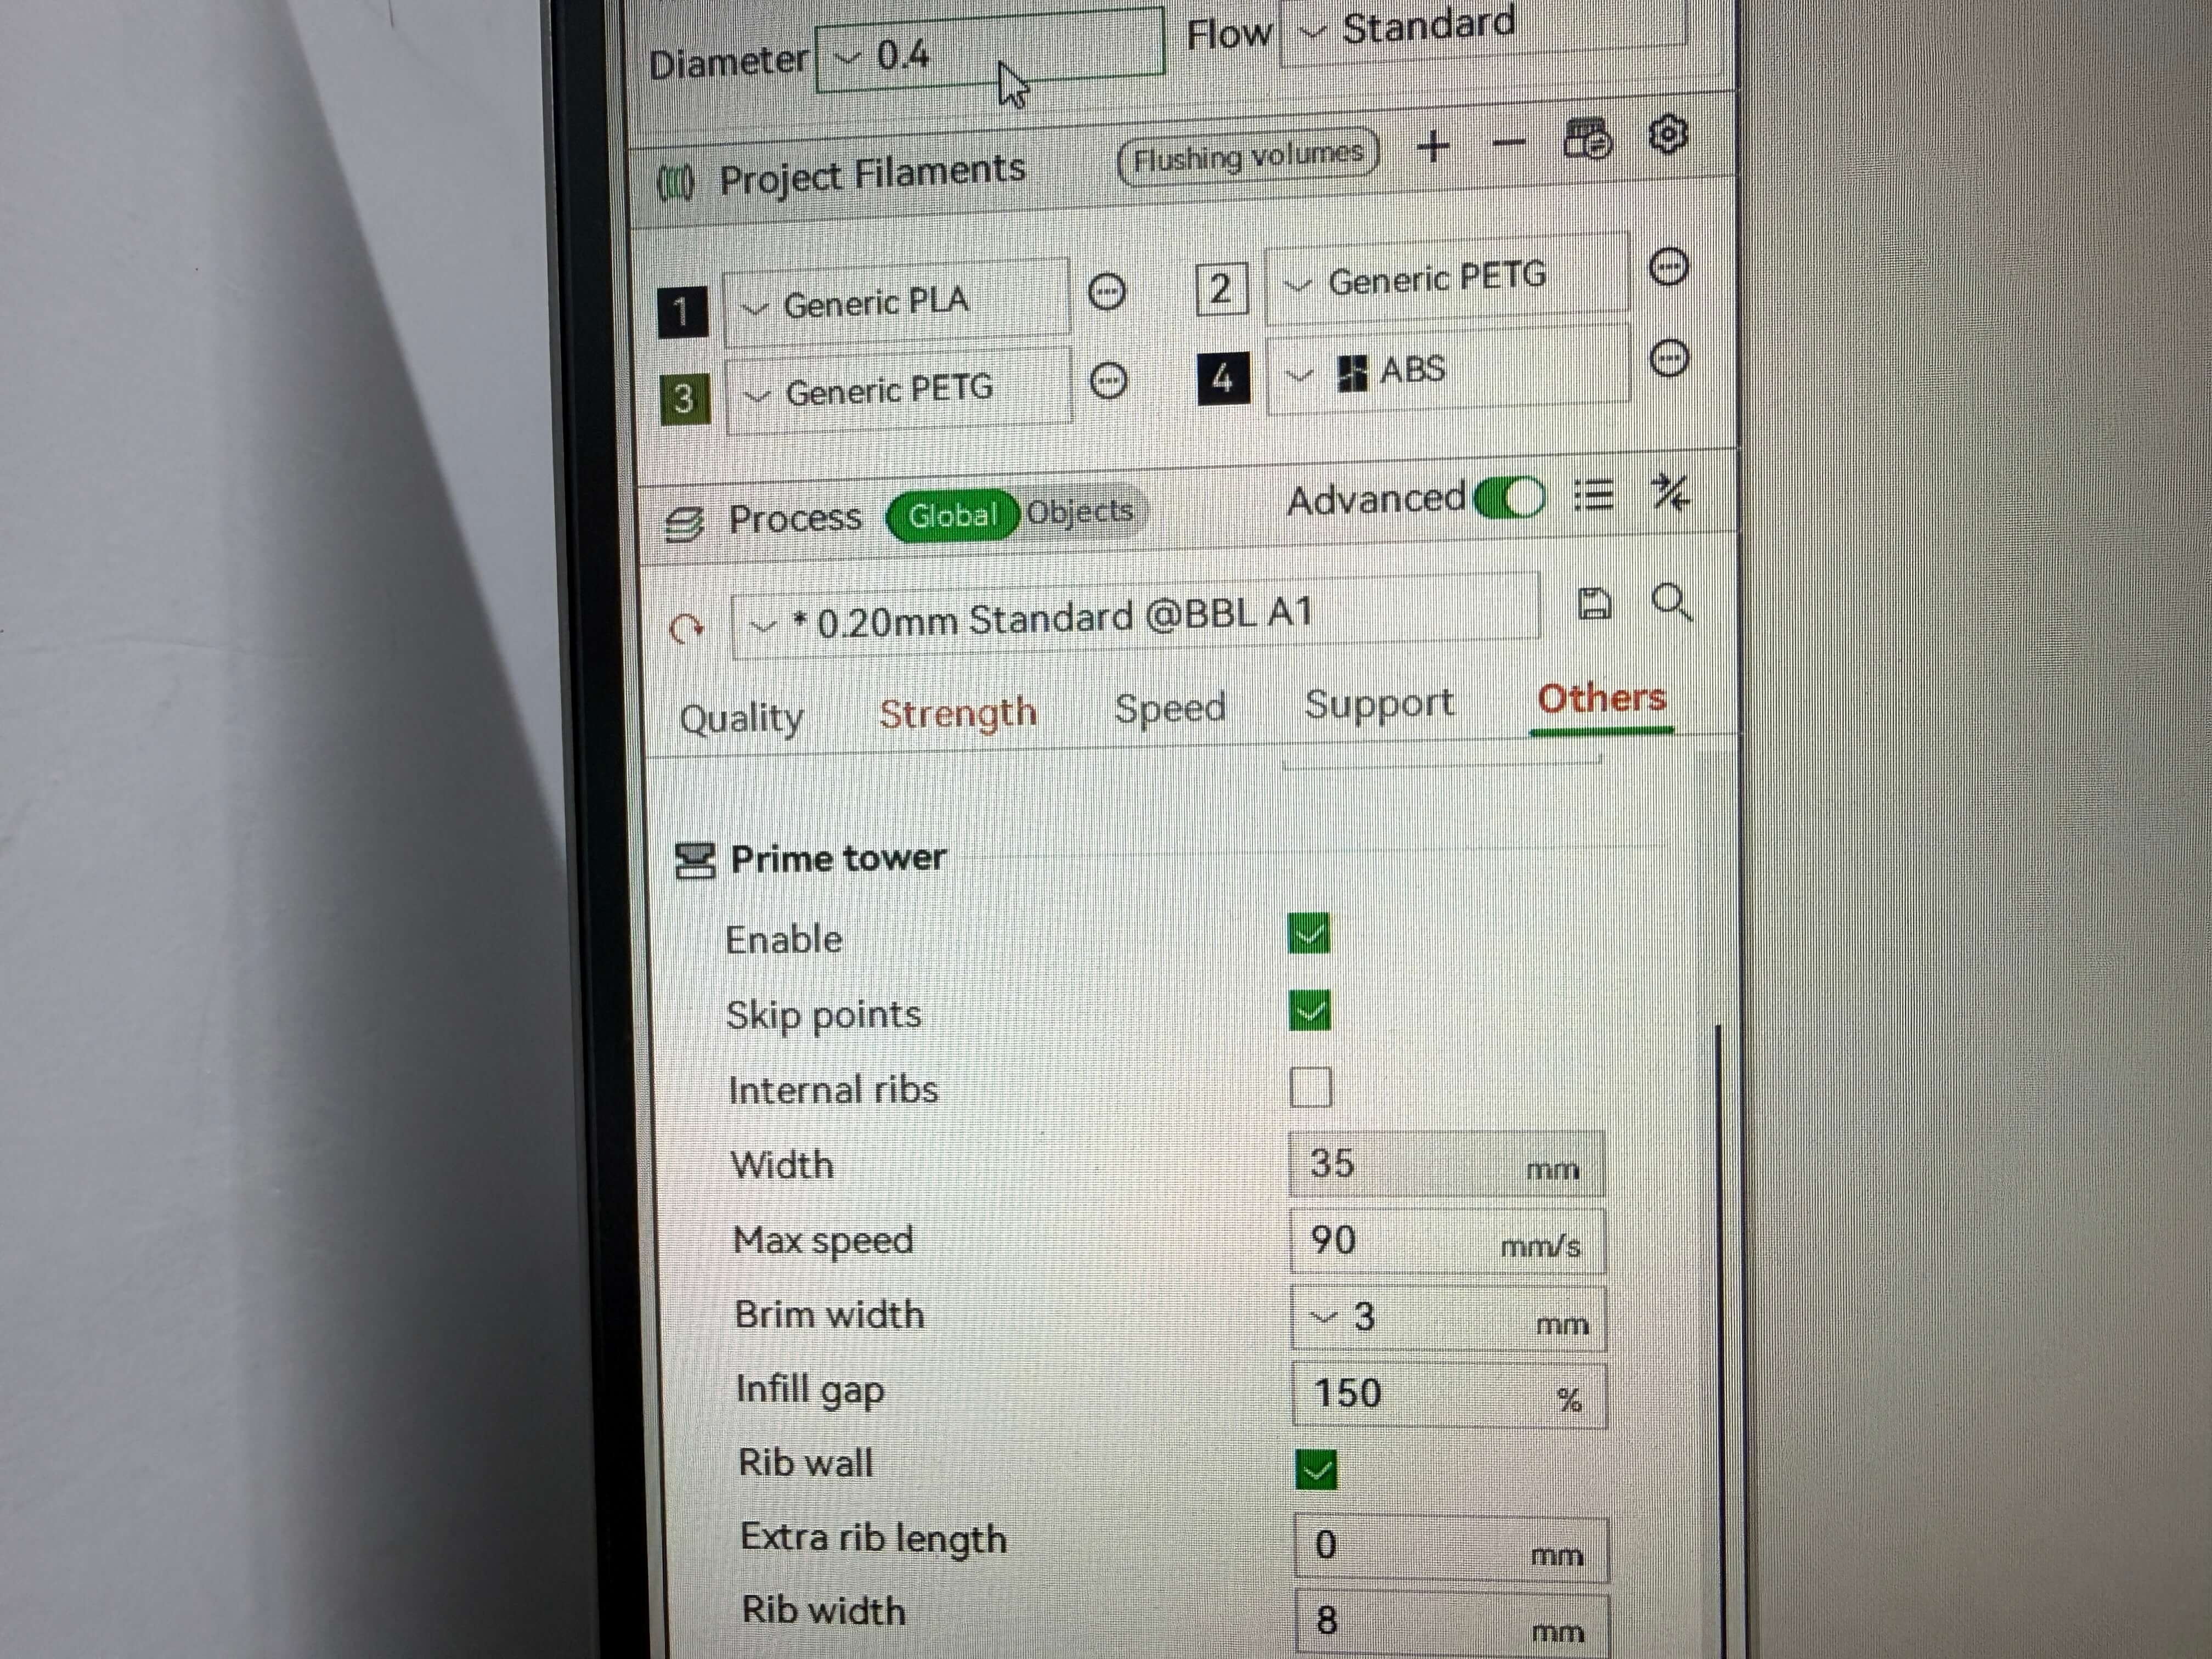
Exploring Bambu Studio (Bambu Slicer)
What is Bambu Studio?
Bambu Studio is slicing software that prepares a 3D model for printing. You import a model (.stl / .step), select printer + material + settings, and the slicer creates printable toolpaths (layers + movements).
It includes tools like G-code preview, multiple plates, remote control/monitoring, auto-arrange/orient, support generation, and per-object/per-part settings.
What we used it for
- Import the 3D model
- Select printer
- Select filament/material + settings (layer height, supports, infill, speed, etc.)
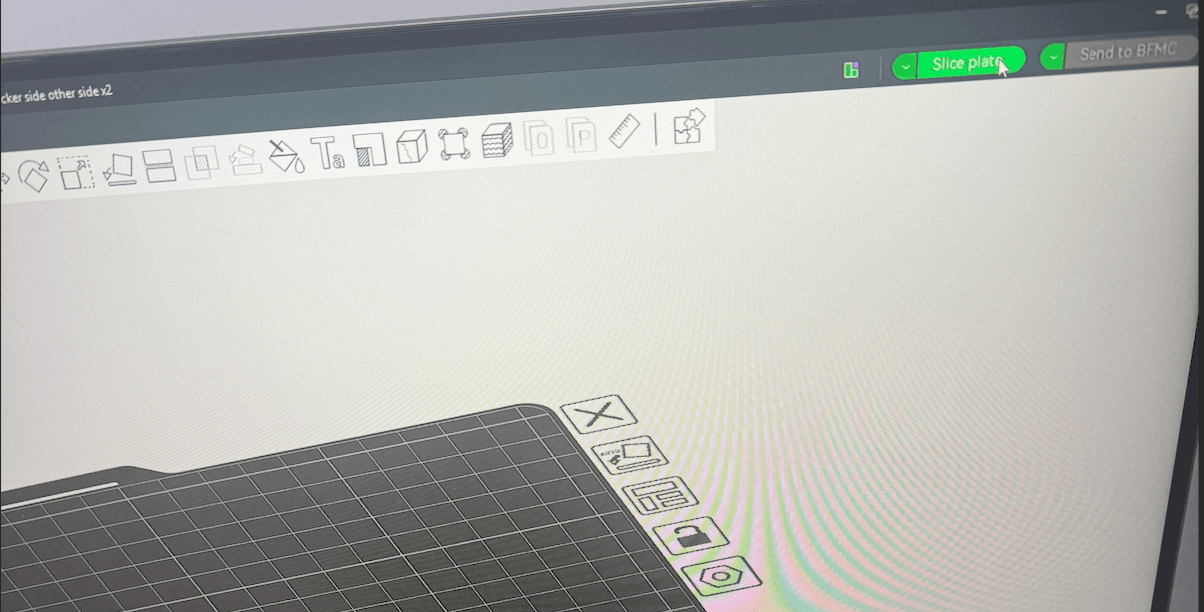
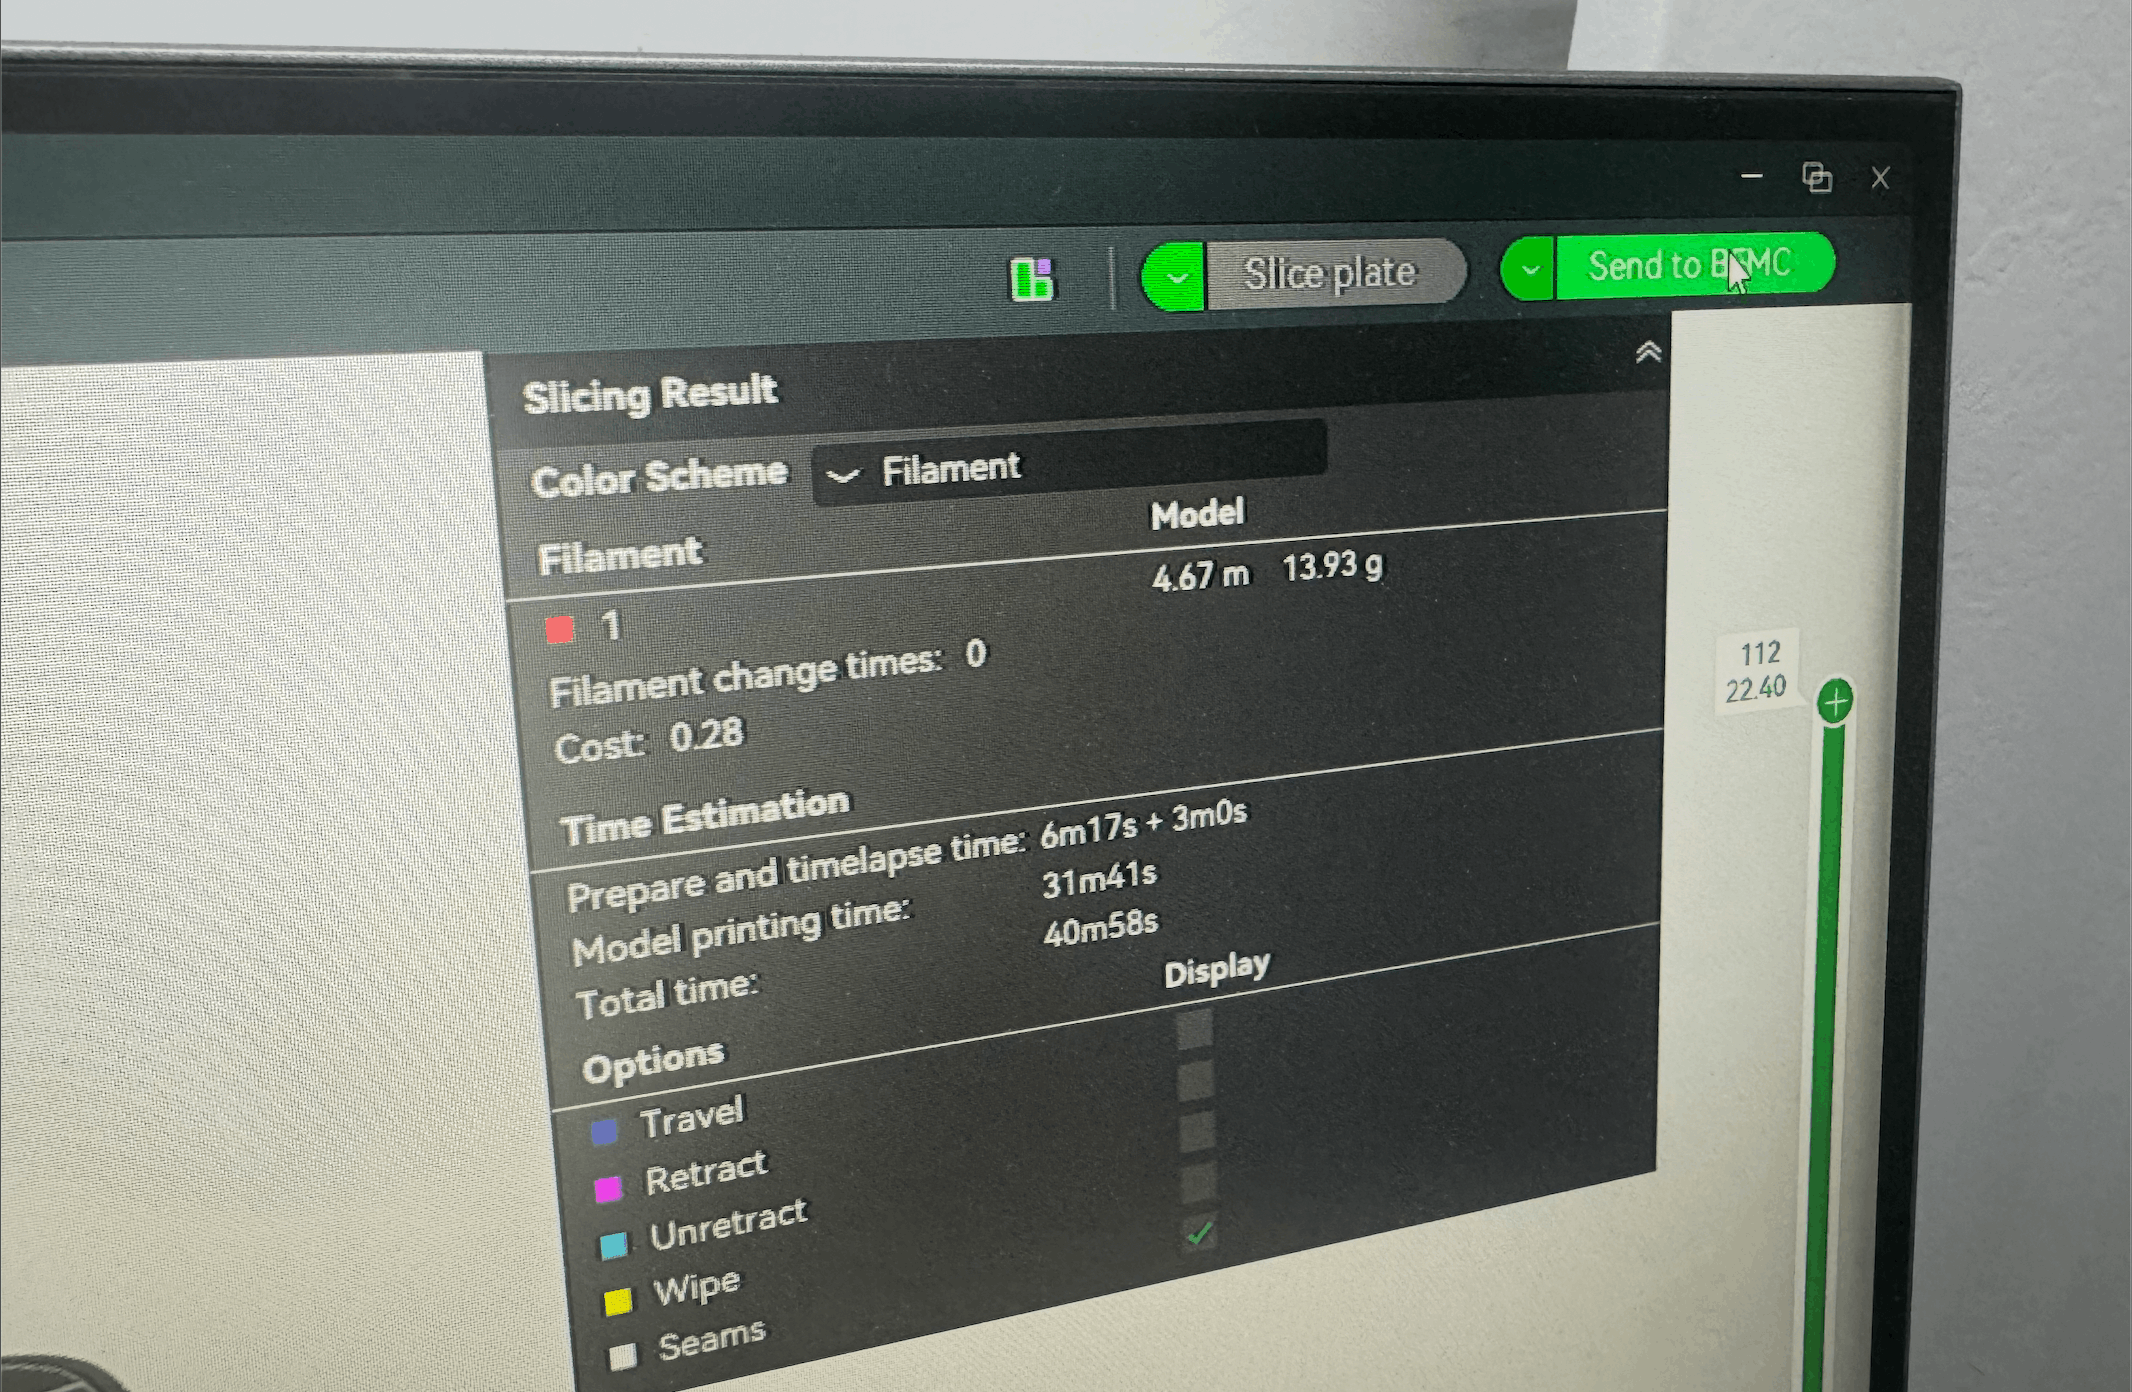
- Slice the model
- Send to printer / export file
- Monitor the print


Design Rules
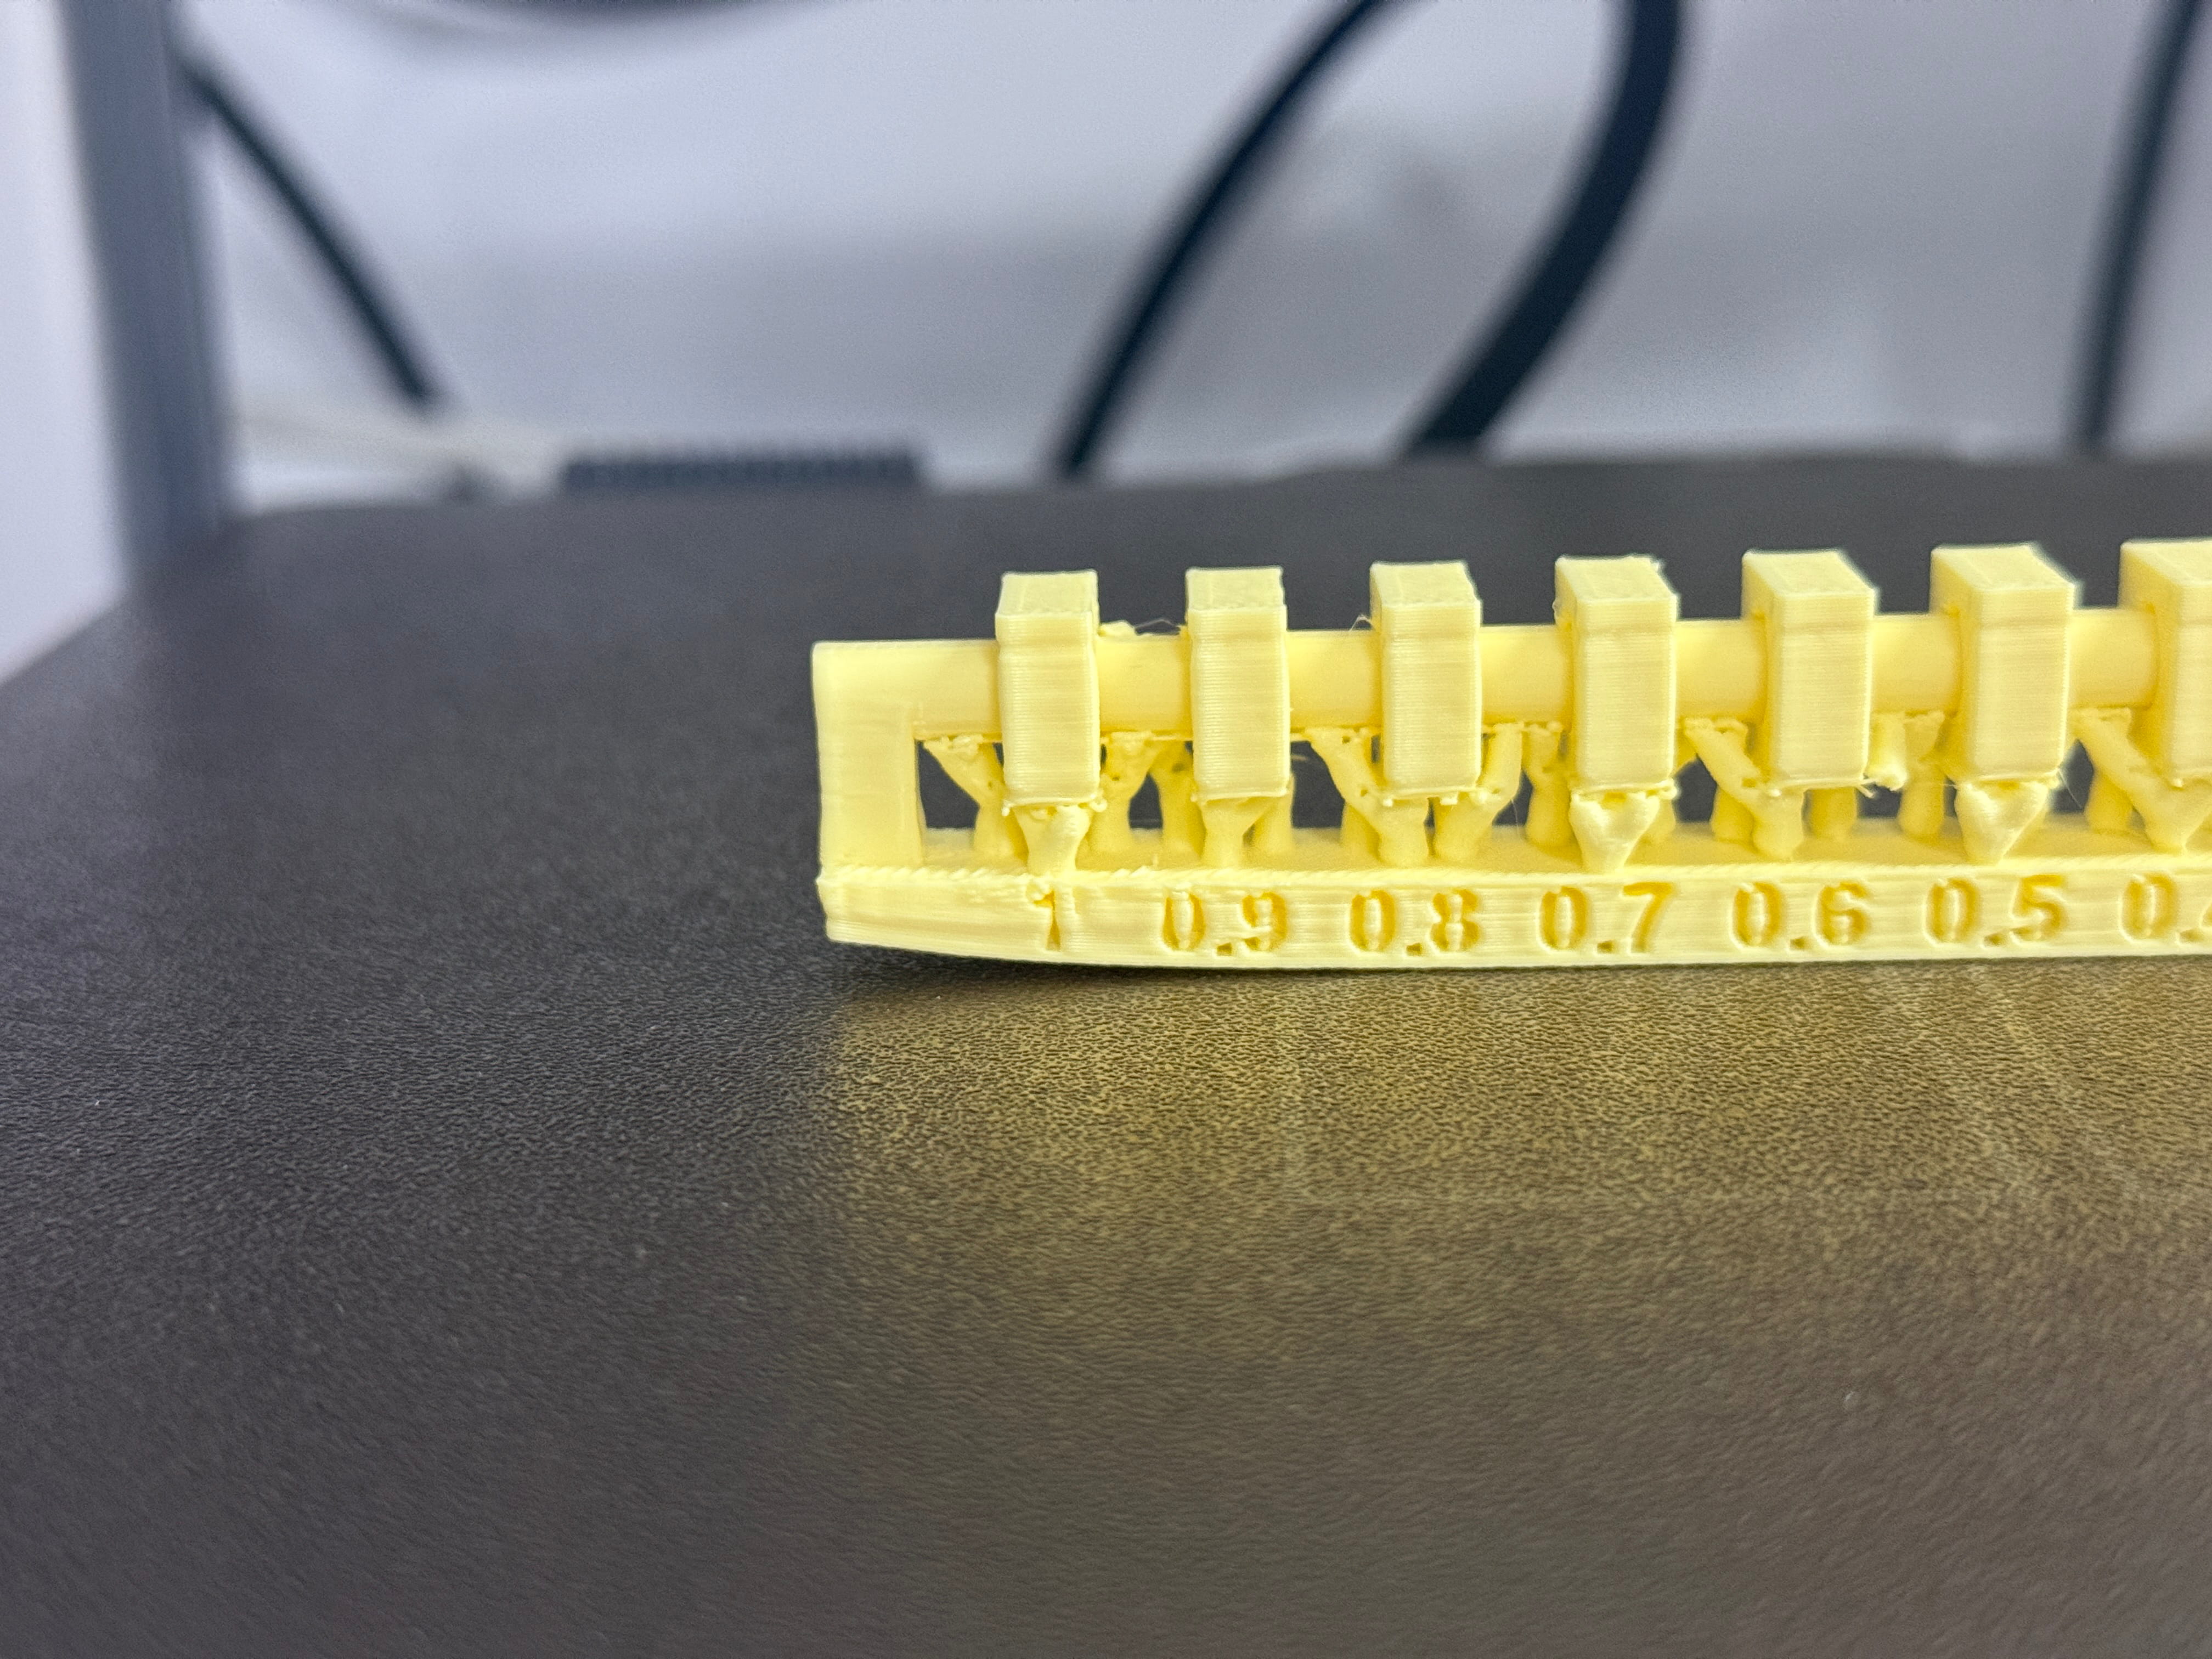
Overhang / Angle Test
Overhangs extend outward with no material directly underneath. Many printers can handle up to about 45° without supports, but it depends on printer + material + cooling.
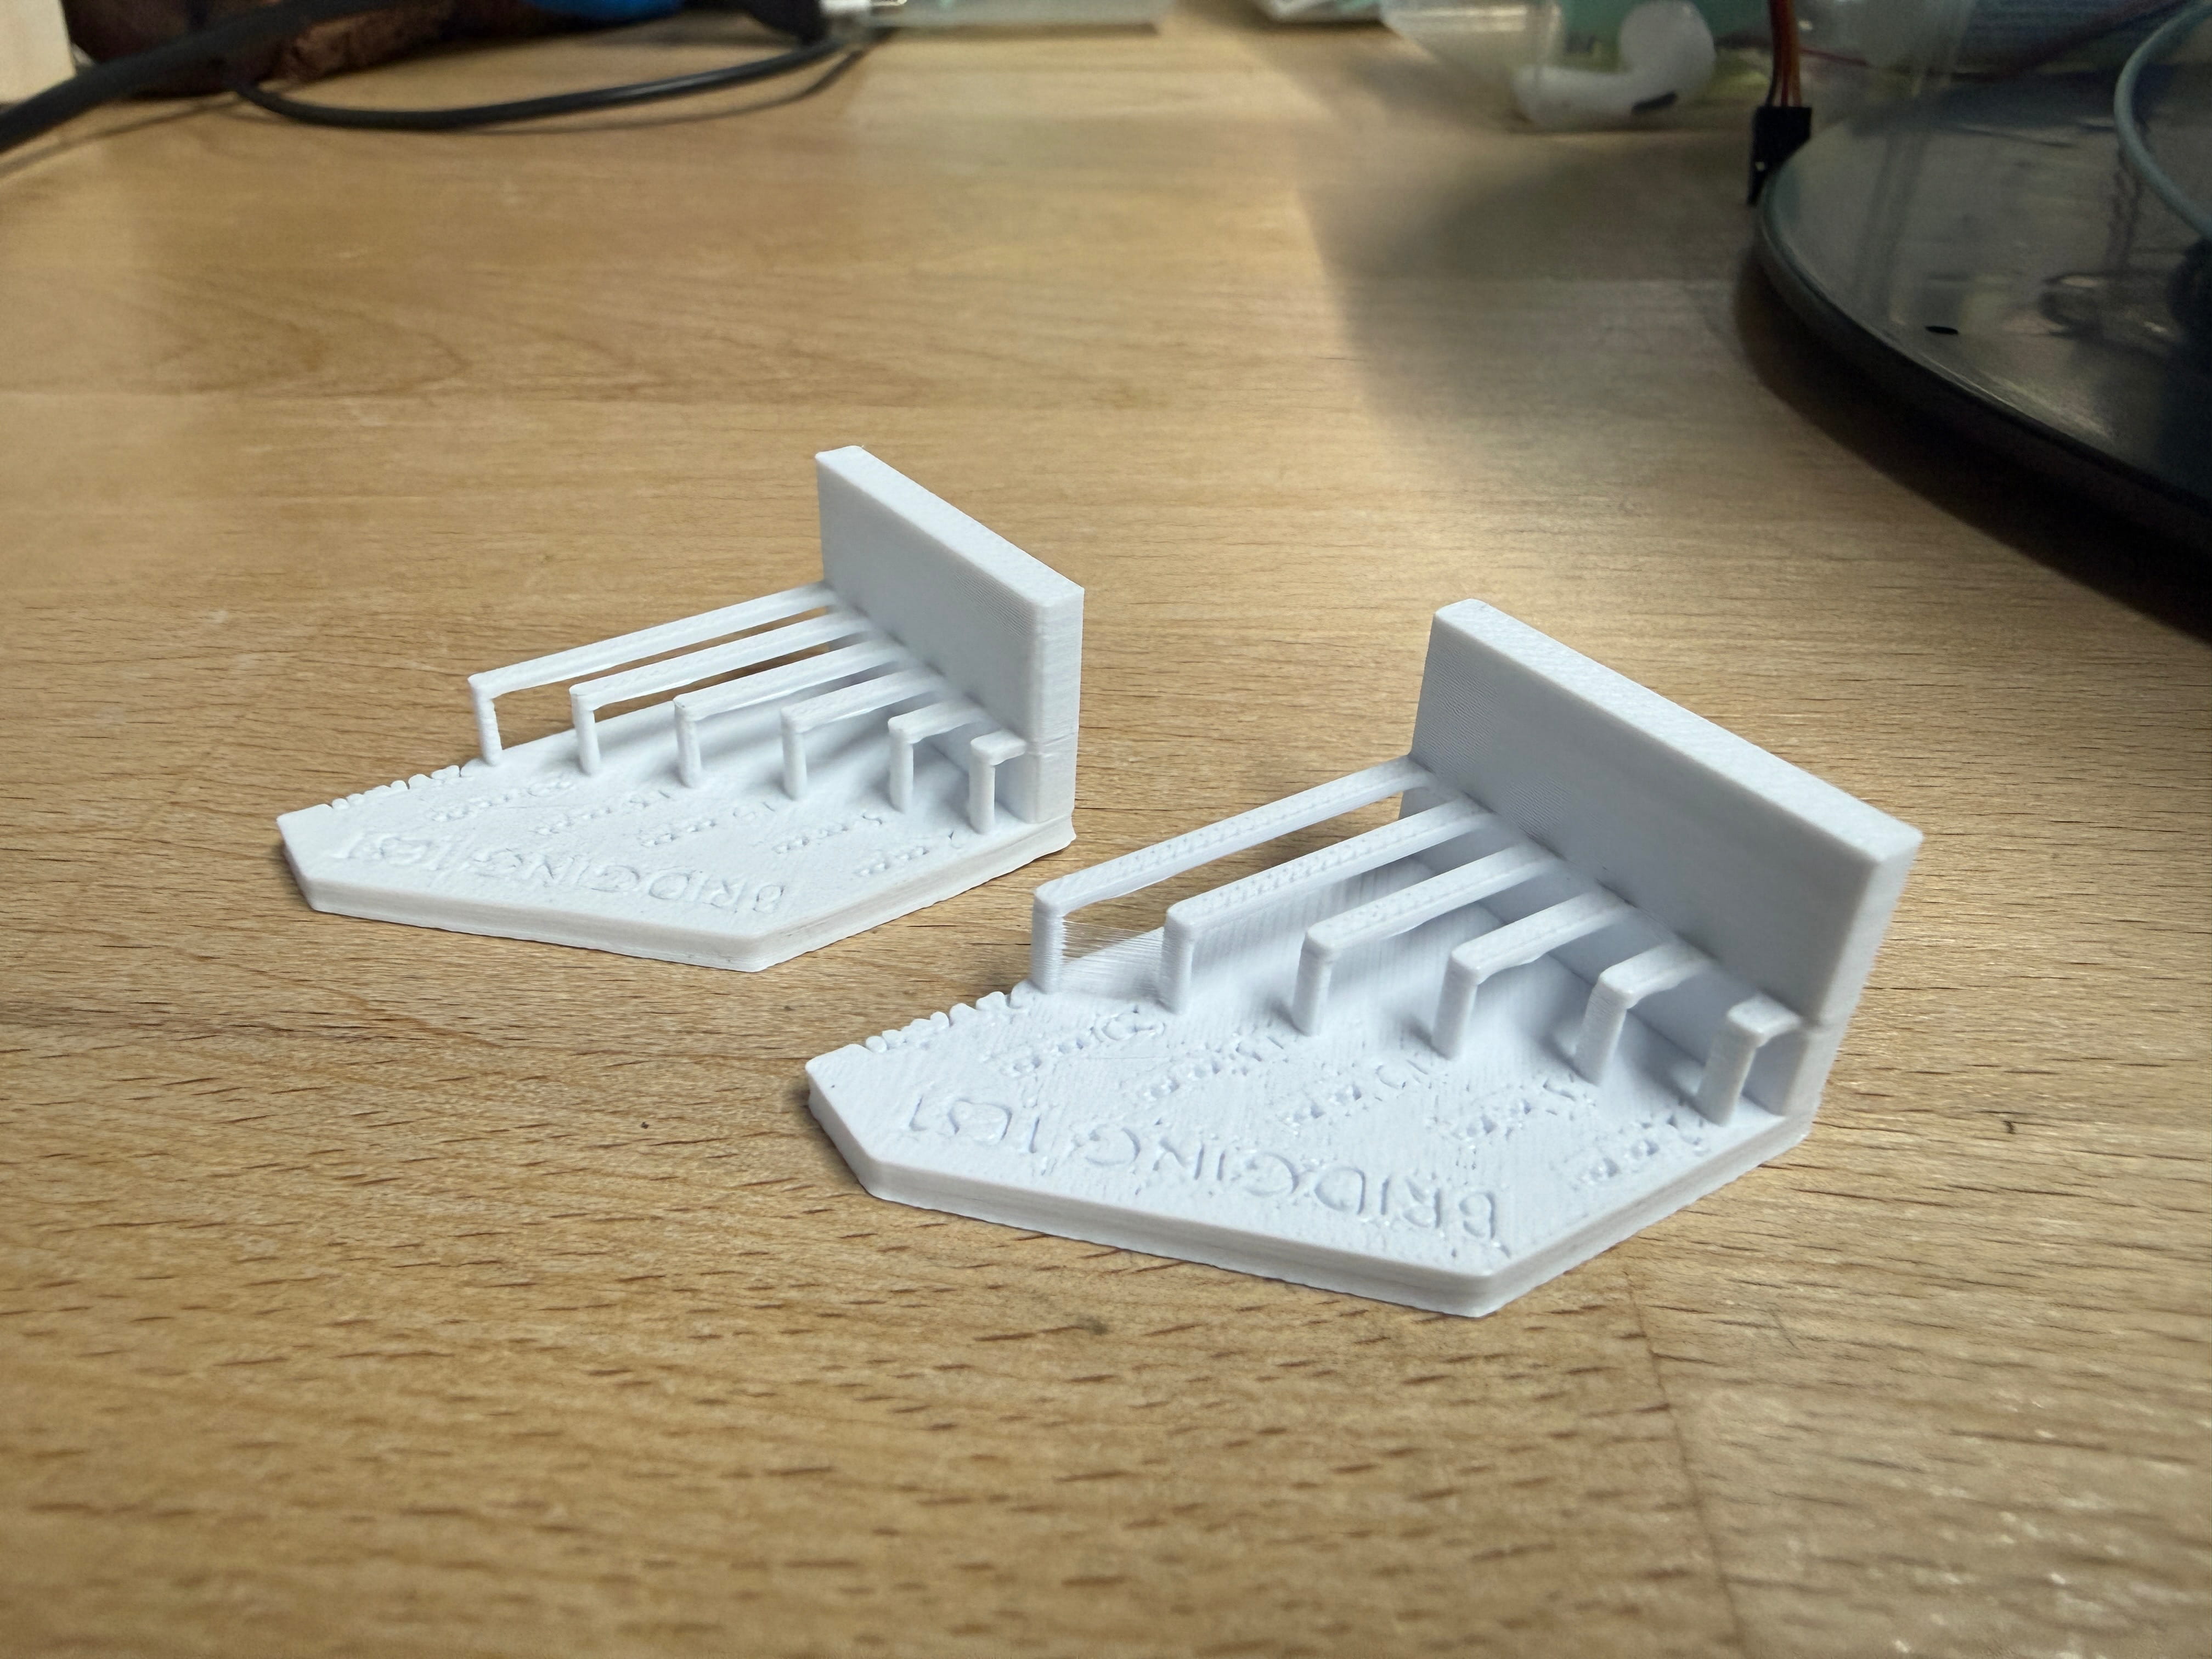
Bridging Test
Bridging prints across an empty gap without supports. Shorter gaps are usually easier. We achieved a successful bridge using Bambu Studio settings.
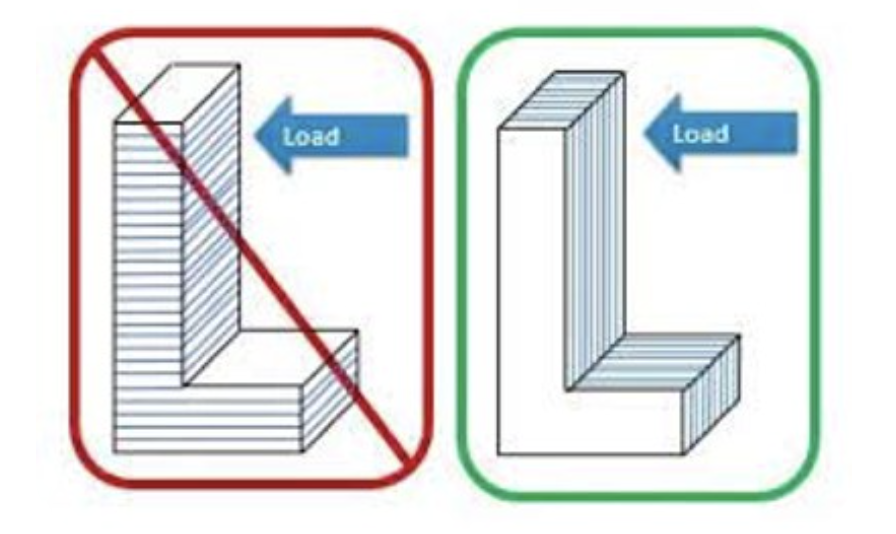
Anisotropy
Because prints are layered, strength changes by direction: parts are usually weaker across layer lines. This matters for mechanical parts that carry force.
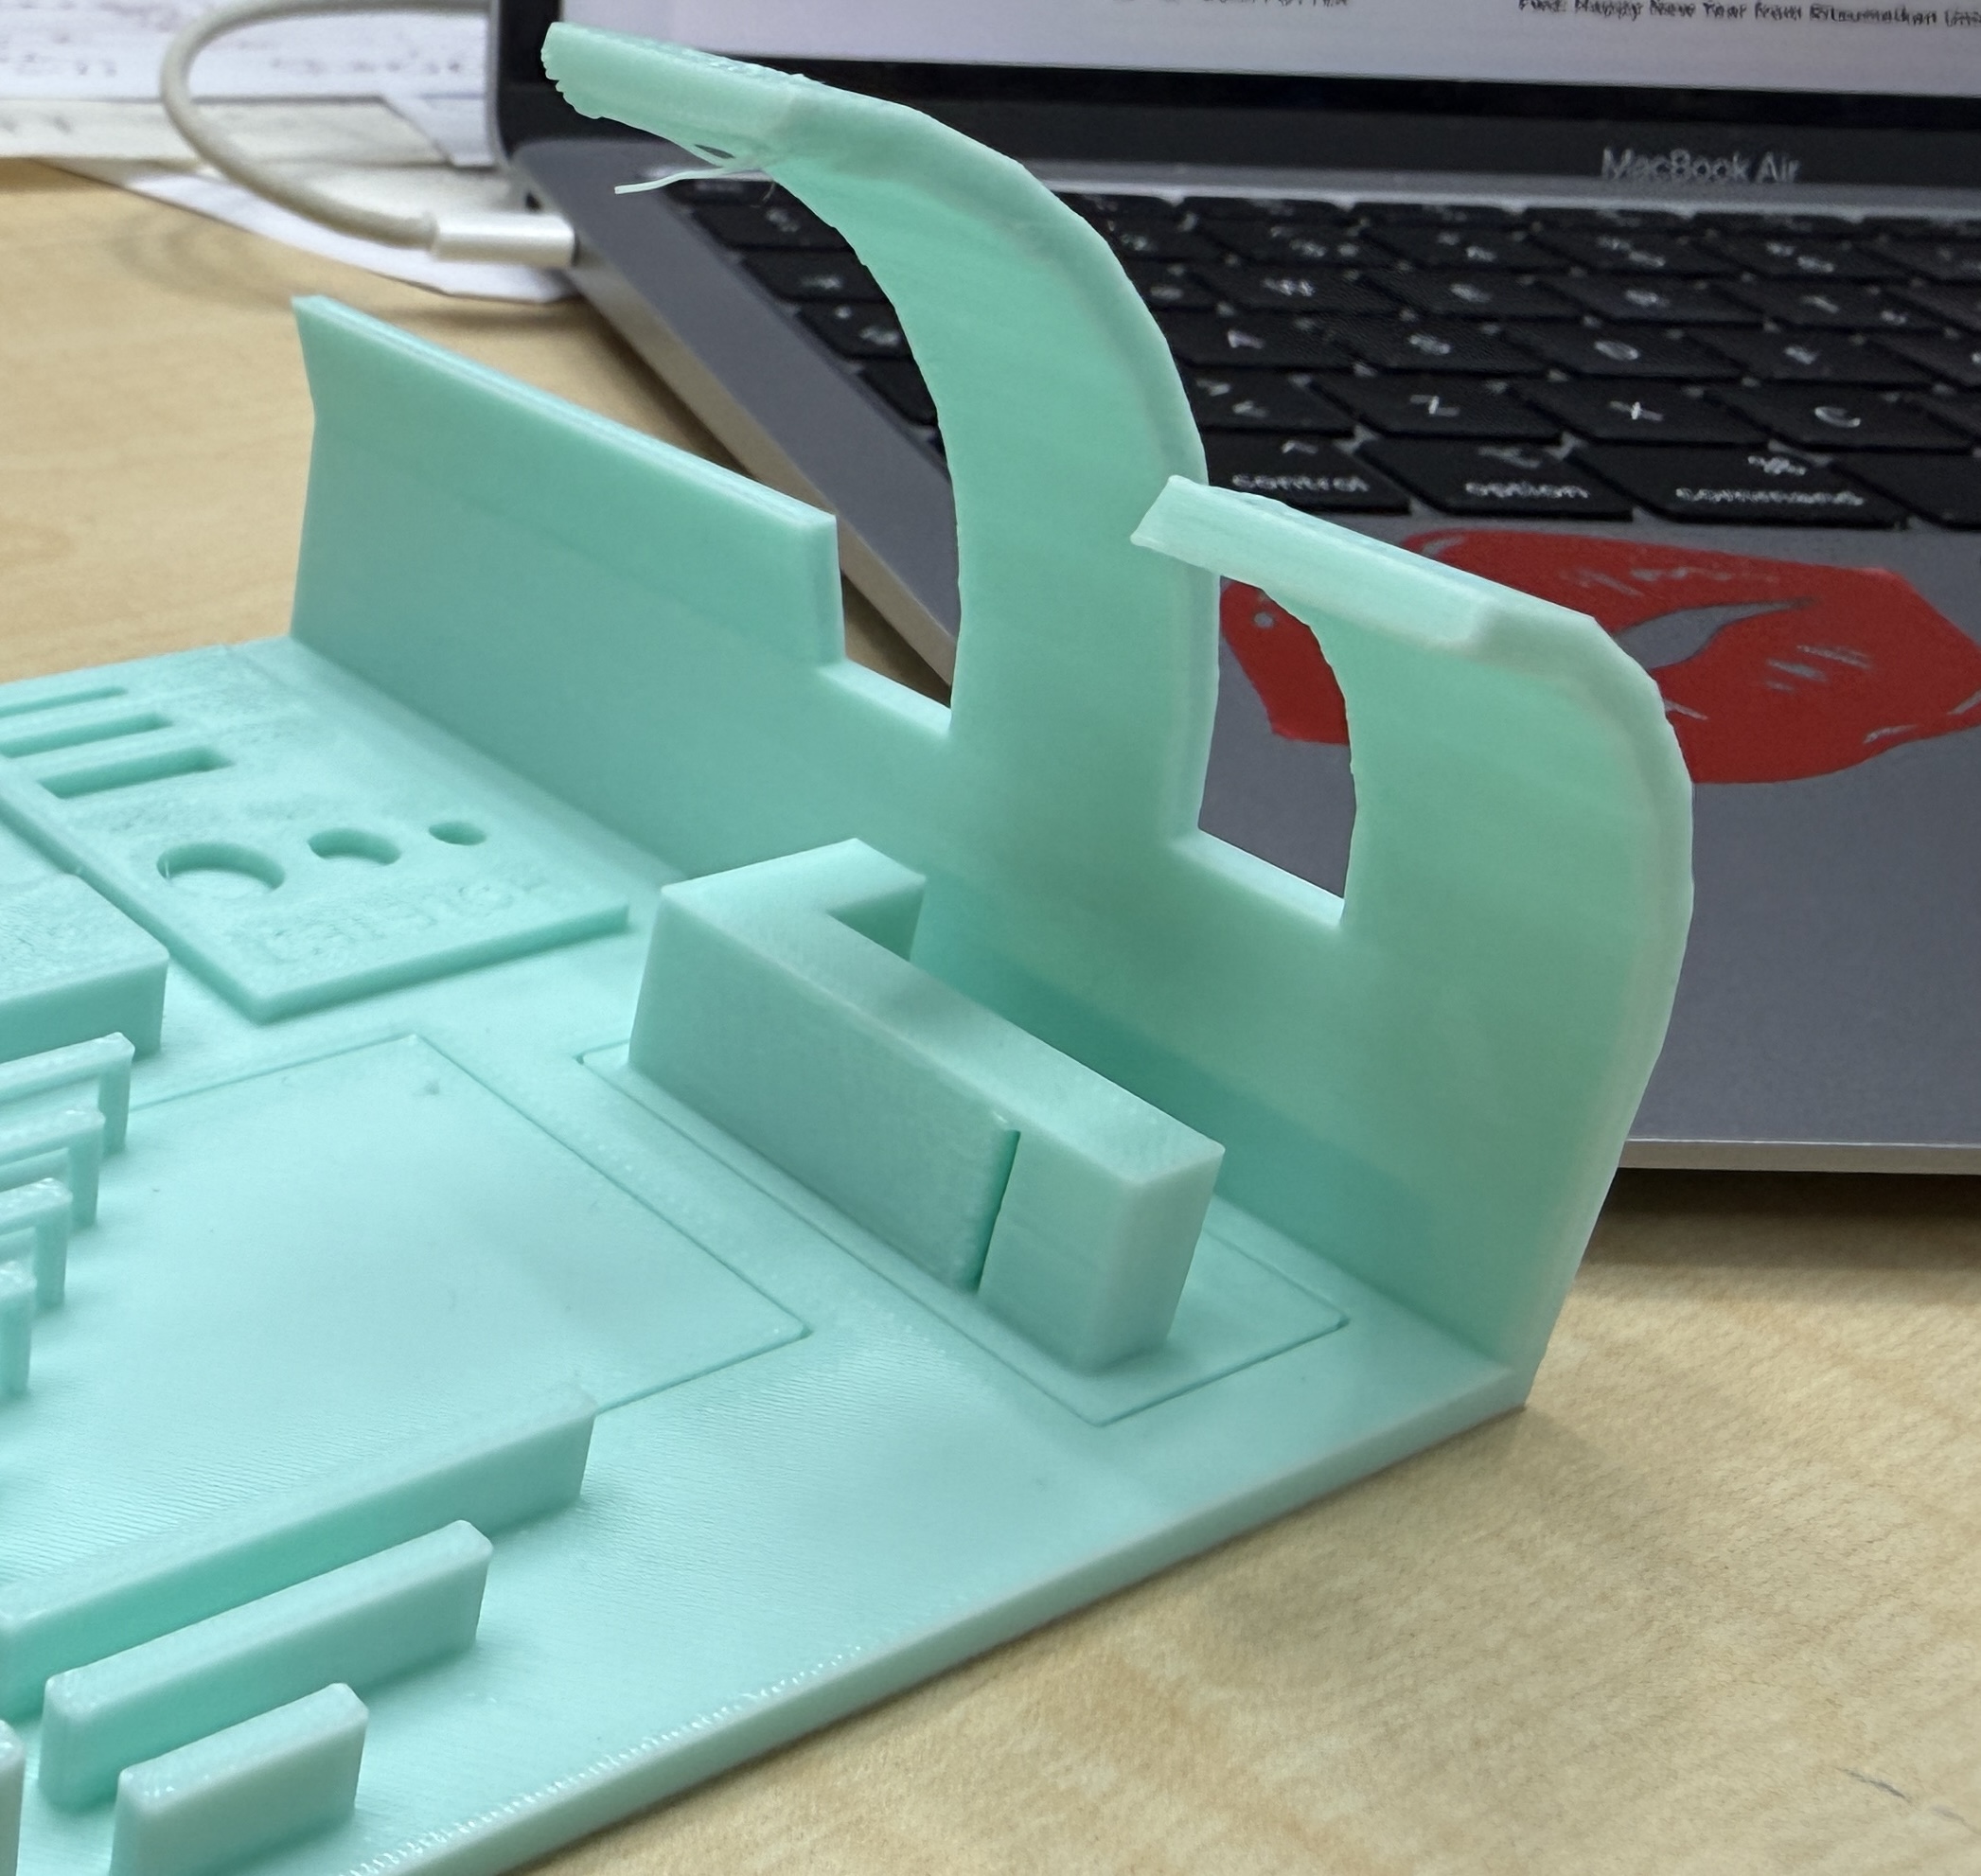
Surface Finish
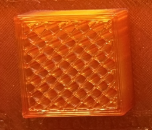
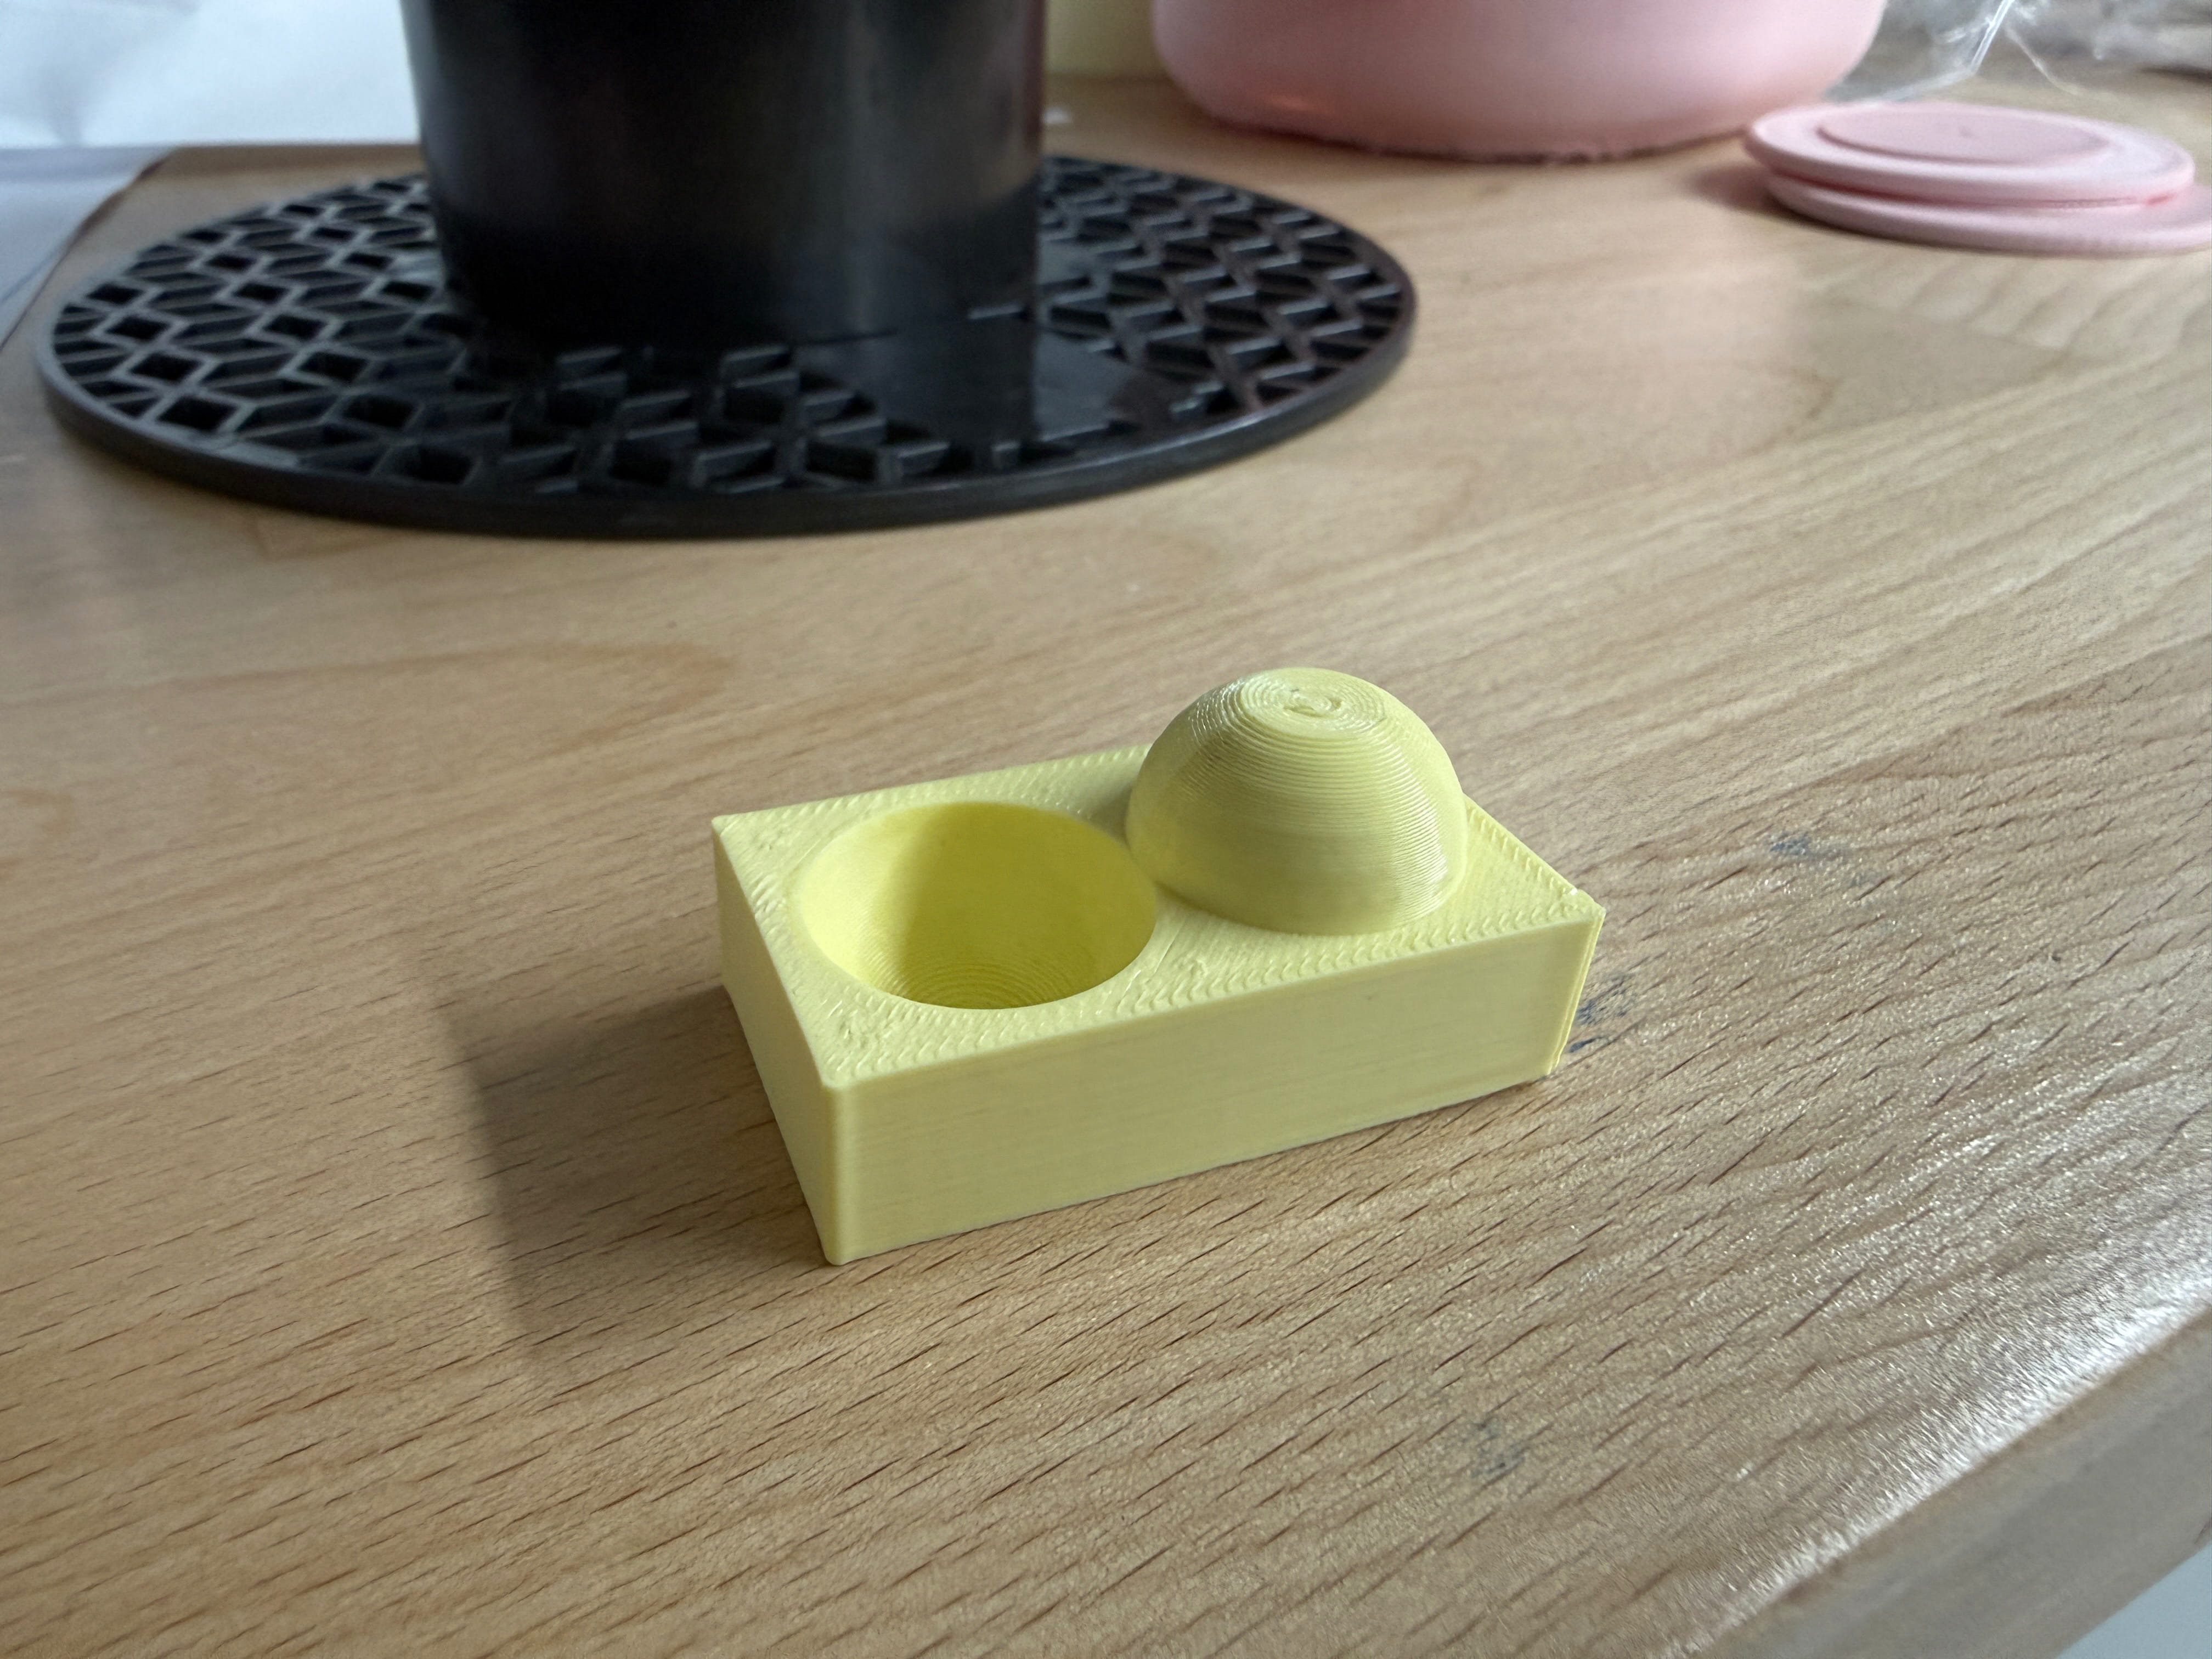
Surface finish depends on layer height, printer resolution, material, and post-processing (like sanding). Our print was mostly clean, but a sphere had a small bulge which we removed with a flush cutter.
Clearance and Warping
Clearance is the gap between supports and the part (often ~0.2–0.5 mm depending on printer/material). Good clearance makes supports easier to remove.
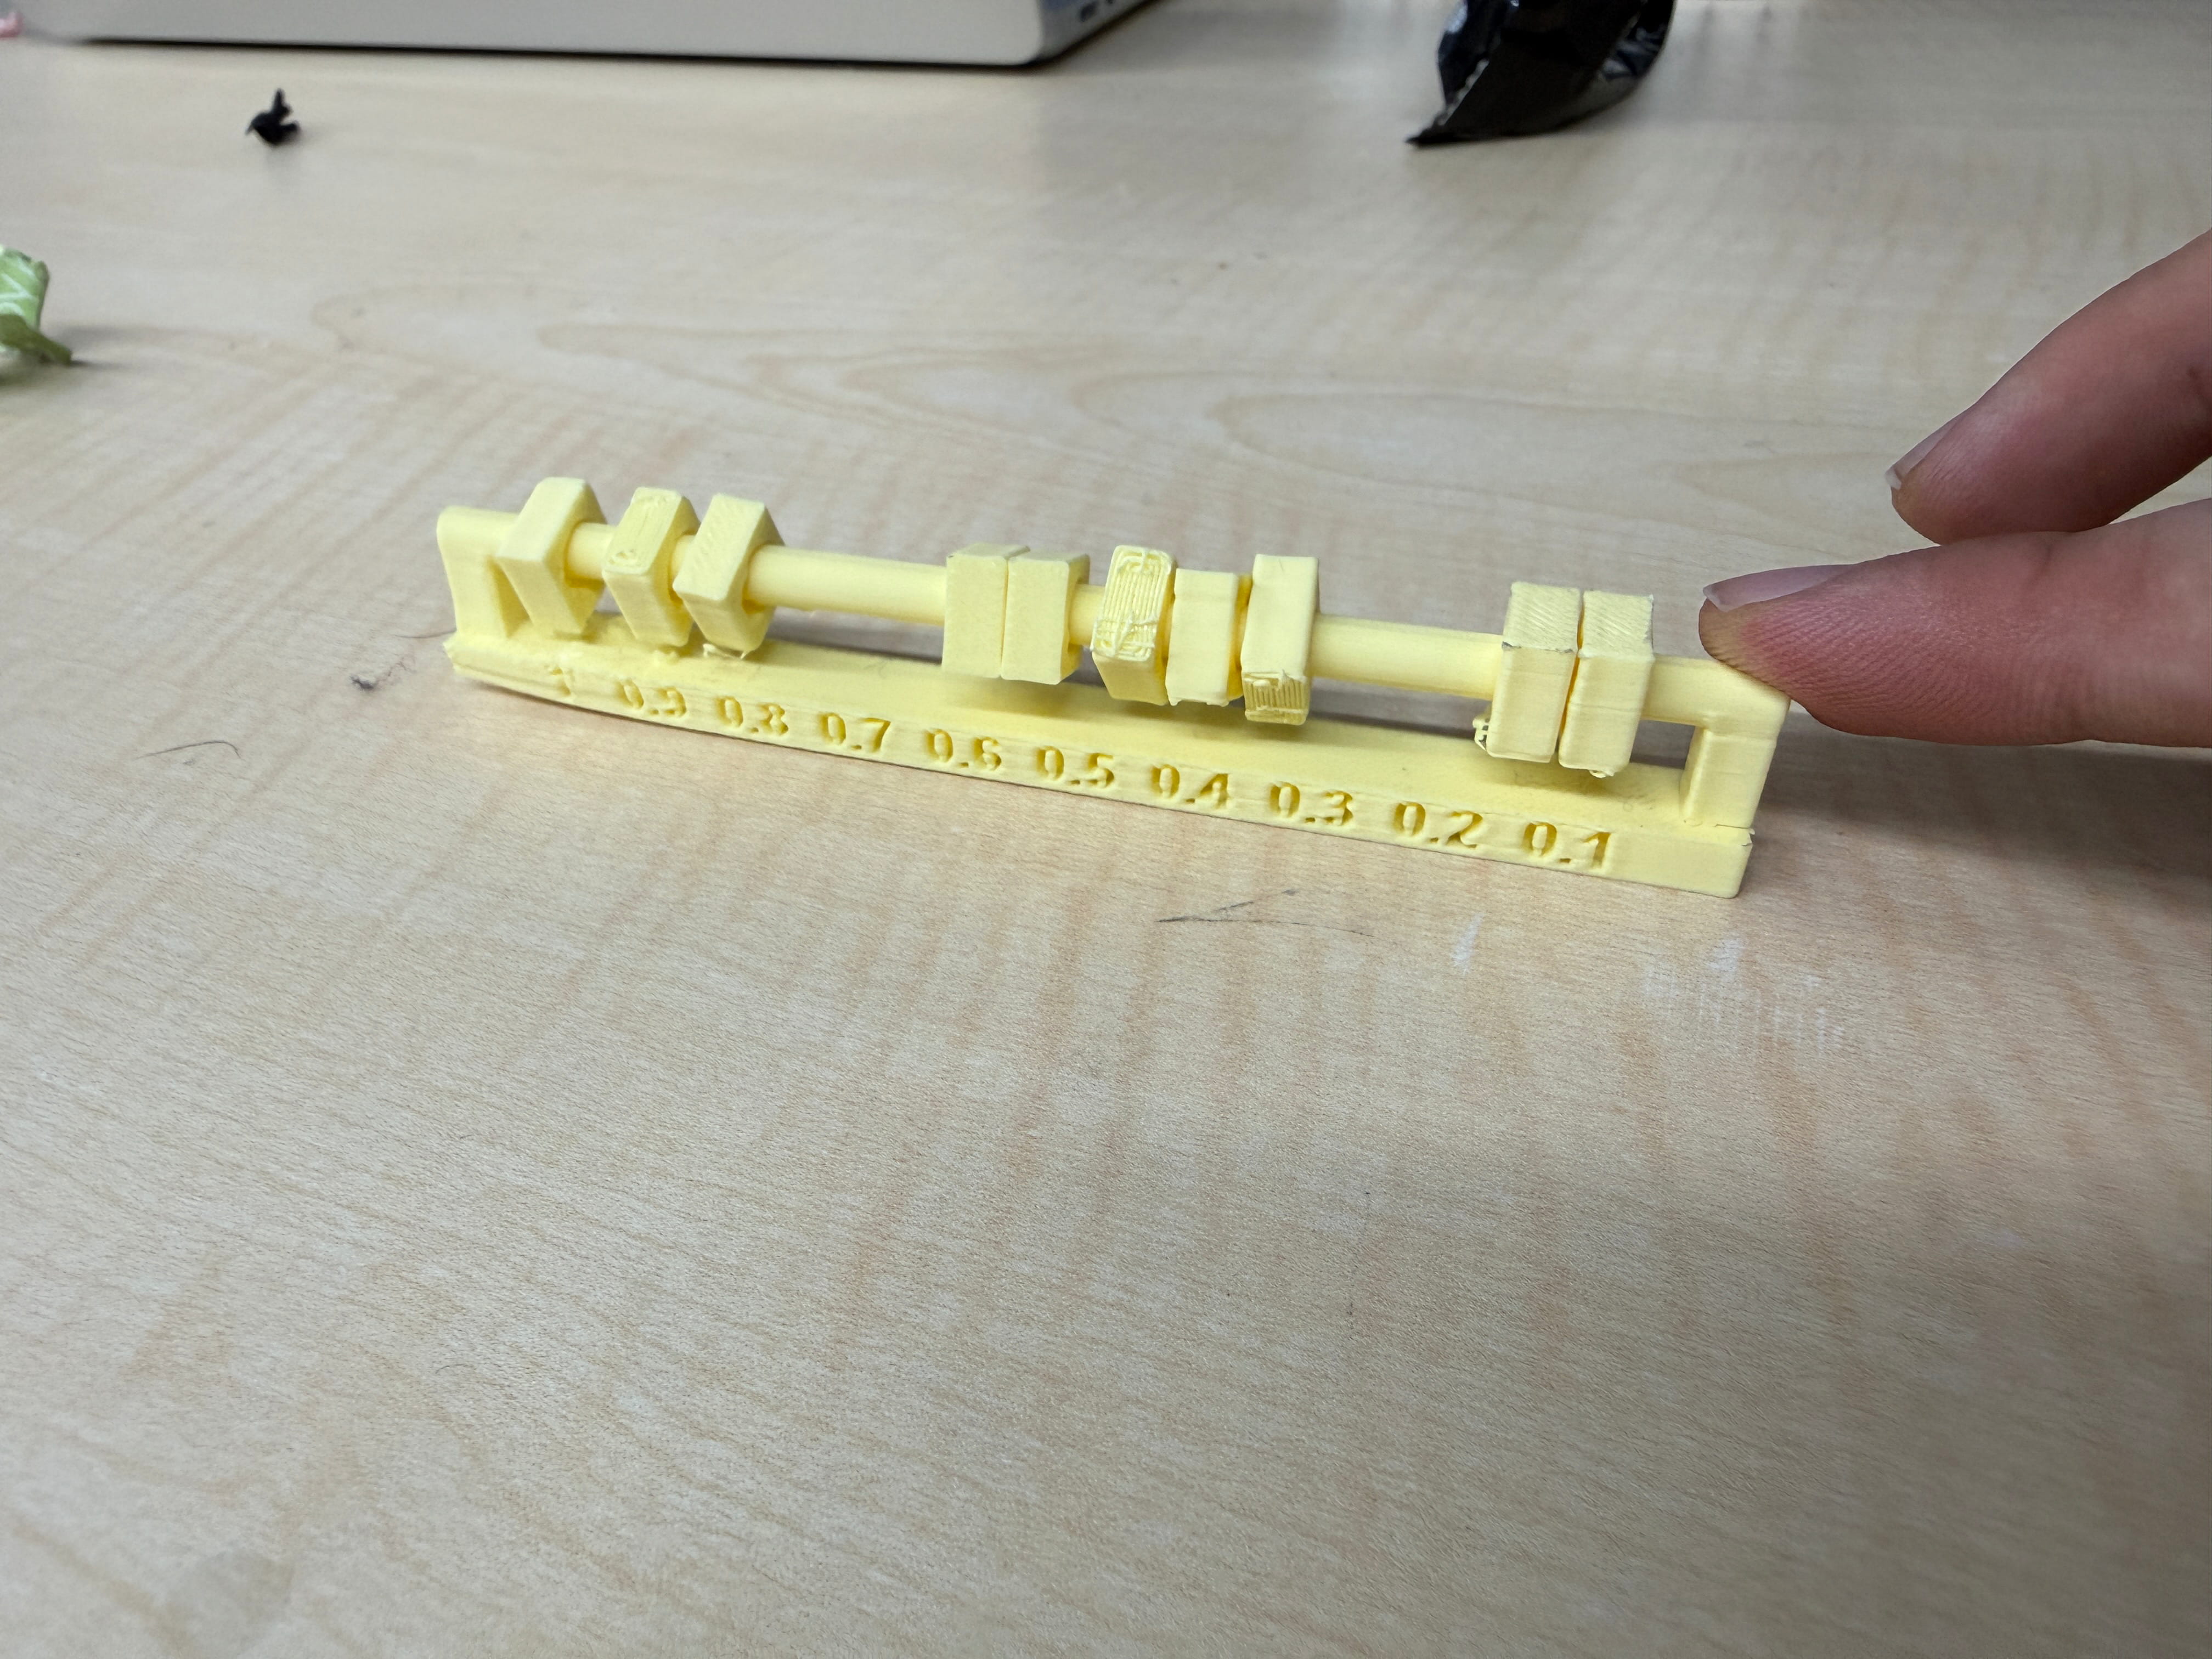
In our clearance test, we saw slight warping on the bottom edge, likely from bed adhesion or temperature changes. Better first-layer calibration and adhesion would improve this.
Supports
Supports are temporary structures for overhangs above ~45° and complex geometry. They improve success and quality but increase time and material usage. Good orientation and settings can reduce support needs.
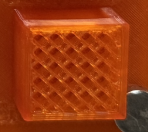
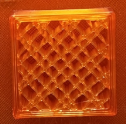
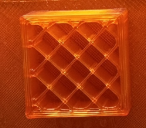
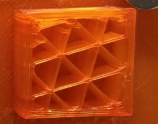
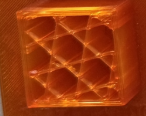
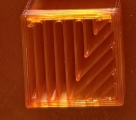
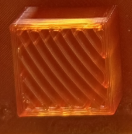
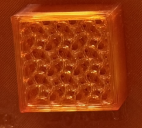
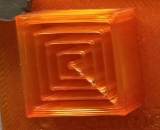
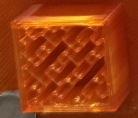
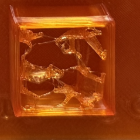
Infill Patterns and Density
Infill is the internal structure of a print. Density ranges from 0% to 100%. Many prototypes work well at around 20%, while mechanical parts often need higher values (e.g., ~50%+).
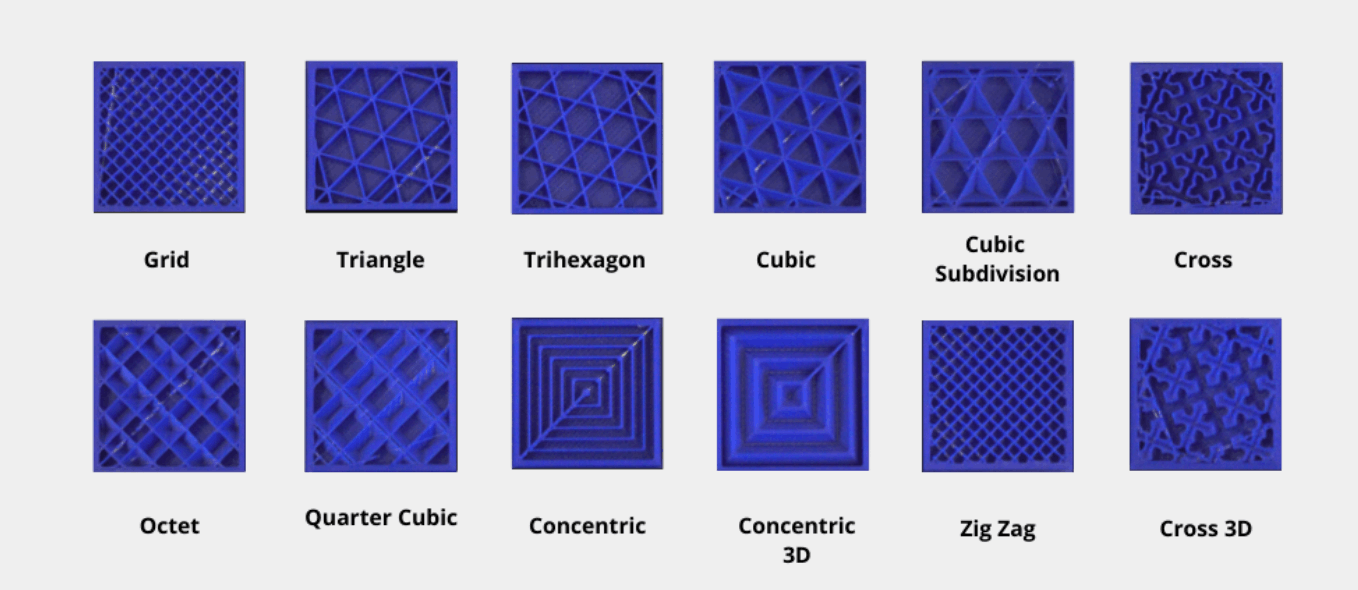
Infill pattern affects strength, flexibility, and print time. We printed these patterns at 20% density.
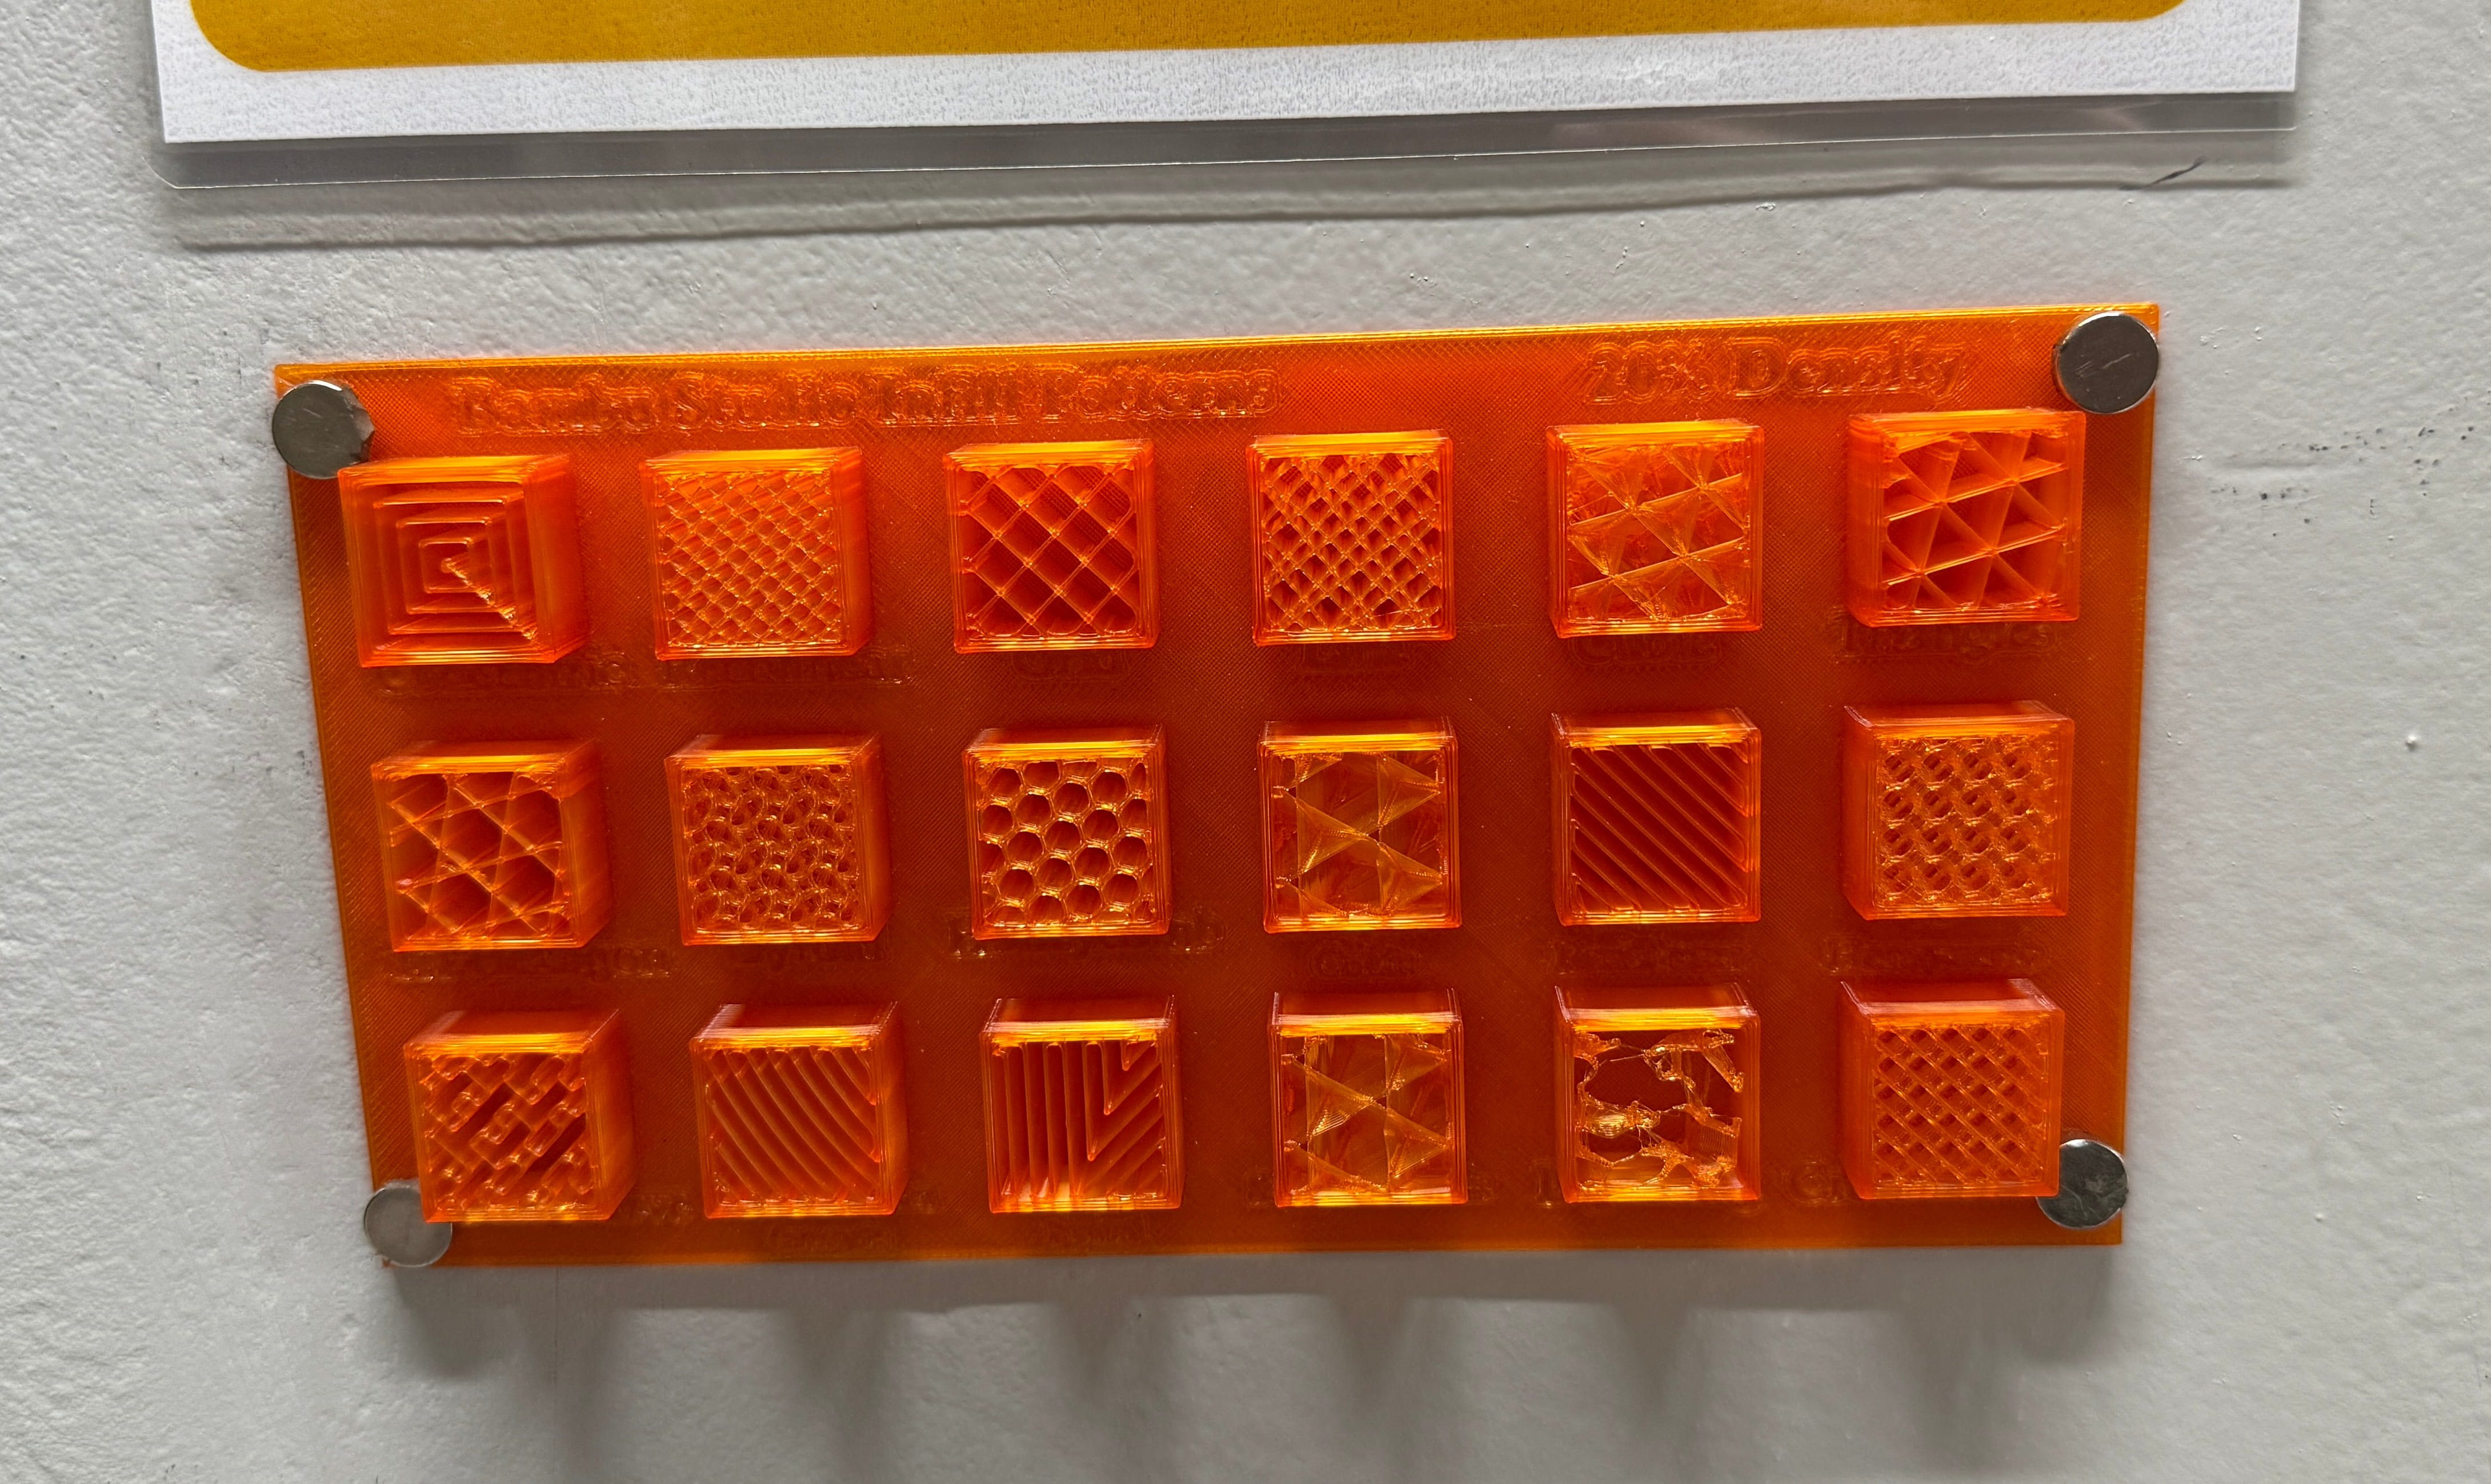
Pattern notes (20% density)
- Cross Hatch: criss-cross lines; balanced and practical (fast–medium).
- Lines: straight parallel lines; fastest for low-stress prints.
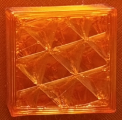
- Grid: 2D squares; common general-purpose option (fast).
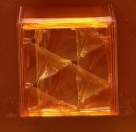
- Triangles: 2D triangles; better strength than lines/grid (medium).
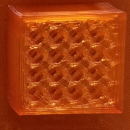
- Tri-Hexagon: mix of triangles/hexagons; strong and efficient (medium).
- Honeycomb: hexagons; strong but can be slower (medium–slow).
- 3D Honeycomb: more balanced internal support; slow.
- Cubic: 3D pattern; balanced strength (medium).
- Support Cubic: denser only where needed; efficient (medium–fast).
- Optigram Spiral: continuous curved path; smooth flow (medium).
- Archimedian Chorda: curved chord geometry; decorative + moderate support (medium).
- Gyroid: smooth 3D waves; excellent strength/consistency balance (medium).
- Concentric: follows outer shape; more aesthetic than strong (medium).
- Aligned Rectilinear: consistent-direction rectilinear; predictable and fast.
- Hilbert Curve: space-filling curve; interesting geometry (medium–slow).
- Lightning: internal branches only where needed; very fast + low material.
- Rectilinear: basic straight-line infill; fast general use.
Cross Hatch
Lines
Grid
Triangles
Tri-Hexagon
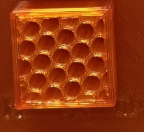
Honeycomb
3D Honeycomb
Cubic
Support Cubic
Optigram Spiral
Archimedian Chorda
Gyroid
Concentric

Aligned Rectilinear
Hilbert Curve
Lightning